
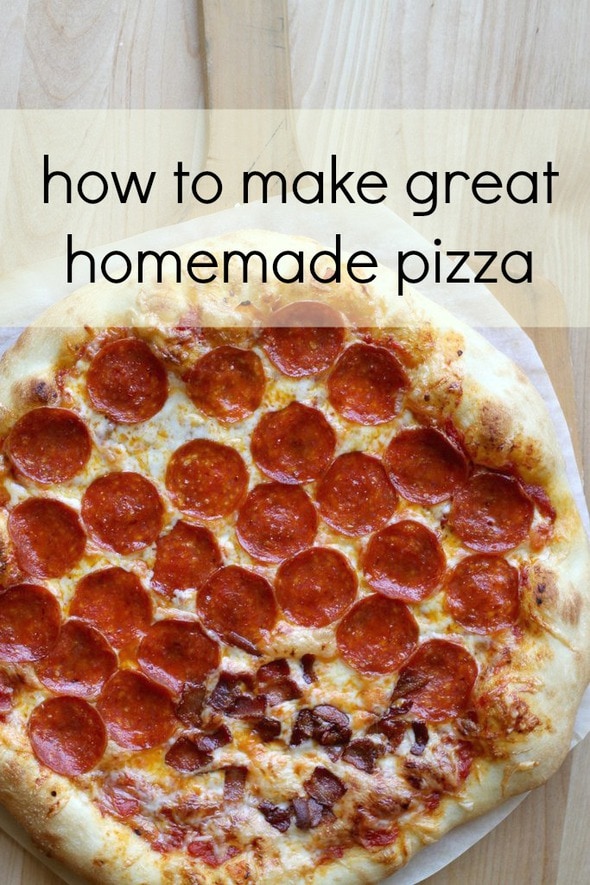
How to Make Deep-Dish Pizza
(Want to jump straight to the recipe? Here's a printable, picture-less PDF.)
My deep-dish pizza skills are all thanks to Cook's Illustrated...without them, I'd have had no clue how to go about making this at home.
Why is this pizza so tasty?
Well, the dough bakes up into a soft, lofty crust.
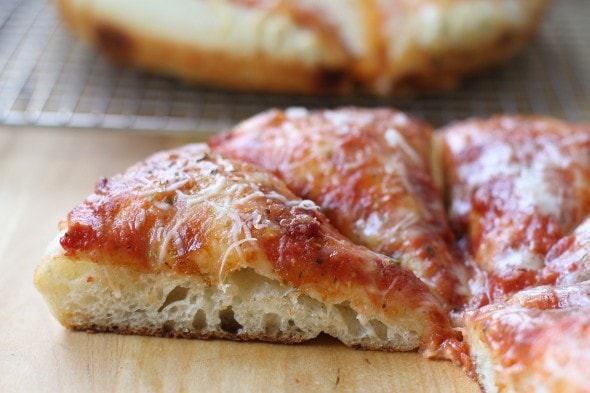
And because the pans are oiled, the bottom of the crust is delightfully crispy without being hard or crunchy.
This isn't a Chicago-style deep dish pizza, where the cheese is topped by sauce. It's more akin to a pan pizza you might order at a restaurant.
(Although my Baking Illustrated book calls it Deep-Dish Pizza, so I'm not sure what's up with that?)
A few notes:
Cook's original recipe uses the food processor to mix the dough, but I get very annoyed whenever I try to use that instead of my stand mixer (also, my food processor sounds a little wheezy when I try to make it mix stiff yeast dough). So, I do this in my stand mixer, and I just finish up the kneading on the countertop.
Also, their recipe calls for a large deep dish pan. Fortunately for me (since I don't own one of those!), they also included directions for using two 9-inch cake pans instead.
My cake pans are nothing special, but they've been working just fine, and I'm thrilled that I don't have to buy and store an enormous deep dish pan.
It's best to have a pizza stone for this recipe, but if you don't, never fear...there is a workaround in the recipe. 😉 A more condensed version of this recipe (more suitable for printing) is here.
Part of the secret to this pizza's springy dough is the lowly potato, which does magical things to yeast doughs. So, start by peeling and quartering a russet potato. 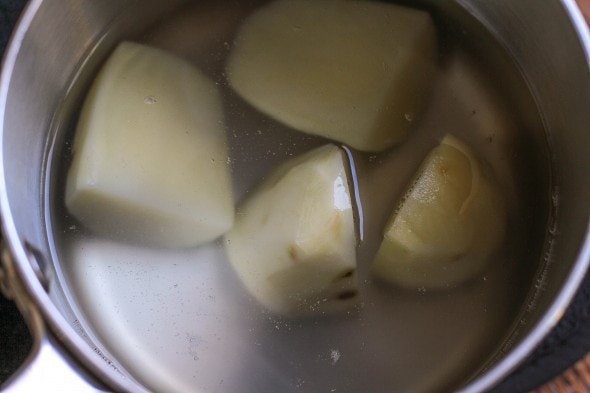
Heat 1 quart of water to boiling. Add the potato, and cook for 10-15 minutes, or until tender. Let the potato pieces cool a bit, and then grate them on the fine side of a box grater (or use a potato ricer.)
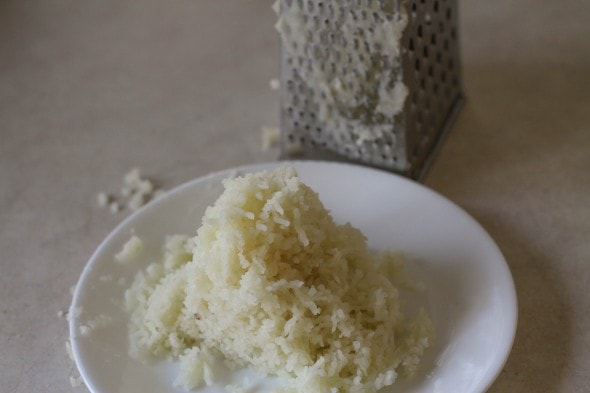
Measure 1 ⅓ cup of lightly packed potato(save any extra for another purpose).
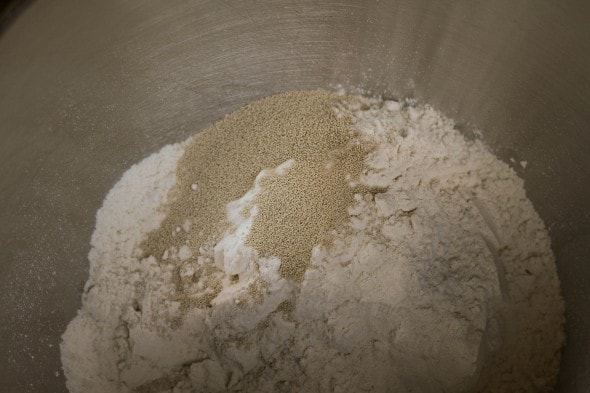
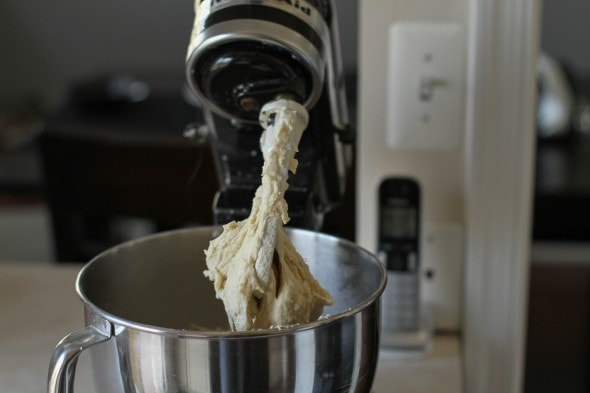
Combine 3 cups of flour, yeast, and salt in a mixer bowl.
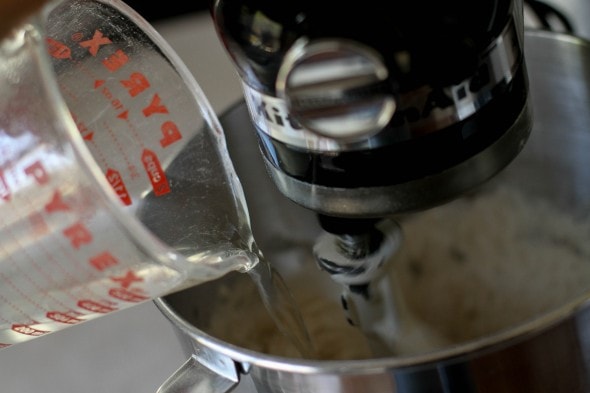
Mix together, and add water and two tablespoons oil.
Beat in grated potato, and let the dough mix for 2-3 minutes.
It'll be fairly thick at this point.
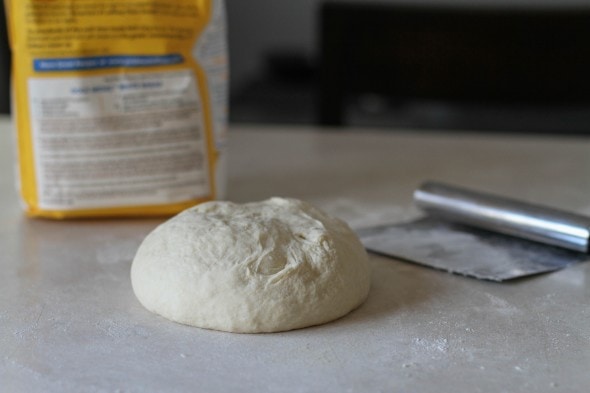
Turn the dough out onto a floured counter.
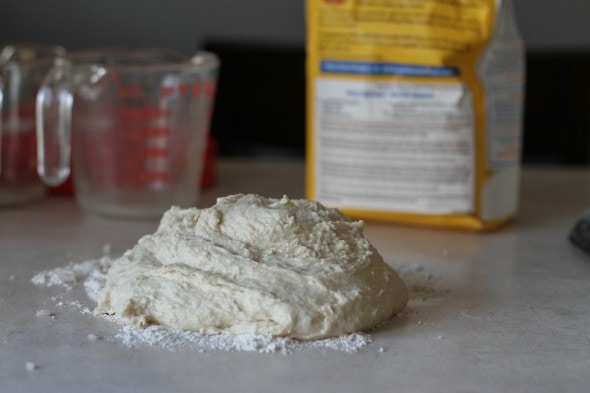
Knead for a few minutes, adding flour as necessary.
Place the dough back into the mixer bowl (I never bother washing it first!) and cover with a wet tea towel. Let the dough rise for an 45-60 minutes, or until it's doubled.
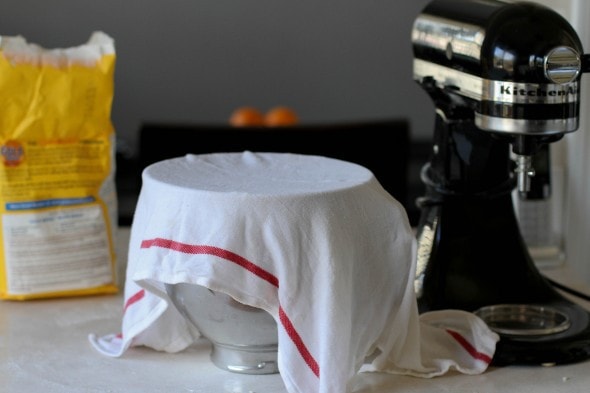
How long that will take depends greatly on the temperature in your home. It'll rise way faster in the summer than in the winter!
Gently turn the dough out onto the counter and divide it in half. Stretch each half into a 9-inch circle.
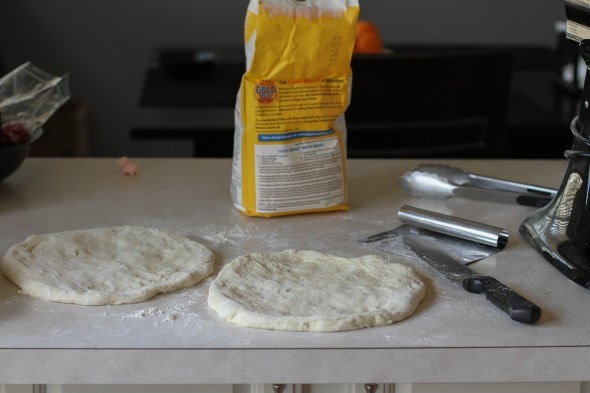
Measure 2 tablespoons of oil into each cake pan and swirl to coat the bottom. Place one piece of dough into each pan. Let the dough rest for ten minutes, and then try to stretch the dough up the sides of the pans.
Honestly, this rarely works for me because the oil makes the dough so slippery that it falls right back down. I keep on trying, but I really have no idea why.
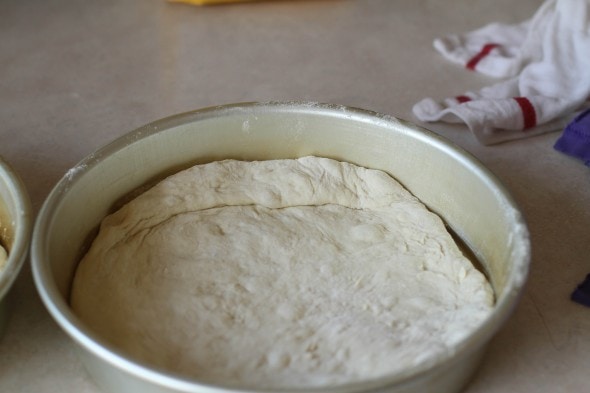
Maybe you'll have better luck than me!
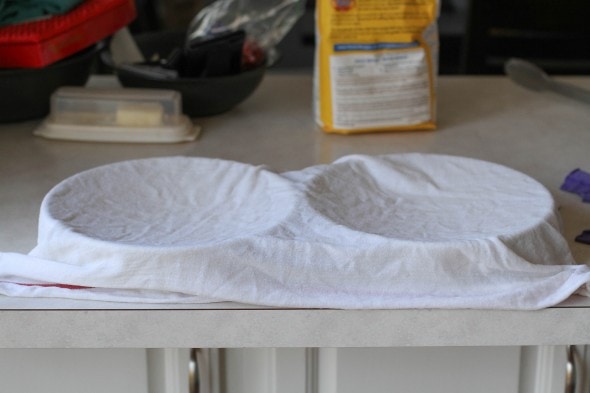
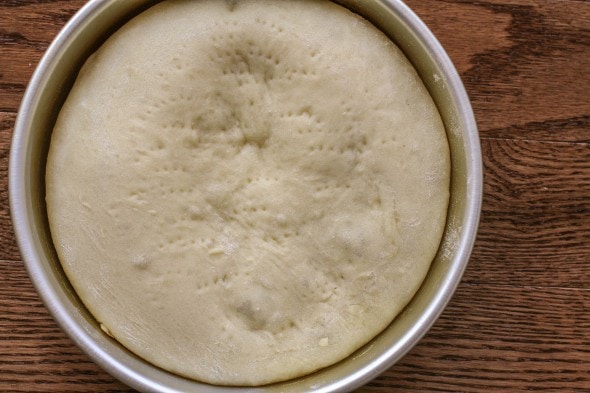
Cover the pans with a wet tea towel, and let the crusts rise for 30 minutes, or until soft and puffy.
Meanwhile, place a pizza stone on the lower rack of the oven and heat the oven to 425 degrees. If you don't have a pizza stone, you can instead place a rimless baking sheet on the lower rack of the oven.
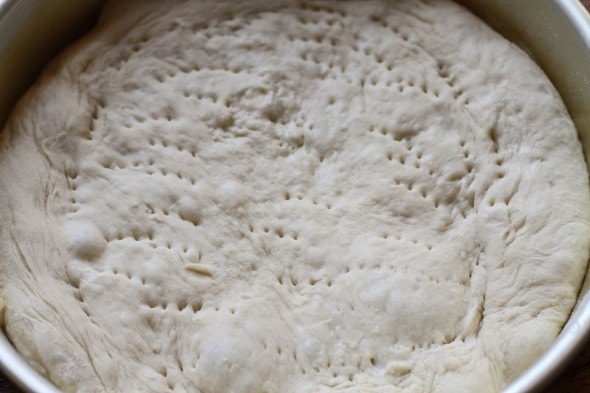
When the crusts have risen, poke them all over with a fork, and place them in the oven on top of the pizza stone or baking sheet, and bake for 5-10 minutes (I usually do 10 minutes), or until lightly browned. This will help the dough to develop some structure so that the toppings won't make it fall and go flat.
I apologize for this blurry picture...this is the par-baked crust, but I only took one picture (and a bad one at that) of the crust at this stage.
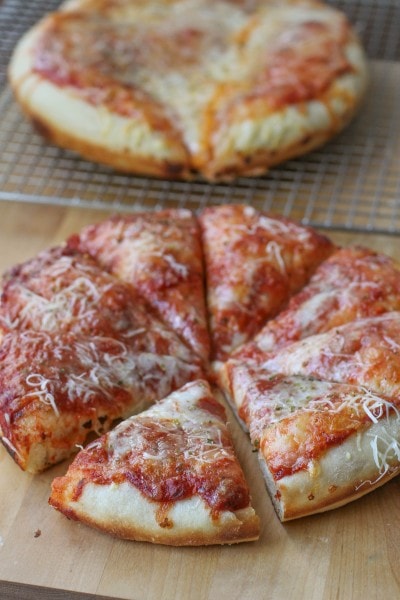
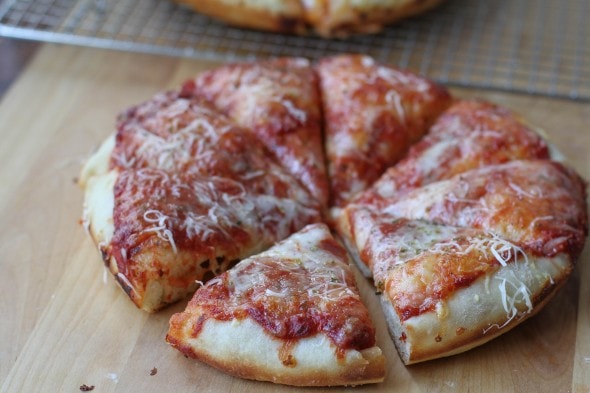
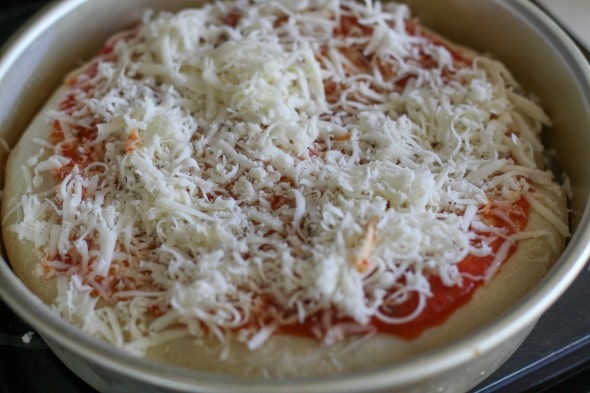
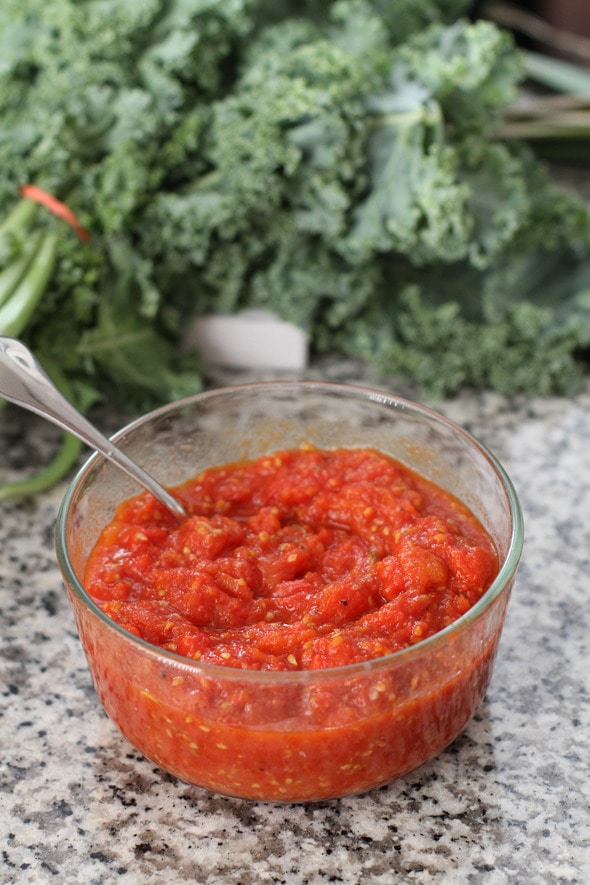
Take the pans out of the oven and add tomato sauce and cheese (plus other toppings if you wish).
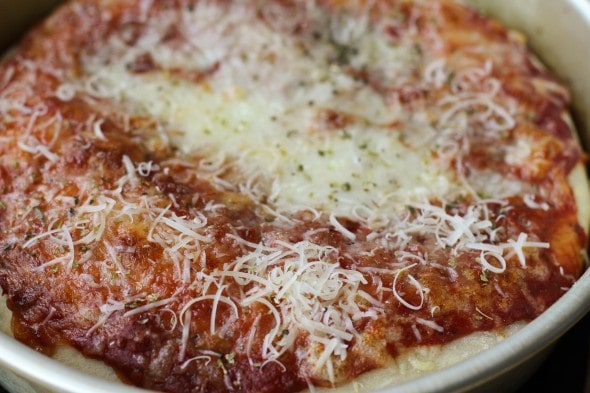
Bake on pizza stone or inverted baking sheet for another 10-15 minutes or until cheese melts. I sometimes move the pizza stone to the middle rack of the oven for this, because I have problems with my crust getting too brown if I leave it near the bottom of the oven (my oven tends to be hotter at the bottom than at the top).
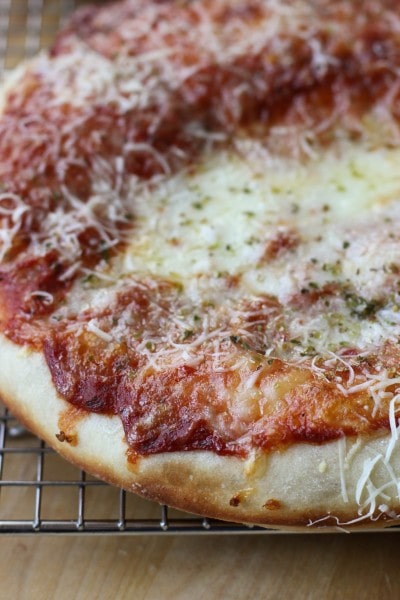
Move the pizzas to the top rack of the oven and bake for 5 minutes, or until cheese turns spotty brown.
Use a knife to loosen the pizzas from the pans, and turn out onto a cutting board or cooling rack.
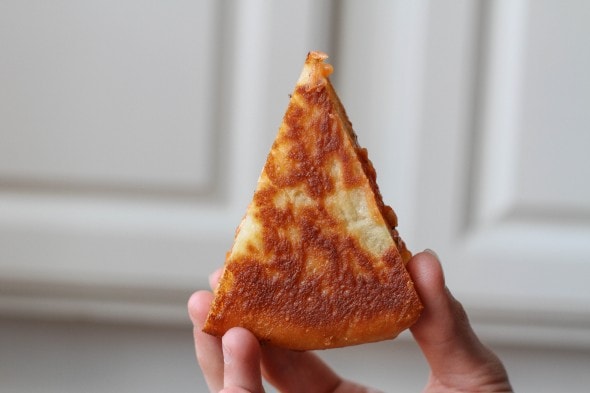
Cut into wedges and serve.
Happy pizza making!
Deep Dish Pizza
Printable Deep Dish Pizza Recipe
Ingredients
1 medium baking potato (about 9 ounces), peeled and quartered
3 ½ cups unbleached all-purpose flour
1 ½ teaspoons active dry yeast
1 ¾ teaspoons table salt
1 cup warm water (105 to 115 degrees)
6 tablespoons vegetable oil, divided
tomato sauce, mozzarella cheese, and whatever toppings you desire
1. Bring 1 quart water to a boil. Add potato, and cook for 10-15 minutes, or until potato is very soft. Let potato cool, then grate on the fine side of a box grater. Measure 1 ⅓ cups of loosely packed potato; set aside.
2. In the bowl of a stand mixer, combine 3 c. flour with yeast and salt. With the mixer running, add water and 2 tablespoons oil. Beat for 1 minute, then beat in grated potato.
Beat for another 2-3 minutes, then turn dough out onto a floured surface and knead, adding flour as ncessary, for 3-5 minutes, or until smooth and elastic. Place dough in bowl, cover with wet tea towel, and let rise until doubled, about 45-60 minutes.
3. Pour 2 tablespoons oil into two 9-inch cake pans, tilting to spread oil over bottoms of pans.
Gently turn dough out onto counter, divide in half, and shape each half into a 9-inch round. Place dough in pans; cover and let rest 10 minutes.
Press edges of dough up sides of pans; cover and let rise for 30 minutes.
4. While dough rises, place a pizza stone on the lower rack of the oven and heat the oven to 425 degrees. If you don’t have a pizza stone, you can instead place a rimless baking sheet on the lower rack of the oven.
5. When the crusts have risen, poke them all over with a fork, and place them in the oven on top of the pizza stone or inverted baking sheet, and bake for 5-10 minutes (I usually do 10 minutes), or until lightly browned. This will help the dough to develop some structure so that the toppings won’t make it fall and go flat.
6. Take the pizzas out of the oven and add tomato sauce, cheese, and desired toppings. Bake on pizza stone or baking sheet for another 10-15 minutes or until cheese melts. I sometimes move the pizza stone to the middle rack of the oven for this, because I have problems with my crust getting too brown if I leave it near the bottom of the oven (my oven tends to be hotter at the bottom than at the top).
7. Move the pizzas to the top rack of the oven and bake for 5 minutes, or until cheese turns spotty brown. Use a knife to loosen the pizzas from the pans, and turn out onto a cutting board. Cut into wedges and serve.
Kristen, oh dear. Now I'm craving pizza like crazy. I am going to try this. I don't know when, but I will 😀
YUM! I must get a mixer asap! 😉
Kristen, having thought about this I have a question for you. I have no idea when/if I would be able to afford a stand mixer. Does making your own dough work just as well (or, sorta well) with a hand mixer?
Shana, do you have a food processor? If you do, you can just follow the basic directions, except that you'll only need to process the dough for maybe a minute(the food processor is faster than the mixer).
Or, you could mix it well by hand and then knead it for five minutes or so. Just make sure your potato is well cooked so that hand-kneading will distribute it well in the dough.
This looks too yummy to put off trying...it is totally on the menu for dinner tomorrow....
Shana~ I have had great success with making bread/yeast doughs completely by hand...it's messy and a bit of a work-out but totally doable! I have only had my stand mixer for about a year and always mixed everything by hand before that.
Off topic, nothing about pizza (but it does look extremely tasty!); I'm relatively new to this attempt to live frugally. Okay, my 2 teenage boys haven't changed size in a year or so and have tons and tons of church polos and t-shirts for spring and summer left over, so all they're getting this year is a pair of long khakis, a couple cargo shorts in a neutral color and some new sneakers and maybe swim trunks. My question is, how much is really enough?I'm looking at my daughters' closets and man, do they have a lot of too small clothes, way too much stuff. My girls have totally outgrown last summer's clothes and have different body types (one is tall and skinny, the other is shorter and well I won't say it, but you can guess, so hand me downs to the younger is out). How many outfits do you budget in for each child, or do you just pick a set money amount and they get what they get? Please help. Thanks.
....just got done with our pizza dinner. It was AMAZINGLY delicious! Definitely going to add it to my list of favorite recipes.
Have you tried CI's thin pizza? I prefer thin pizza to thick and that one is really good( and very thin). I also love grilled pizza and CI's recipe rocks. I'm a total CI junkie too. I just made their tortilla soup and red chili chicken enchilada's a couple days ago.
Kiki-I'll work on a post about that. Good question!
Emily-I'm so happy it turned out well for you! Yay!
Randi-Yep, I make their grilled pizza quite often, especially in the summertime, when I hate to heat the oven up to 450 degrees. I haven't tried a thin crust version in the oven...I'll have to look into that. My husband is a thick crust fan, but he liked the grilled pizza and he may very well like the oven thin crust pizza too.
Wow, this was so good. We are cutting back but pizza is one thing my husband really craves. He said this will definitely replace take out anytime I want to make it. Thanks so much for posting this!
I tried this recipe last night and this pizza was so good! And one recipe made enough pizza to fill up my 16 and 19 year old sons' stomachs. There was even enough for me with some left over. I made my crust in 10-inch pans, so it probably wasn't quite as thick as yours. Thanks so much for posting this recipe!
This is a wonderful recipe!!! I have a friend who is a baking wiz and also subscribes to your blog. She made this pizza for her family and us and everyone loved it! Kudos to you for posting such great frugal recipes!!!
Any idea what would happen if you only had a sweet potato on hand? Would that still work?
I think that would give the crust a weird color and flavor. If I remember right, Cooks doesn't even recommend using other white potatoes besides russets.
I'm not sure if you'll see this comment, but here's a restaurant trick for getting dough to NOT bounce back (rather to stick to where you want it) - use vegetable shortening instead of oil. It's miraculous! Helps to give the crust a little satisfying crunch too. Nice recipe!
wondering if you, or anyone else, has tried their own crust recipe to make deep dish in this manner? i'm sure the potato adds a wonderful flavor to the crust, but was wondering if any ole crust would work or does it need to be a certain recipe?
If you want it to be proper deep dish, you should use a deep dish dough...I don't think regular dough would be quite the same.
I'm sorry to burst your bubble but this is a pan pizza. not a deep dish. A deep dish pizza is a stuffed pizza with pizzia sause on top. That is a true Deep dish pizza. (I am a pizza maker at Klavons Pizzeria and Pub.)
Chicago-style Deep Dish Pizza does indeed have sauce on top. But does a pizza have to have sauce on top in order to be considered deep-dish?
Regardless, the cookbook I got this recipe from titled it "Deep Dish Pizza". 🙂
I have made this in the past (from your website), and I love the taste and texture. But I really, really dislike using white flour, because of its lack of nutrition. Do you have any idea if this type of pizza would taste okay using white whole wheat? I prefer to use 100% whole wheat, not even a half white/wheat combo.
WOW!! This looks awesome!! I've made homemade thin crust pizza lots of times, and this looks GREAT!! Can't wait to try it!!
I've also never tried potato in the crust...can you taste it at all when eating the pizza?
Nope, it doesn't taste potatoe-y at all in my opinion!
Not sure if you will see this in time, as I'm trying this tonight. It looks so good! I just wanted to clarify--do I cook the pizza in the 9" pie pans sitting on top of a pizza stone? Or do I pre-cook in the 9" and then move to the pizza stone part-way through? I'm trying to figure out the purpose for the pizza stone if it's just to sit in the oven below the 9" pie pan. Thanks! 🙂
Yep, just keep it in the cake pans and put them right on top of the pizza stone.
The pizza stone just provides a blast of heat for the bottom of the pans.
Looks delicious! Too many steps for me though. Working full time with 3 different part time jobs I barely have time to eat. Want to make and ship me some crusts FG? 🙂
I'll take a slice, thanks!
This looks delish, but it's too much work for me! I put my toppings on pita breads, 20 min in the oven and call it a day! I wish I liked cooking/baking.....
I've been looking for a yummy pizza sauce recipe--either a single or multiple batch. Mind sharing yours??
I mostly just use the tomato sauce that Aldi sells! Easy and cheap.
This is one of my favorite pizza recipes, but I don't make it often because my kids prefer thin crust. When I want to make one larger pizza, I often cook it in my cast iron pan. It always turns out great!
hello! such a good recipe! I was a pizza made with potato years ago and have been searching high and low for a recipe. THIS. IS. IT!!! I was wondering if you have tried making the dough the night before and pull it out the next day and let it rise? any suggestions on doing so?
thanks! 🙂
Do you mean in the fridge? I think you could let it sit in the fridge overnight, then shape it and let it rise in the pans as usual. That rise will definitely take longer than normal, though, due to the dough being cold.
Let me know how it goes!
So I’ve done this twice. I made the dough. Spray a little olive oil Over the top and cover. Leave it overnight in the refrigerator. When I pull it out it’s rather proofed, which hasn’t been an issue for me. I form it and let it rise maybe 30-60 mins when I get them in the greased pans.
I almost think it gives it a bit of a lighter crust taste overnight, but I can’t tell I should make one overnight and one the day off and see the result side by side