
How to troubleshoot common yeast bread problems
Since so many people are baking bread right now, I thought I'd publish this so I can take a stab at helping those of you who have written me about your yeast baking troubles.
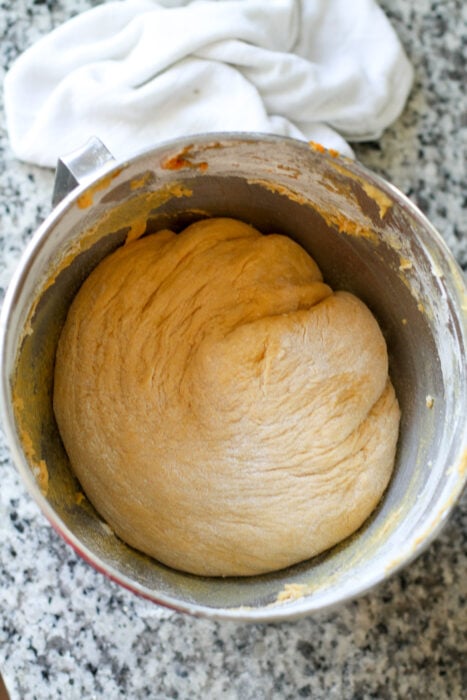
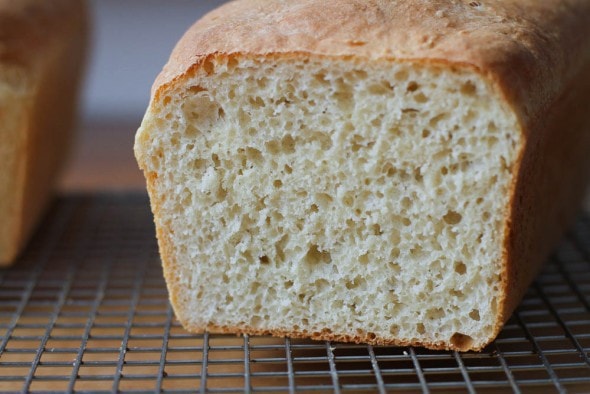
 (the bread pictured here is challah)
Problem: My bread didn't rise at all!
If your bread dough didn't change in size at all during the rising period, this probably means that your yeast is dead. There are several reasons this could happen.
Your liquids were too hot, so they killed the yeast
For recipes where you add the liquid directly to the yeast, 110°F is about right, and for recipes which combine the flour and the yeast before the liquid is added, 120-125°F is right. I use a digital instant-read thermometer to test the temperature of my liquids, though a non-digital one works fine too.
Your yeast is old
(Note: this is not usually the reason for flat bread. Keep reading below for the most common problem!)
If you've kept your yeast at room temperature for a really long time, it might have lost its potency. Keeping yeast in the refrigerator or freezer will prolong its shelf life greatly.
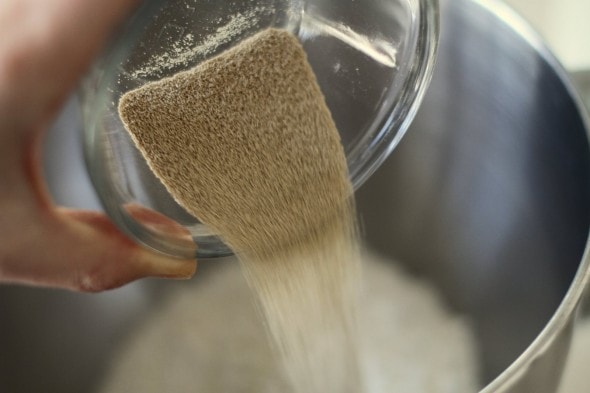
I keep mine in a screw-top lid in the freezer just to be safe. I could probably keep it in my cabinet, though, given how fast I go through a two-pound bag of yeast!
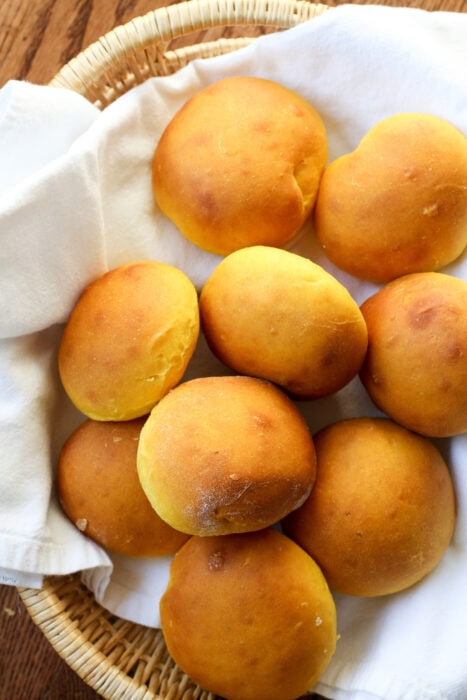
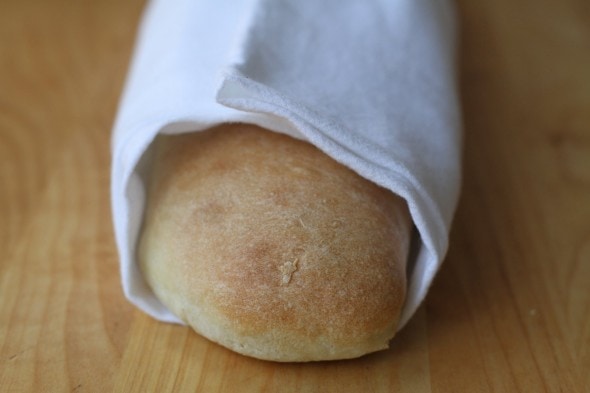
(Butternut squash rolls. Video in that post might be helpful to you.)
Problem: My bread rose, but not enough.
Again, there are a couple of causes for this.
Your yeast is old
Sometimes old yeast does work a little bit, but not enough to lift a batch of dough correctly.
Make sure you have new yeast, and store it in the fridge or freezer if you don't bake a lot.
Your dough was too stiff.
Generally speaking, when I've helped people learn to make bread, they've been surprised at how soft the dough should be.
So, if someone's dough isn't rising properly, this is almost always the first thing I suggest looking at!
Most novice bakers err on the side of adding too much flour, so if your bread isn't rising properly, this is the most likely cause.
Yeast raises dough by producing air bubbles, which in turn lift the dough. If the dough is very stiff, the yeasty air bubbles won't be strong enough to lift the dough.
The dough should be soft and fairly pliable...like the recipe books say, it should feel kind of like a baby's bottom!
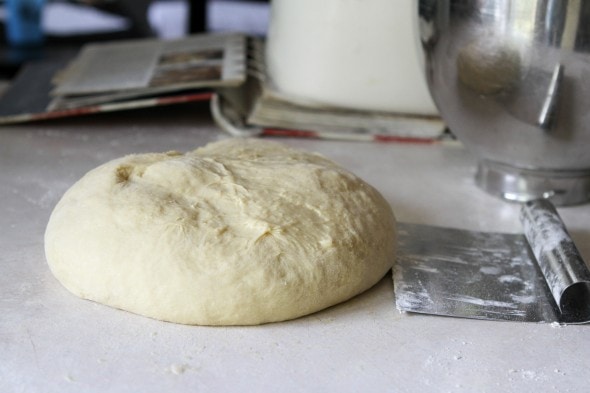
The flour amounts in a yeast bread recipe are really just guidelines. The amount of flour you will actually need can vary a lot depending even on which brand of flour you are using.
Let feel be your ultimate guide, not the cup measurements.
You didn't knead properly/sufficiently
As I explained in my post about gluten, kneading stretches and develops the gluten in the flour.
Proper kneading produces stretchy gluten strands that are strong enough to hold and enclose the yeasty air bubbles.

I wrote a post on kneading that might be helpful to you.
Your house is too cold
My own house is actually a little too cold for bread rising in the wintertime.
To combat this difficulty, I turn my oven on to 350 for 1 minute (I set a timer so I don't inadvertently leave the oven on) and then put the dough inside the oven to rise.
This provides just enough heat for the yeast to do its work.
(Incidentally, your bread dough will eventually rise in a cold house...it just will take longer for the dough to double in size.)
If you let your dough rise in the oven, just don't forget to remove it before heating your oven!
Problem: My bread is crumbly.
This is probably caused by insufficient kneading. Properly kneaded dough is stretchy and produces bread that is more chewy than crumbly.
See above for solutions to this problem, and also check out my post on kneading and gluten.
It could also be caused by dough that is too dry due to too much flour. See above for my thoughts on that.
Problem: My bread was undercooked/doughy inside.
Obviously, this is sometimes caused by simply not baking the dough long enough, but there are a couple of less obvious things that contribute to this problem.
Your dough didn't rise enough
Dough that hasn't risen properly tends to be on the dense end of things, and thus takes much longer to bake than properly risen dough does. See above for solutions to rising difficulties.
You didn't preheat your oven
Bread that starts out in a cold oven will obviously take longer to bake than bread that starts out in a hot oven.
You might also be surprised to know that starting with a cold oven will also produce bread that is not as light and fluffy. The initial blast of heat from a preheated oven gives the bread a little bit of a last-minute rise (bakers call this "oven spring").
I always, always preheat my oven before I bake bread. To help me remember to do this, I set a timer to go off about 10 minutes before the dough will be risen enough to bake.
Your oven temperature sensor is not calibrated properly
This is a fairly uncommon cause of underbaked bread, but if you're still having difficulties after fixing the previous two problems, you might want to get an oven-safe thermometer and check to make sure that your oven really is 350 degrees when you've set it to 350 degrees.
If you'd like a concrete way of testing your bread for doneness (I don't think that's a word, really!), you can insert an instant-read thermometer into the side of a loaf. Most breads are done when they reach 190 degrees.
I rarely do this myself, but you might find it to be helpful if you're new at baking.
Problem: Why is my yeast dough hard to roll out?
It is possible that you have added too much flour, which will make your dough too stiff to roll.
It's also possible that you just need to give it a couple of minutes to relax. When you first punch down your risen bread dough, the stretchy gluten proteins will be a little tight. If you let the dough sit on the counter for about 5 minutes, the gluten should relax and the dough will be easier to roll.
Want some easy breads to try?
If you've never tried yeast baking before, you might feel very overwhelmed by reading this list!
Yeast baking is really not as scary as it seems, though, and many of my readers will attest to that. If you want to give it a try, here are a few recipes that are fairly simple.
Garlic Breadsticks-These are so small, it's easy to get them to rise and bake all the way through.
Glazed Honey Pan Rolls-This dough rises very easily, which is why I included it here. You can leave off the glaze if you prefer to keep things simpler.
Easy French Bread-These loaves are not as tall as regular loaves of bread, which means that it is not as difficult to get them to rise and bake properly.
And the loaves are so handy for panini sandwiches, garlic bread, Beef au Jus sandwiches, and the like.
Thin-Crust Pizza -This dough is almost entirely kneaded in the food processor, which makes it almost fool-proof. I just use my normal food processor and my normal blade...nothing special is required. You'll need a pizza stone for optimum baking results, though.
English Muffin Bread-This is a batter bread, which means it uses a very soft dough that is just mixed in a stand mixer...no kneading necessary!
And if you are one of those people who is just not interested in messing with yeast, you'll be pleased to know that there are a number of no-yeast baking recipes in the archives.
There's even a recipe for no-yeast sandwich bread.
________________________
I hope that this helps to solve some of your yeast-baking problems. I'm sure some of my readers who are experienced bakers will be by to share some of their solutions as well.
And of course, you can always email me if you have a problem I didn't address here. Happy Baking!
P.S. Here's a roundup of all the yeast recipes I've posted; you can pin it for easy reference in the future.
P.P.S. Good flour makes a difference in yeast bread baking. Gold Medal unbleached is a great affordable option, and King Arthur All Purpose flour or King Arthur Bread flour are good (but pricier) options. This is a case where I think it's worth it to spring for name brand instead of store brand.
I just want to throw in a vote for pull-apart garlic bread in the "easy and delicious" category! It's quickly become one of our favorites. I've started adding 1 1/2 tsp of garlic powder to the dough, however, and doubling the garlic salt in the butter mixture. It's extra yummy that way!
Salt can kill yeast also. So if you're adding salt and yeast at the same time, stir it up before adding the water - if all the salt is next to yeast then the yeast will die.
I made the thin crust pizza dough without a stone and it was great. I cooked it on a preheated metal baking pan instead and it was nice and crispy, just as I like it.
A question: where do you buy a two-pound bag of yeast? What brand do you use? I keep buying the yeast packets at the store and they're like 50 cents each -- not all that frugal in the long run. Also, I don't think the quality of the yeast is that high. I bought a jar of yeast at the grocery store for $7 but I think it had lost its powers from sitting on grocery shelf for who knows how long.
I buy my yeast at Costco, but it's also available like that at most warehouse clubs. You can also buy it online, which I'd highly recommend if you don't have access to a warehouse club. You can get a two pound bag online for around $8, which is not as good as a warehouse price, but still a REALLY good deal!
I've also seen large quantities of yeast (I guess they must be 2 lb ??) at Gordon Food Service (GFS). Check http://www.gfs.com for locations. They sell to both organizations and individuals.
2# bags of yeast are available at Foodservice stores Associated Grocer's Cash & Carry here in Seattle does not require you to be in the food service industry to shop in their store. Some others might.
There is a trick I read about somewhere for helping dough rise in a cold house. Boil a couple cups of water, then stick the dough and the boiling water (in something like a glass measuring cup that will let the steam out) into the oven together. The steam keeps the oven warm and humid which really helps the dough rise. This trick really helps me a lot in the winter over here in the western U.S. where it is cold and dry.
Thanks to you I was able to conquer my fear of not kowing how to knead bread! I have since made several different types of bread including your pull-apart garlic bread (which we just absolutely LOVED) and the oatmeal cinamon bread - which is great for breakfast. It's been a fun winter weekend activity and one I plan to continue on with. The next adventure is going to be a raspberry bread recipe a friend gave me and french bread. Thanks again!!!
Here's what I do for the cold house bread dough doesn't rise problem. If I need to use the oven for other things I place a heating pad under the bowl I have the dough in. I put the heating pad temperature on low and it usually rises in the same amount of time it would if the house was not cold!
Another cause of bread not rising sufficiently could be the additions of things that may retard the yeast like too much salt, cinnamon or garlic. I know I have added salt twice and not realized it until I checked my dough and it was not rising. My CI gleaned trick too a cold house and rising bread it to microwave a cup of water move it aside and place dough container in microwave to proof.
What an excellent post! I've never aspired to baking bread...but we had an old landlord who baked bread (among a whole book of other things they did) and we were lucky enough to be presented with their family recipe book. My daughter has BEGGED for me to try the bread...but I've been a coward to try anything with yeast!
Your post gives me some courage! Thank you!
When I bake bread I run a load of dishes throught the dish washer, unload the dishes and use the still warm and steamy dishwasher as a "proof box" to let my dough rise.
I make the pull apart garlic bread a lot, too! I just want to say that a stand mixer makes bread baking so easy, it is a bigger hassle NOT to just make your own. I got my kitchen aid stand mixer for $110 at Kohl's. There's nothing better than freshly baked rolls, still hot from the oven, slathered with butter and honey.
I usually bake sweet dough and if my house is too cold - I've learned a trick by using your microwave - I just take a 2 cup measure of water - boil the water in the microwave and after it has boiled put the water off to the side in the microwave - take my dough, put it in a container that would fit in the microwave - cover it with a cotton cloth and the warm moist air in the oven lets the dough raise very nicely and quickly. I have been doing this for years and it always works beautifully.
I've heard that chlorine in the tap water can have a negative affect on dough rise.
My mom taught me to "knock" on the loaf. If it seems hollow, it's done. If dense, bake it a bit longer.
I made your Challah bread yesterday and the loaves came out beautiful. I braided one and plopped the other half in a pan unbraided. Most importantly, my family LOVED it. They asked me why haven't been making it all along? I guess I will be baking more often.
Our house is super cold at the moment so the idea of heating the oven for a minute and then putting the dough in there is so obvious, why didn't I think of it?!
I didn't think of it either, Steve!
I have a question. I use a bread machine (I work 40 plus hours, mother of 3) so I try to "cheat" as much as possible. My bread always comes out to stiff. It is not soft and/or fluffy like other loaves of bread. Do you have any thoughts or suggestions??
Thank you
Ramona
I use my machine to make the dough all the time, now. Once it starts to knead, check on it several times by opening it and feeling the dough. I usually have to sprinkle water on to the top of the dough until it is slightly tacky. And if you blow it by putting in too much water, you can always do the same with flour. Then just let it proceed when it has the right tackiness. I make a recipe that can't be baked in the machine because it makes 2 loaves.
This process works every time, but you do have to fuss with it a little. Sure beats the hand-kneading, though. And it still requires rolling it out and forming it for 2 bread pans.
After not having baked bread a few years (got out of the relatively new habit of making my own bread after moving into a rented house with a really bad oven and then went through a phase of only making soda bread about three years ago) I gave it another go yesterday. I picked up a hand-operated bread slicer on freecycle over the weekend and wanted to give it a go but hadn't bought bread and decided it would be a good idea to use up that packet of yeast I bought months ago and still had sitting on the shelf.
The recipe I have used successfully before is a very simple one which calls for fast action dried yeast which is simply added to the other dry ingredients (flour and salt) before adding the wet ingredients (tepid water, honey and sunflower oil). Living in a different country now, I wasn't too sure if what I had bought could be used in that way and as the instructions on the packet said to activate it in water first I decided to wing it and see what happened. So I used part of the water and a spoonful of sugar to activate the yeast and added that to the dry ingredients just after adding the rest of the wet (I used a smidge less honey to make up for the sugar). All seemed to go okay, I made sure to knead properly for at least the ten minutes mentioned and left it to rise. Added the sunflower seeds, kneaded again and left for a final quick rise before putting it into the oven. It's only a small electric oven so it took a bit longer to cook than normal but eventually it seemed ok. My question is more about the taste. It's an incredibly yeasty, nearly beer-like taste. No, it doesn't really taste like beer but that's as close as I can come to describing it - it's nearly sweet but that's not it either. It's still edible and I have to say I'm loving my new slicer (and pile enough cheese and chutney on top and it doesn't matter what it tastes like) but if anyone has any tips I'd be interested to hear them. Thanks.
My bread is not as white as it should be it is also rather heavy and dense, what am I doing wrong.
Usually denseness is a matter of the dough being too stiff, which makes it hard for the yeast to do its work. Try adding a little less flour and see if that helps.
I've gone back to baking all our bread now that we are retired and much more into cooking properly. I am happily working through all your recipes. They are SUPERB and fool proof. One thing though--I'm experimenting and made wholewheat with sunflower oil this week. Uh oh, it was dampish and gluey in the center. Luckily I cut a hot slice (yes, to slather with butter!) and so could put the loaf back in the oven for 15 more minutes on 300 degrees.
I think this also explains the problem we had when we bought bread at a Great Harvest store a few times--theirs has exactly the same unpleasant, raw-doughy texture. I want to tell them why we've stopped buying but DH says "No = impolite" What do you think? (Used to buy all our bread from them in Oregon but now we live in Delaware)
I appreciate the problem-solving, but is there anything you can do with a batch of dough that didn't rise? It seems horribly wasteful to throw it out; there must be some way to use it!!!
If yeast was the problem, you can mix up a teeny bit of dough, using yeast, enough water to dissolve the yeast, and a bit of flour. Then you can thoroughly knead the yeasty mixture into the dough, and let it rise.
I've done this when I forgot to add the yeast to my dough. And I've done it more than once. Hee.
Thank you! I finally found that tip on another site and tried it. We're on the second rise now, and it is doing better! I also read a bit about "proofing" the yeast, which I may now get into the habit of doing, just to be sure. Love the internet . . .
All the information has been wonderful. I have rolls that I make that everyone loves. So when the holidays come around it is a given that I make the rolls. Several years ago I moved into a new home that is very open. Ever since then I have had a hard time getting my rolls to rise. It is so frustrating because I love to make bread. I don't use a bread machine. I use my KitchenAid. I will definitely apply several of the tips mentioned here. I have always stored my yeast in the pantry. I will stop doing that. I am sure I have had old yeast as well. I also have probably added too much flour to the mixture when it is too sticky to handle.
The one question I still have is this...using these tips will work great for the first rising. My question is will these tips also work once I divide the dough up to make the individual rolls that are placed on a cookie sheet. My recipe makes 48 rolls. Any suggestions will be greatly appreciated.
Thanks!
Is your new kitchen cooler than your last one? And does it have any drafts? When the weather is cool (and my house is too!), I turn my oven on for a minute, turn it off, and then let the rolls rise in the slightly warm oven.
Yes my kitchen is cooler than my last one only because it is much bigger and open to my family room. I think there are drafts as well because on each side of my kitchen is an archway leading to either the dining room or foyer of my house. I am going to have to try the oven thing.
I wonder if anyone on this site has seen and had experience with the proofing box that is sold on Amazon. The name of the product is - Folding Bread Proofer and Yogurt Maker.
I have also proofed mine in my pantry with the door closed. It keeps it out of the drafts. (My husband randomly airs out the house which drops the inside temp tremendously). You can also heat up a bowl of water in the microwave and then just tuck your dough inside.
My understanding of the reason to get it out of drafts is to prevent the surface from drying out which will make it resistant to stretching during the rise.
The job requires us to be on the road daily for 12.5 hours, because if this, I use a bread machine. If I didn't, I would have to buy store bought bread (or just do without since store bought bread is "yucky" - :^0
Anyway - I find many good recipees here but don't know [if I can - or] how to make them in the machine.
Is there a formula that will help me? I have a SUPER recipee that all my friends and family really like, but I would love to be able to make some of the recipees I find on here, too, without ending up throwing away flour, yeast, etc. if it doesn't work in the machine.
Thanx!
PS My house is also cold and my dough won't rise in the winter months even in the bread machine. Can I just remove the pan from the machine and put it in the microwave with the warm water, or use the heat pad, etc.? If so, do I do it as soon as it has been kneeded?
I'm no help here, since I don't use a bread machine! Maybe another reader will be able to help you.
And yep, your ideas about warming the dough during the rising period should work just fin.
I use a bread maker for mixing and proofing (rising) all my yeast dough, and then just pull the dough out, shape it and bake it in the oven. Any recipe can be made in the bread machine, the trick is to add all liquids *first*. Here's the order I recommend (leaving out any ingredients that aren't in your recipe, of course!): warm liquid, butter/oil, egg, salt, flour, sugar, yeast.
Another important thing: don't add the salt and yeast together! Make sure they're separated by a layer of ingredients. Also, a pinch of sugar added with the yeast will help.
Ive been making dinner rolls a long time and the rolls have been proofing very fast and you can smell the yeast in them very strong what could cause that
Is your home temperature really warm? In the summer, I have to keep an eye on my bread/rolls because they tend to rise pretty quickly when the hose is s warm.
I made a yeast dough and didnt add enough yeast. Can I rework the dough with the additional yeast or do I have to scrap it?
Yep! I usually (I've done this more than once!!) dissolve the yeast in a little water, add a little bit of flour to make a really soft little bit of dough, and then knead it into your yeastless dough.
And all will be well. 😉
I did this but my dough is not rising. What else i can do? I don't want to waste all the ingredients. 🙁
Hmm...is it possible that your yeast is just bad? Is it old?
Thanks to all, for all the tips! It turned out that the yeast packets were, "Ahem", elderly. I dumped all of them into the measuring cup, added a pinch of dough and a smidgen of flour with warm H2O and voila! The dough is rising right now!
Can't believe I forgot to warm the water for my bread. Will it eventually rise, or do I have to throw it out and start over?
It should still rise, yes. It'll just be a bit on the slow side. Can you put the dough in a warm spot in your house to rise?
When my house is cold, I like to turn my oven on to 350 for one minute, turn it off, and then place the dough inside, covered with a wet tea towel. The bit of heat plus the moisture from the tea towel make for good rising conditions.
To help raise your dough: I bring a cup of water just to a boil in the microwave while I preheat the oven for 1 min. Turn the oven off (turn on your oven light if you have one) and put in the bread to rise, covered with a tea towel, and the cup of hot water (on the bottom of the oven somewhere). That raises my bread every time. But remember to take out the cup and the risen bread before starting the oven to bake. Works like a charm. Need to remember to set a timer, though, to check on it. I forget sometimes that it's in there until it's King Kong sized.
My bread taste very good but it’s not a very pretty loaf. It seems to pull apart when it’s rising. It’s whole-wheat and I grind my own wheat. What am I doing wrong?
That sounds like maybe not enough gluten development, or maybe your dough is too dry.
With whole wheat, it's sometimes easy to add too much flour, because as the dough sits and rises, the bran/germ absorb more and more moisture. Early on in the recipe, you could try letting the dough sit for about 10 minutes, to let the whole wheat absorb some of the liquid. Then you can proceed with the recipe, and you'll probably end up adding less flour. This little rest also aids in gluten development.
Great article and inspiring!
Any tips for making gluten-free bread?
Unfortunately, no. Gluten-free baking is such a different animal! ATK does have two good gluten-free cookbooks in print, though, and they both have quite a few baking recipes.
And there are a number of dedicated gluten-free blogs out there too, so I'd do some reading on those.
Thanks! Actually my wife is not gluten intolerant - she is specifically wheat intolerant - I guess I could try some oat or other flour?
Oats have no gluten, so you'd have a heavy, dense loaf. Remember that wheat supplies the gluten that gives the bread it's airy crumb. So you may have to try gluten free breads anyway.
Rye, barley, and spelt have some gluten, but the results won't be the same as a bread with wheat--look for a recipe specifically for one or a combination of those grains if you want success.
Yeah, any non-wheat flour is definitely going to require some special methods and modifications. I would consult with a good cookbook/website dedicated to non-wheat baking!
Also: you can try recipes that are naturally wheat free. For example, there are oat pancakes that just don't have wheat in them (oats, buttermilk, eggs, but no flour). Or cornbread recipes that are made with 100% cornmeal; no flour necessary.
Or on the cookie front, these have no wheat flour in them, but that's just how they're are. They're accidentally gluten free! https://www.thefrugalgirl.com/wednesday-baking-monster-cookies/
One GF blog with a fantastic recipe for mixing your own GF flour is called The Joy of Gluten-Free Baking. You can mix as much flour at a time as you want, once you get the ingredients. A couple of the ingredients are pricey, but use such small amounts per batch that they will last a long time. Then other ingredients are really cheap, like flours you can get in the Chinese markets. I find that the baked goods taste much closer to those made with regular flour than the pre-mixed GF flours you buy, and it's also much cheaper over time.
I’ve been making bread and sweet rolls for over 50 years but have never noticed any difference in yeast or flour brands. I do prefer bread flour for breads and some generics don’t make it at least where I shop. Right now I have Aldi AP flour. What differences do you note and is it just in baking bread? I use store brand flour for Rouxs, pie crust, cakes, cookies, etc.
When I've tried off-brand flour, it has felt to me like the amount of flour I need for bread dough is very different. I'll be adding flour like usual, and suddenly my dough is way firmer than I want it to be. I also think the flavor of bleached, off-brand flour is not as good.
For cookies/brownies, etc. I haven't noticed as big of a different. But the main thing I bake is bread, so I just always have Gold Medal or King Arthur flour at my house.
We have found the biggest impact of different flours in cookies. We have found a brand we like for cookies and use other “house brand” flour for bread and other cooking requirements. I bought 80 lbs of Walmart flour and then we noticed all our cookies were coming out flat. Through trial and error with the other ingredients we determined it was the flour. Luckily we bake a lot of bread.
Oh, that's so interesting. I guess I haven't baked cookies enough to notice. On the other hand, I haven't baked with store brand flour for so long, I haven't had a chance to notice in eons!
The chocolate chip cookies my husband made were greasy and pretty much inedible. I hate wasting expensive ingredients like butter and chocolate, but we were happy to have figured out the issue. Now the cannister with the “good” flour is clearly marked and given cookie priority. Never come between a man and his cookies.
Ugh, yes, I really, really hate it when I waste butter. Chocolate too.
I have a top-loading washing machine. I let it fill to the small load with hot water (saved and used for washing clothes later), I put down a thick towel, and put my bread pans on it and cover with the other half of the towel or another one, and the warmth raises the bread beautifully!
And I, too, use a bread machine to mix and knead. My arthritis is much happier.
I would like to say how much I appreciate your revisiting these existing posts. It's good to have answers at hand to questions that so many of us are having (or having again, as the case may be).
I appreciate the feedback! I figure that lots of people are looking for A) help with specific issues and B) something entertaining/educational to read.
So, I've been digging through the archives for things to update and republish on the days I don't normally post.
I've been experimenting with using less yeast than the recipe calls for (out of fear that I'll run out during this pandemic and not be able to get more!). I find that if you use half the yeast a bread recipe calls for, just double the rising time --- for instance, if the recipe calls for a 1 hour rise, give it 2 hours. I've got nothing but time these days, so the extra rising time doesn't matter to me! So far, so good.
Yep! As long as you can be patient, then it works really well to just give the yeast more time to grow.
Perfect for these stuck at home days.
Thanks for helping everyone with this Kristen. Many of us grew up in home that never had homemade bread! I know that I thought baking bread was complicated and something only advanced bakers could do before I decided to jump in and do it several years ago. Once I figure out the right temp for the water so I didn’t kill the yeast, it came together.
In fact, now that someone is home at our place 24 - 7 we are going through a lot more bread and my husband and son are baking the bread too.
Happy baking!
Thank you for posting more often during this higher stress time. It is calming to read your gentle and practical posts.
Aww, that is such a lovely thing to hear. I am delighted that what I write is helping you to feel calm. Such a compliment!
I made a yeast Easter bread in the bread machine with eggs yolks no whites, sugar, bread flour, spices and liquored up raisins. It looked great at the finish of the bread machine cycle with a rounded top. After cooling the top collapsed and became stodgy and the sides created a waist. What happened? What can I do to avoid this?
This sounds like an underbaking issue to me. A lot of times bread will LOOK done on the top when the inside isn't totally cooked, and sweet breads definitely will brown more quickly than regular breads.
I'm not too familiar with bread machines, but is it possible there was too much dough for the machine?
If not, could you try baking it longer next time?
It is possible to make the a custom cycle with a longer bake time or I can redo the recipe to put in 3.5 cups of flour instead of 4 cups. Is there a cups of flour to tsp of yeast ratio?
Any suggestions for clean up? I always have sticky bits of dough left on my bowl and spoon which dont wash off well and then stick to my dish cloth and dish drain.
Yes! I always, always put my dough bowl in the sink and fill it with water. I let it sit for a nice long time (while the bread is rising and baking), and then the extra dough rinses right off.
I put the spoon and the Kitchen Aid beater in the bowl with the water too, and then they're easy to rinse out.
Very helpful, but I am confused by what type of yeast to buy, can you explain the different kinds and which ones you use.
The yeast I buy from Costco is labeled as instant yeast, and I use it in every kind of yeast bread recipe, old or new.
The instant yeast seems to work exactly the same as the active dry yeast I used back in the 90s, so I don't think it makes a difference at all.
Thanks, I can smell the bread baking already. PBH
Kristen,
In the Frugal Girls receipt dose not say how to prep your yeast before adding to wet ingredients? I’ve always heated some water 105• and let my yeast start working before adding to wet ingredients when it cools down a bit so as not to clabber my eggs? What’s your suggestion?
Also my mom always scalded the milk..
What does that help in bread making?
J Middlebrooks
As I understand it, modern milk does not need to be scalded before use in a bread recipe. I see that all the time in my old bread cookbooks too, but I don’t ever scald mine; I just heat it to the temperature specified in the recipe (that heat is important because warm dough will encourage the yeast to grow.)
Modern yeast also does not require a head start in warm water. You can certainly do it that way if you want; no harm, no foul. But it’s not necessary.
Here’s one you haven’t listed. I was moving my bread pan after the final rise and it fell UPSIDE DOWN!!! It pretty much flattened. Is it salvageable?
Yep! I'm probably too late to help you this time, but if this happens again, you can just let it rise one more time. This rise will go quicker, so keep an eye on it so it doesn't overrise.
Approximately how long do you kneed dough for light and fluffy yeast rolls? What can I do if my yeast rolls are not light and airy? The yeast was active and the dough rose as it should have.
Usually, the problem with heavy bread is that there's too much flour added. Is your dough fairly soft and slightly sticky?
Also, the type of flour can sometimes be a problem; I like Gold Medal unbleached all purpose flour, and if you want to get fancier, King Arthur all purpose flour is really lovely!
Should you throw out hard dough that rose halfway. I have made recipe before and sough rose nicely. Also,, dough is breaking instead of stretching. Should I continue to bake or just start over?
This sounds like a case of a dough that is too dry. If it's too dry and stiff, it won't want to rise, and it will break instead of stretching.
It's probably easiest to just start over, honestly.
Should you throw out hard dough that rose halfway. I have made recipe before and dough rose nicely. Also, dough is breaking instead of stretching. Should I continue to bake or just start over?
I made the bread recipe from Frugal Wife. It said to add the yeast to the flour without proofing it first. I did this and was sad to say the yeast didn’t dissolve this the bread is poor. I have been baking bread/dough recipes for probably 50 years and was hesitant to do this. However, I did follow if word for word. Very disappointed.
Oh, interesting. A lot of my bread recipes call for adding the yeast to the flour, then adding in liquids and mixing.
But if that method doesn't work for you, you can always modify a recipe by dissolving your yeast in a bit of water first and then proceeding with the recipe.