
Some mending/modding I'm a little bit proud of

First, the part I'm proud of, and then something super basic...
This past fall, in a bag of hand-me-downs we found two heavy-duty long sleeved shirts that were almost Zoe's size. It's kind of hard to find knit shirts made of thick, warm knit fabric, so I really wanted to keep these. However, they seemed to be from a previous era where waistlines were higher and shirts were shorter.
So, the torso part fit Zoe but the sleeves were too long. Since I'm not super great at hemming knit clothes, I thought I might just cut the sleeves to the right length and leave them unhemmed (Knit fabric doesn't fray.)
But then I remembered reading about how you can make a lettuce-edge hem by using a tight zig-zag stitch, so I gave it a try.

And I'm pretty darn pleased about how it came out. I did this first on the black shirt and then on the purple one, using one of Zoe's well-fitting shirts to determine the proper sleeve length.
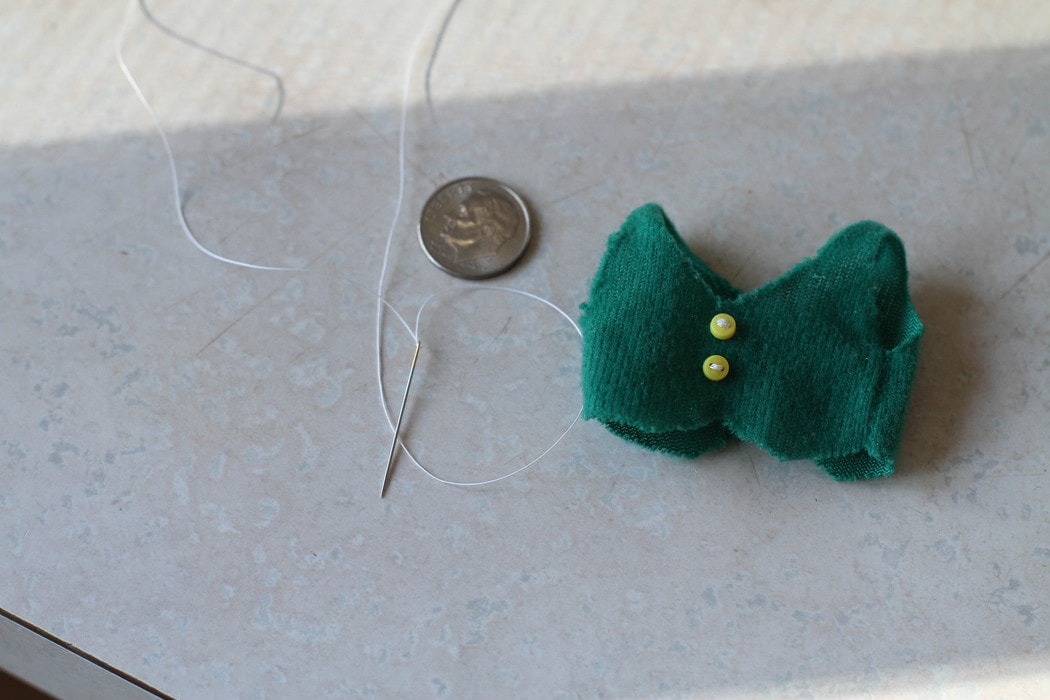
The black shirt was good to go, but the purple one had a tear near the hem.
So, I took some of the fabric I'd cut off the sleeves of the black one and sewed kind of a messy heart over the hole.

Zoe picked out a button from my button box to add to the heart.

I've never done something like this before, and I'm quite sure there are ways to make it more flat and even (probably involving interfacing), but hey, this worked out ok for my first ever attempt and it makes the shirt wearable.
And Zoe is happy with it, so, you know.

I've said it before and I'll probably say it forever...trying to rescue stuff that's ugly/damaged is such a low-stress proposition. If the hole repair had been unsuccessful, it would have been no big deal. I paid nothing for the shirt and Zoe wasn't going to wear it with the tear anyway, so I had pretty much nothing to lose.
And it only took me a few minutes, so I wouldn't even have been out much in the way of time.
Now for a much more basic repair, which I hesitate to even share here, because it's so basic. But just in case one person on the planet doesn't know how to do this...
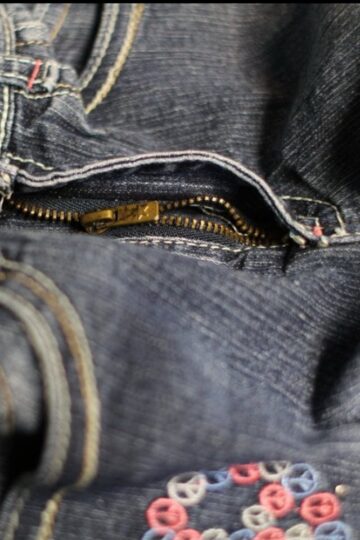
Zoe's jeans adjuster came out of her pants the other day, and I just hooked a safety pin on one end and fed it through.

I learned how to do this when I sewed my first pair of shorts as a kid, but it's awfully handy whenever ties or adjusters make their way out of clothing.

So, now I'm curious: How many of you already knew how to do this?
I'm guessing it's a high percentage because I checked with Mr. FG last night and much to my surprise, he knew how, even though he is not at all a sewing kind of guy.
___________
Joshua's 52 post: Extra-Terrestrial
I think this one is a great picture, but it's even better if you remember he took it with a $100 point and shoot.
(Says she who is terrible at moon pictures. Even with an SLR.)
I knew, but I sew and I remember first learning this...it is such an aha moment. The hemming and patch idea is brilliant! I am constantly reminded this about nutrition information. What I think is common knowledge, really isn't. You are helping people everyday!
I didn't know!!! Wow, thanks for the tip!! I have been mending clothes for my family for years and have never figured that one out. Great!
Awesome-I'm glad I shared, then.
I had no idea! I love the patch!
Yay! So glad I posted about it. It's such a simple thing, but it can turn something unwearable back into usable shape.
Me, me! I knew! There's a sewing tool made specifically for this purpose, but works nowhere near as well as the good 'ol safety pin! ( for me, anyway!)
You are such an inspiration to me when it comes to all the creative ways you find to alter clothes to fit you kids. Sadly I will admit I am more apt to use clothing with holes for rags to clean with than mend them. Although once and a while if it is a favorite item, or an item we don't have many of, I will mend it. Oh and yes I knew the safety pin trick, but I took sewing all through high school.
That purple shirt looks like it came from a kid's boutique, now. People pay a lot of clothes to look "handmade"!
I did know, but I also sew. It is really handy for the strings coming out of sweatshirts!
This strings in the hoods of sweatshirts, I meant.
I don't sew or have kids, but I just had to stop by to say that Zoe is adorable. I've been reading you blog for several years now & I can't believe how big she is!
Thank you! I happen to be a pretty big fan of hers too. 😉 She was just a little two year old when I started blogging and now she's eight. Craaaazy.
I Love the thriftiness of Zoe's shirt- that would make me happy to accomplish such a cute outcome! Great job!!! Looks trendy!! And... I had NO IDEA ab the safety pin. I just struggled yesterday for one of these elastic bands that disappeared into my sons jeans... I really dug around for it... Got it... But this SP trick would've helped tremendously!!
Yeah-once one end disappears, it's usually easiest to just pull the whole thing out and then thread it through with the safety pin.
Now you know for next time!
I knew but I also sew. I know that your tip will help many folks though. I love to mend/salvage/refashion for my kids.
I knew because I have sewn something similar - however I still love to read basic advice like this. It's a good reminder of how easy it is to fix something.
Hello
Did you make the "adjuster" for the pants and, if so, how did you do it? I've lost weight but am not quite ready to throw out all my pants and this would be just the thing to help keep them up.
I didn't-it's one that came with the pants. They're pretty common in children's clothes these days.
Yep. I knew it, but I sew....some. Good job on the mending! Very creative! Thanks for being willing to share the "basics". Having a solid foundation is a good way to unleash all that creativity! I just want to say that I appreciate this blog. Thank you for all your effort and hard work you put into it!
I learned the safety pin trick (and everything else I know about sewing) in my mandatory junior high home ec class - I hope they're still doing that!
Ooh, good idea. I think I knew about the safety pin thing once upon a time ... thanks for the reminder.
Love the lettuce-ripple sleeves. I was smiling at your cover-up of the boo-boo on the sweatshirt--I re-learned how to knit a year ago and sometimes projects don't turn out exactly right--the lesson I have learned is that sometimes disguising errors makes a product even better. Zoe is a cutie and the sweatshirt looks darling on her.
Hand on heart, I have never heard of a jeans adjuster. I have threaded elastic using a safety pin though (trying to redeme myself here)
Lizzie
I knew about attaching something, but I usually use a knitting needle or a chop stick. LOL A bit bigger and faster to push through! Great idea on fixing the shirt -- I keep around strips of fabric, buttons and even a Bedazzler style thing to cover the random holes that pop up. 🙂 Mostly on my clothing. The boys hate it!
I can barely mend a button but I knew about using a safety pin to thread elastic/drawstring through the waistband because my mother and grandmother were both seamstresses. Sadly, I didn't learn any of it!
Wow! I'm impressed. That shirt is so cute with the details you added on the sleeves and I just love the button heart!
And, I didn't know about the safety pin trick. Alas, my son turns 11 in a couple weeks so most of his clothes no longer come with those elastic adjusters.
My Mom taught me the safety pin trick when she taught me to sew. It has come in handy so often.
Zoe's purple shirt is adorable as is she! What a great save for a hand-me-down. I had never heard of the lettuce-edge hem, what a great idea.
I always love your sewing posts. I am super excited to have found two new size 24W knit dresses with the 50% tags last week at Goodwill. Each cost$1.99 and there is enough fabric to make a skirt from each dress plus leftover fabric for quilt squares. Skirts are my preferred Summer wear, and $2.00 for a new skirt can't be beat!
Now that you know about the lettuce stitch I can see you cutting off the neck ribbing of t-shirts and feminizing them. Lots of t-shirts develop holes right where the ribbing attaches so this is one way to save those. It takes more thread than you might first think, though.
I think the "new" version of the shirt is cuter than it started out. Good job!
I've lost a lot of weight, but I still have a bit of a belly and need larger sized pants than it would seem to fit well at the waist. But my legs are thin, and the pants look SO baggy. I can't find other pants I like as well. I bought matching thread, and I'm trying to get up the courage to sew up the inseam to make the legs less baggy. This post is inspiring me.
I actually find it easier to sew up the outside of the led and hip area than the inseam, but either method works. I find the altered seam on the inseam bothers me more.
I don't sew except buttons and inept but effective small hole patching, but I did know about the safety-pin trick.
About that common knowledge thing: within the past 6 months I read two things about knowledge sets. One, that people who teach themselves things tend to think that others know just as much on the subject - because, well, they taught themselves so others probably have as well; whereas people who learn things in classes don't make that assumption. Two, that people who know a lot about a subject, tend to underestimate how much they know relative to others; whereas people who know only a moderate amount tend to overestimate how much they know. (Both these insights correspond with my personal experience.)
Huh, that's interesting.
(Especially the first part, because very little of anything I know has come in a class!)
I knew how to do it, but never knew that 'that button thing' was called an adjuster, so thanks!
I knew, thank goodness, because I need to do so frequently. My husband, however, did not when I met him. He does now, but not precisely how to do it, just that it CAN be done, and thus brings everything to me for 'search and rescue.' 🙂
The shirt is adorable! And it may be just the inspiration I needed. I hate that I don't know how to sew, but I don't have anyone in my life that can teach me. I also have no idea what sort of machine would be best for a beginner (inexpensive, but not cheap...I don't want to make a huge investment until I know it's something I'm going to stick with). I actually tried to learn a few years ago but I think I had a bad machine. It kept locking up and eating my thread and I finally just gave up. Any suggestions?
Have you asked about lessons at your local crafts store? I think JoAnn's fabric offers a basic sewing course and a "get-to-know-your-machine" course (you could ask to just sit in on it since you don't have a machine yet). You could also make a flyer requesting lessons & post it there or find a local yarn/craft store to post it at. Good luck!
Wow, great work on the sweater - its new owner looks so proud!
I knew about the safety pin tip, but that is probably just because my mother used to sow. I live in a different country to her now, and have to fend for myself whenever something need stitching (I haven't got a sowing machine). I've got really short legs but am useless at hemming, so lately I have taken to just folding up the trousers and sowing four solid stitches (one in the front, one in the back, one on each side) to hold the fold up. Pathetic, I know...! 😉
Wonderful ideas and tips, thank you!
A simple way to prevent stretching and rippling when you appliqué on knits is to iron a piece of freezer paper, shiny side down, on the wrong side of the garment. After stitching, carefully tear the freezer paper away.
Good to know! Thank you.
Great idea on the patch...we have a four year old daughter and I can totally see my wife doing that. Thanks for sharing. 🙂
I think I am going to try this hem today on long sleeve t shirts that I love but I know won't fit this coming winter because SOMEONE is growing so fast!!! short sleeve shirts, here we come!