
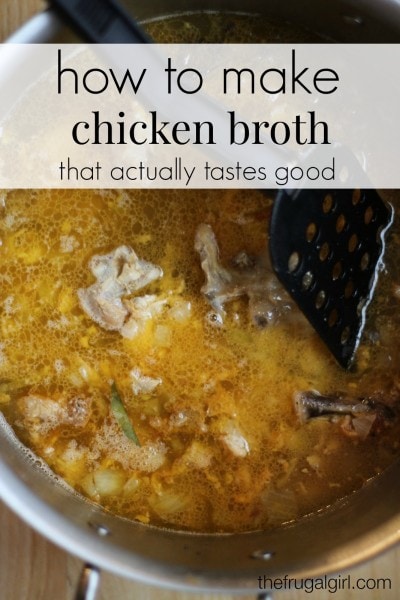
How to make chicken broth that is actually tasty
When I last mentioned making chicken broth, some of you shared that you've had trouble making chicken broth that rivals what you can buy in the store.
So, I promised to show you how to make chicken broth that does not resemble dirty dishwater, either in appearance or flavor.
Though this recipe doesn't come directly from Cook's Illustrated (What the what???), the method is kind of a riff on their chicken noodle soup recipe.
(Because, um, pretty much everything I do in the kitchen relates back to CI/ATK somehow.)
CI's method for making chicken soup broth involves hacking up an entire chicken, browning it, and then making broth. After making the soup several times and enjoying the super delicious broth, I started to realize that I could do something similar when making broth from leftover chicken bones.
The key, I think, is having some raw chicken to start out with. So, when I spatchcock a chicken, I always save the backbone (and any extra skin/fat I trim off the chicken).
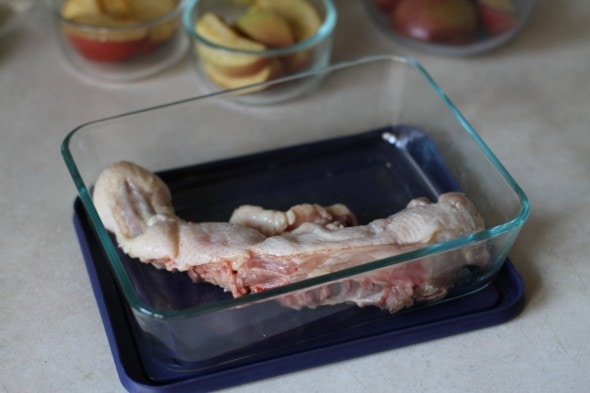
Also, when I make Teriyaki Chicken, I end up with some uncooked skin/fat/bones because the recipe calls for deboning raw chicken thighs. If you don't have any leftover chicken, I would grab one or two raw chicken thighs from the freezer.
By the way, this will totally work with turkey bones/skin, so save any raw bits from your turkey at Thanksgiving!
Here is what is important to know about broth making:
If you want delicious broth, do not just plunk bones into a pot with water and simmer them to death.
This is easy and hands-off and will produce nutritious chicken broth, but the broth will not knock your socks off either in appearance or flavor.
If you do a little prep work before your dump water into your pot, though, your broth will be exponentially improved.
So, first I heat my Dutch oven over medium heat and then add the backbone and chicken skin to the pot. I let the fat render until the chicken skin is pretty crispy and the pot bottom is full of browned bits.

If there is one thing Cook's Illustrated has taught me, it is this: Brown All Of The Things.
And whenever I apply that principle, my food is indeed more flavorful.
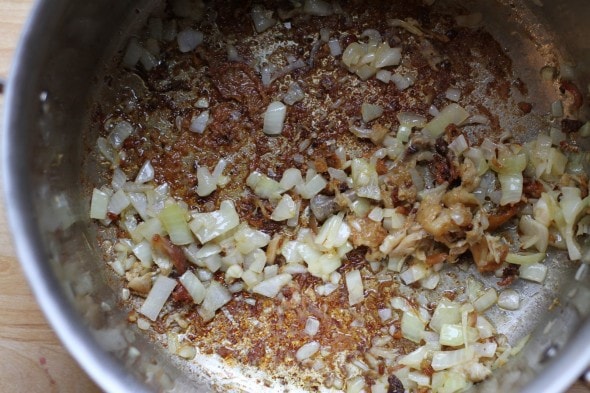
Ok, so, once I have the lovely browned bits, I take out the bones and such, and add about a cup of chopped onion. I saute that in the chicken fat and browned bits until the onions are fairly soft.
Since chicken fat is very chicken-y-tasting, this will give your broth a good flavorful start.
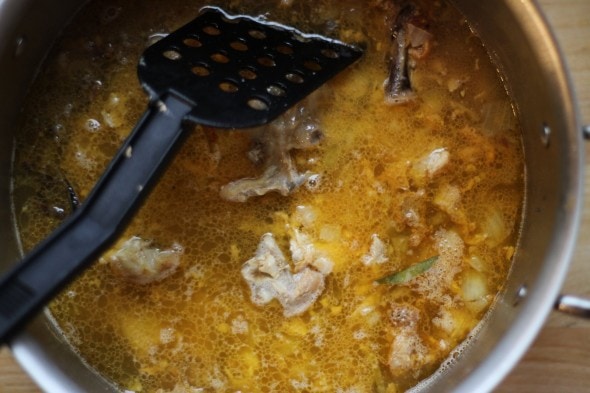
Then, and only then do I add water and the chicken bones. I also sometimes add in thyme and/or bay leaves, depending on what I plan to use the broth for. And I add a few teaspoons of salt as well.
Heat the water to a simmer, scraping the bottom of the pot to release the browned bits, or fond.
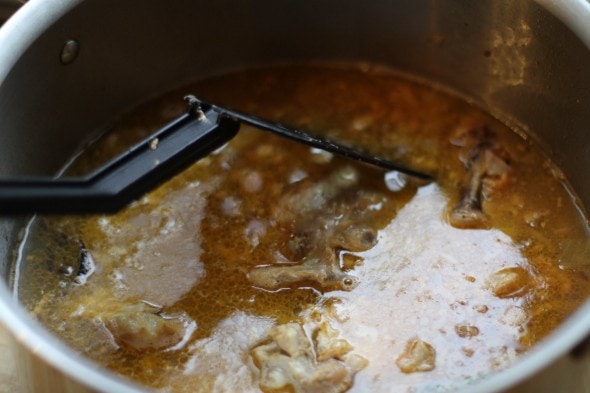
Because of all the browning you did before adding the water, your broth will have a lovely, appealing tint and flavor even before you've simmered it.
But simmer you should because your broth will extract flavor and nutrition from the chicken bones as it cooks. If you let your stock boil, it'll be cloudier than if you keep it to a simmer. But the world will not come to an end if you boil it, so don't stress, k?
After an hour, the broth will be quite delicious, but if I have more time, I let it cook longer. If you let it cook for many hours, you'll probably need to replenish the water, or you'll end up with very concentrated stock (which is fine if that's what you're going for!)
For one chicken's worth of bones, I'd say I probably end up with about 4 quarts of stock, although I don't really do a whole lot of measuring as chicken broth is more method then recipe.
Once the broth is finished, strain it through a fine mesh strainer and let it cool. Once it's down to room temperature, you can refrigerate it.
As it cools, the fat will rise to the top and solidify. For most purposes, you'll want to spoon off the fat and discard it, because leaving it there will make your recipes unpleasantly greasy.
However, if you want to use the broth to make chicken noodle soup (I plan to post that on Wednesday this week), save a few tablespoons of the fat, because you can use it for sauteeing the veggies.
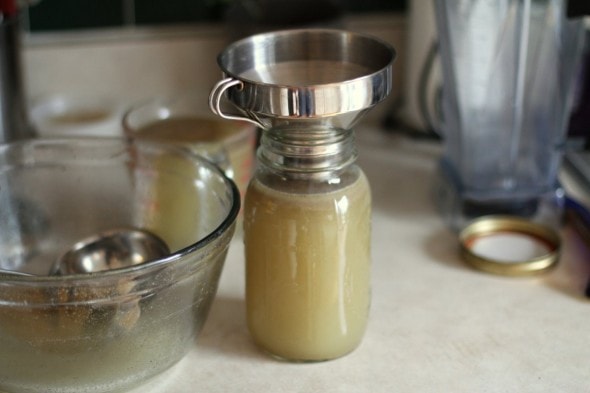
(This is an old picture of broth, from before I figured out the browning method. And clearly I boiled this stock because, hello, cloudiness!)
If you're not going to use your broth right away, you can freeze it for future use. And you can do this in regular glass Mason jars as long as you leave sufficient room for the broth to expand as it freezes.
Give this a try! If you've had trouble producing tasty broth before, I really, really think this method will help change that.
P.S. If you want still more flavor, I've read that browning the bones in the oven before making broth helps increase flavor. But I'm pretty happy with my broth at this point, so I'm loathe to add another step.
My local grocery store sells the day old rotisserie chickens for a couple of dollars off. I save the bones, skin and other inedible parts and then make stock from that. Gonna try browning the stuff first to add more flavor, but always add a whole quartered onion, a couple of carrots (cut into thirds or quarters) and a couple of celery stalks. I always get a rich sauce and since it was left over "throw away" chicken parts, I feel like it is almost free. I always let it set overnight in the fridge and then you can get almost all of the fat out of it and then make a tasty soup.
That sounds fantastic. I wish my store did that.
I also do a similar process, though I don't usually brown anything, so I have to try that. The turkey soup from the carcass is the best thing about the day after Thanksgiving! I throw in whatever veggies or pasta I have and we all sit and admire the newly decorated tree. (:
Some thoughts about stock:
1. Kristen's technique will not work for beef or pork stock; only for bird stock. The reason boils down to the nature of the fat and bones: bird fat and bones taste like the bird, meat fat and bones (and marrow) taste like fat. Bird fat and bones contribute flavor, meat fat and bones don't. To make up the flavor difference you need to use meat.
2. The standard rule of thumb is that one pound (or one quart) of bones makes 1 quart of stock. I think that makes a damn thin stock (unless you use a lot of meat, as the CI recipe does) so I use 1 lb = 1 pint.
3. I consider roasting the bones to be instead of browning in the pot, rather than in addition to. You roast the bones, a quartered onion, 1-2 stalks celery chopped, and 1-2 carrots chopped; at 350-400F for 20-40 min, till everything's browned. Scrape it all into the stock pot, deglaze the roasting pan, scrape that into the stock pot as well.
4. Please, please, please, don't salt the stock. You don't know what you're going to use it for, or how concentrated it's going to get, or what will be added to the recipe. Unsalted stock, like unsalted butter, allows you to control how salty the end result it. You can always add more, you can't ever take any away.
5. When the bones fall apart in the stoc,k you know they have given you their all. At that point the connective tissue has fully dissolved into the stock, making it rich and a touch gelatinous. Typically that's 2-3 hours.
6. To save freezer space and containers, concentrate your stock. I simmer mine down to 25% of original volume.
This is a fabulous, very I formative comment! It’s very similar to what chefs do to make a delicious stock. Thank you so much William B!
@WilliamB,
Onion skins add beautiful color and flavor to any broth.
@WilliamB, hi….how much water do you use to start. Say 2lb of bones.
Not WilliamB, but on my stovetop, I just cover the bones with water plus maybe an extra inch or two.
I throw in veggies that are on their last leg (including celery I've put in the freezer--it's gross for eating, but perfect for making a broth!) along with the bones into the crockpot, and my magic ingredient is pickling spice. Watching people try things I make with the broth is fun because they love it and don't know why. That pickling spice adds something special! I just froze over a gallon of turkey broth last week using this method (two crock pots going at once).
I am using the crockpot method right now. My family had Thanksgiving dinner last night. I got to take the turkey carcass and some mashed potatoes home. Nobody wanted them. I picked off 7 cups of chicken. I put the whole carcass in a crockpot and covered it in water. I put a glug of vinegar. Let it simmer on low all night. Just added some veggie from the veggie tray I took. Supposed to let it cook on low for 2ish more hours and strain. This is my first time in a crockpot.
The best broth I've ever made was made with the bones from one rotated chicken, plus a whole raw chicken, plus onion and celery "ends"
I keep a bag in the freezer, and whenever I peel an onion or prepare celery, I put the peelings and attend and leaves of celery in the bag. That's what I use when making broth.
Also, if you're pressed for time, the dry parts of onion peels will color your broth, which is also helpful for that small batch of giblet broth many people make to use to make gravy on Thanksgiving!
One other thing I've found is that if you want really good, thick, jelled broth when it cools, use the smaller put you can to hold everything, and just barely cover with water, and let it cook for 48 hours.
Argh, swipe-correct! Roasted, not rotated.
Smallest pot. Apparently my proofreading sucks this morning.
Haha, I totally thought you meant rotated chicken, as in a rotisserie chicken.
Good tips -- never have I made a broth that had character. I will try your method. Thanks
I've never tried making chicken broth! We use a giant ton of it for cooking, but I've been using Better than Bullion Organic Low Sodium from Costco.
The problem, you see, is that I have never, in my entire adult life, purchased any kind of raw chickens with bones in it. Really! But I've been having this urge lately to roast a chicken and then make broth from it, so maybe I will give it a try. I wouldn't say I'm a bad cook, exactly--just that it doesn't come naturally to me.
And Mr. FP wants to roast a turkey for Thanksgiving, so I will definitely have us make stock! He ordered a 10-12 pound turkey for our family of 2 adults and 2 preschoolers, so we will really be up to our eyeballs in it.
Ooh, that's a good opportunity to make stock!
Many stores sell chicken backs and necks, which work great for stock. BTW, a well-roased chicken is harder than it sounds, so don't be discouraged if it takes a few tries to get it as you like it.
I have a question. You mentioned browning raw chicken, then onions, and then adding the browned bones back in. Do you also add in already-cooked bones (as in, saved from a different recipe)? I can't imagine you wouldn't (because it wouldn't be very frugal to use only "new" chicken for broth), but it wasn't clear from the post.
Thanks so much for posting this easy method. I can't wait to try it. I think I even have a raw chicken backbone in the freezer to use up :). (I saved it hoping to make stock one day but never have. Your method looks the best of all I've seen, so it's one I'll try.)
Yes! Once you finish browning the onions, then you add in water and the bones from your cooked chicken (or raw bones work fine too!)
Super! Thanks, Kristen. Maybe I'll try to adopt the carcass after Thanksgiving at my in-laws' this week 🙂
Ooh, good idea!
I agree with Kristen that you need some pieces with meat on them and not just bones. I've fund the best method is the bones from one whole chicken (rotisserie or roasted at home) and a whole raw chicken. I toss in a few carrots, ribs of celery, 1 onion, the left over tiny pieces of garlic from the center of the head that aren't easy to chop, a bay leaf, 1 tbl of peppercorns, and a few squirts of ketchup (weird but really gives it flavor but not a tomatoey flavor). I toss it all in a large crock pot, cover with water ( about 3 qrts) and let it cook away for 24 hours. I hate babysitting stock on the stove so this works best for me. You know you have made a good stock when it is cooled it has the consistency of loose jello.
I am always so proud of myself when my broth is all jiggly in the fridge. 😉
I think I was one of your commenters from before. I've only hear tried the boil the bones forever and get meh broth method. Looking forward to our next big chicken dinner so I can try to make a broth that actually tastes good!
Yay! Do let me know how it comes out...I think you'll love it.
I never take the time to brown my chicken or bones, but I can imagine that would add great flavor. Like you, I loathe another step, but it might be worth it for me to try that one. I usually just throw my leftover chicken or turkey carcass in my crock pot and cook on low overnight. Thanks for the tip.
Ooooo what a great tip. I'm gonna try that next time. I do something similar which is to deglaze the pan whenever I roast (or bake or pan fry) the chicken in the first place. I then save the deglazing liquid & bits in a jar in the freezer and add it to the pot when making broth. You can do the same with roasted veggies etc. I also tend to save the juice from canned veggies (on the rare occasions that I use them) I rinse out jars of pasta sauce & save the water etc... Add it all to the broth and it adds a great deal of flavor.
And I think adding a splash of vinegar helps to get the nice gelatinous stuff out of the bones.
Thanks so much! I have indeed made chicken broth in the past that resembled chicken dish water that was less than pleasing to the eye and frankly wasn't brim full of flavor.
Can you do the browning step in a pot and then put the broth in a crockpot for slow cooking? I have an electric stove top at present that I loath so I find myself using the crockpot more and more.
Your blog is fabulous Kristen, I look forward to reading it each day. 🙂
Yep, once the browning is done, the crockpot will work very nicely.
I loved the chicken soup my grandmother and mom always made--clear, yellow soup with some fat still in it, boiled chicken with soft celery and carrots, and tons of egg noodles. Nothing I did ever replicated that soup until I bought myself an electric pressure cooker (Instant Pot).
That was the secret. You just can't reproduce that clear broth and intensity of flavor any other way. They both used a pressure cooker, but I was terrified of them because once when I was a little girl my grandmother's exploded when I was there. Nobody was hurt, but I remember her mopping chicken soup off the kitchen ceiling. An electric pressure cooker is very safe and idiot proof, so I can use it without fear.
I don't brown anything. I'm sure browning makes an interesting flavor, but that's not what Grandma and Mom did, so I don't either. The pressure cooker really intensifies the flavor, IMHO.
My grandma always used chicken feet, and as a young child I loved sucking on the little tiny bones. But I've tried it twice as an adult and can't get over the esthetics--they look like little hands in the pot. Plus the farmer kindly included a few heads in the package too. EWWWW! I know it's honoring the animal to eat all of it, but I just could NOT do it.
So I buy packages of organic wings when they are on sale. They are full of cartilage and really make the soup gel. And we like the little bit of meat off the bones, too.
With the Instant pot, I toss in the wings, a peeled onion, some carrots and celery, pour water over everything, then put the lid on and press the "soup" button. That's it. The pressure cycle takes 30 minutes (with about 20 minutes to get up to pressure) and once the pressure cycle is done it will go to "keep warm" for up to 12 hours. So I can easily load the pot before work in the morning or before bed in the evening and "decant" the soup when I have time.
I freeze most of the broth in 2 cup containers. I've had bad luck with the canning jars--even with plenty of head room I've had the jar bottoms break clean off. So I use plastic for freezing, even though I would prefer not to. I also freeze a good amount in ice cube trays then transfer the cubes to a zipper bag--perfect when you need just a little broth for a sauce or to have a little to drink.
Really looking forward to finally making some delish broth! No mention of giblets, though (unless I missed it). Do the strong flavors of the giblets enhance the broth or is it a mistake to use them?
You know, I'm not sure! I've never tried it.
It's a mixed bag that goes from "blah" to "horrible."
The gizzard and heart don't add anything but they don't do any harm, either. The liver makes the stock taste like, well, liver. Liver-flavored stock is horrible under almost any circumstance.
My wife does a similar broth and homemade is definitely better than the can! She generally uses it right away but I'll definitely mention the idea of freezing them in a mason jar.
Thanks for sharing. AFFJ
As far as using turkey from Thanksgiving, do you just use as much of the carcass as can fit in the pot? Turkey is much bigger than a chicken so I wouldn't think the whole thing would fit. Could I just use half maybe? And freeze the other half for another time? Should I put aside some meat from the turkey before roasting to use for the broth later? What part of the bird should I use? Or is it ok to just use some of the cooked turkey that we didn't eat? Also, for both chicken and turkey how do you know how much water to put in the pot?
I suppose that would depend on the size of your turkey and the size of the pot! You can use a mallet to break up the turkey carcass so more of it will fit.
Just add water to about 2 inches above the carcass.
I like to set aside some uncooked part of the bird to use for the broth later, but if you haven't done that, you can brown things like the wing tips and extra turkey skin to get those lovely browned bits at the bottom of your broth pot.
This was the BEST chicken soup I've ever made--THANK YOU for the tip on browning the chicken, onions, celery. My husband loved it as well! It's a keeper.
I enjoy your blog, it's gentle yet powerful!
Yay!!! I'm so happy your chicken broth knocked your socks off.
ahhh! I made this on Monday, and it turned out AMAZING. I followed it pretty closely, and I used 2 quarts for a kale, chicken sausage, and cannelini bean soup. It is quite awesome. What surprised me about this is the fact that there's so little going on in terms of ingredients, and yet it's so flavorful.
Yes! It almost feels like magic, doesn't it? How could bones, onions, water, and salt and make something so delicious??
I'm not following why all the lovely fat is being discarded. It can be saved and used for frying things, or to add a bit of animal fat into a vegetable-based soup, or many other uses. Our favorite way to use the fat is to fry slices of bread in it to eat with eggs.
I do save bacon fat for such purposes, but chicken fat, I'm not such a big fan of! And I definitely don't like having a bunch of chicken fat in my broth.
But if you love the flavor of chicken fat, then yes, it's a great idea to save it for other purposes.
If you like chicken and dumplings use the chicken fat. It makes one tasty dumpling.
I was wondering if you are using a stock pot for this instead of a dutch oven. You say dutch oven but the link to your fav kitchen equipment only lists to a stock pot. Plus a dutch oven seems too small. Making this right now and I'm doing it in batches because I started with a dutch oven and not much water fits in there.
Thanks!
Hmm...I think I use the terms interchangeably. The All-Clad stockpot/dutch oven I have is 8 quarts, but it is short and wide, kind of like I think of a Dutch oven being.
hey, I haven"t been here in a while! I hope everyone is WELL! I wish you all a veyr early but Merry Christmas and Blessed and peaceful New Year! I do wish I knew to save my turkey bones and made a bone both....Maybe a turkey for Christmas...he he
Merry Christmas to you too!
Thanks for the new tips. I made chicken stock from leftover chicken with vegetables it smells so good and looks even better. I used a stock pot and got almost gallon of stock.
How can I print the Chicken broth recipe without all the pictures and comments?
Thanks
Oh man, I just realize that I did not make a printable for this post! It's more of a method than a recipe, but I will put it on my to-do list.
Thank you for this basic "recipe" - I'm learning how to cook and use chicken (after 15 years as a vegetarian), and I've got a pot of this cooking on the stove right now.
Just re-read this to refresh my brain. Simmering turkey bones in my crock pot and decided to pan "brown" the bones with onions and fennel before I put it in the pot, and I tell you, the flavor and color are amazing (already). Thanks for the recipe! I was also able to peel off two ziplock bags full of turkey meat for use in soup later--
Ohh, fantastic! The browning really does make such a flavor and color difference. And it's not a WHOLE lot of extra effort.
Excellent and simple recipe! I definitely appreciate a method that utilizes chicken and an onion, such a great way to use a leftover rotisserie chicken. Definitely keep the fat on top until ready to use, it keeps an airtight seal that preserves the broth for much longer. I also browned the bones in the pan with some success, but will try it in the oven next time.
Thank you for this tutorial. I recently found that the turkey carcass from the church community Thanksgiving meal had been sitting in the church freezer all this time. They were glad to be rid of it and I was happy to make it into 12 pints of broth, which I canned.
Do you have a pressure canner? Its another step but canning means the broth is shelf stable. My freezer is pretty small so I look for alternative storage solutions whenever possible.
I do not, but I do have a pretty big chest freezer. So, I just put all of my broth into the freezer. I'd definitely do more canning if I didn't have a freezer.
And yes, what a boon to have a free turkey carcass! Those take up so much room in the freezer, so I can imagine that they were delighted to let you take it home.
Sounds delish.. how much water do you add to the pot of bones ?
I do not usually measure this; I just add water to keep the bones covered.
how much room do i need to leave in the mason jar when freezing it ?
Reading this post AFTER the “sandwich fail” one, I have to laugh about how important it is for you to “brown all the things”!
Can we can this?
I love the Altra running shoes! Smart! Still on my first pair, but I will buy more.
Imagine going to all the trouble to make chicken broth from chicken backs and scraps and then wanting 'to spoon off the fat and discard it.' Then when you need some fat for cooking, no doubt reaching for the bottle of cheap nasty processed soy or rapeseed oil. This was 9 years ago though so hopefully you've learned 🙂
Have you ever tried making your broth in a pressure cooker?? Would love to know your method if you have ☺️
I don't have a pressure cooker, actually! So I have no advice about that.