
Wednesday Baking | Homemade English Muffins
I showed you all my English Muffins in my What I've Been Up To post and a LOT of you asked for the recipe. Fortunately for you, I was already planning on posting the recipe, so I've got pictures in hand. Or rather, on my hard drive. 😉

English Muffins aren't actually English...they just got their name because they resemble crumpets, which are indeed from England (I know this tidbit because I read way too many baking cookbooks as a teenager. I lived a wild life in those years. 😉 ).
But, they are yummy nonetheless, and it's kind of fun to make these at home. Homemade English muffins are even more unusual than other types of homemade bread, so if you can manage to get your English-muffin-making skills down pat, you can handily impress your friends and family. 😉
The dough is really not that much different than most bread doughs...it's the cooking method that's odd. These are cooked on a griddle or in a dry frying pan, which means that you don't have to turn on your oven (which is just about perfect at this time of year).
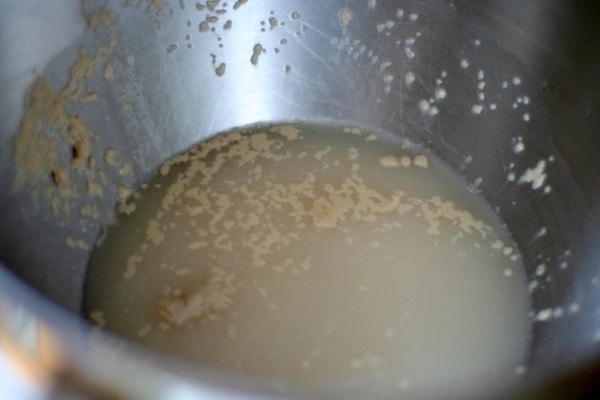
To start, dissolve the yeast in a cup of warm water.
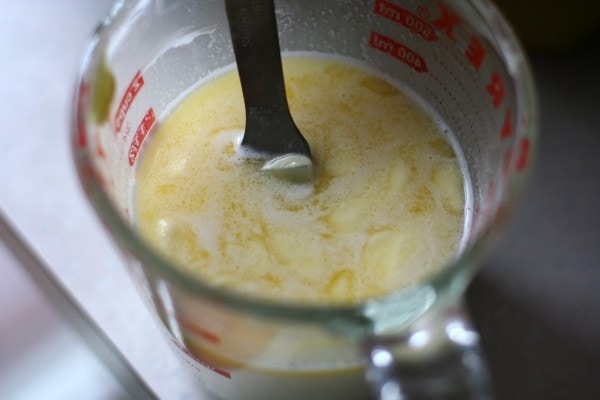
Then heat the milk, sugar, salt, and butter to 110 degrees F. This is cooler than the temperature required for most of the recipes I use, and that's because we're adding the warm liquids to the dissolved yeast instead of to a yeast/flour combo.
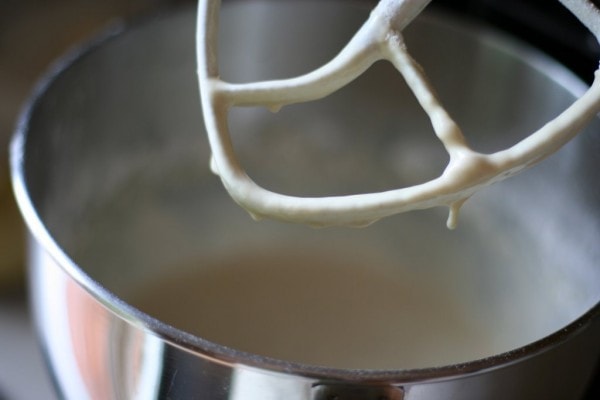
Add the warm liquids to the yeast mixture along with 3 cups of flour. Beat for 3 minutes on medium speed (or mix well by hand). The dough will be more like batter at this point.
Add enough flour to make a soft dough (don't add too much flour...err on the soft side!). Turn it out onto a floured surface,
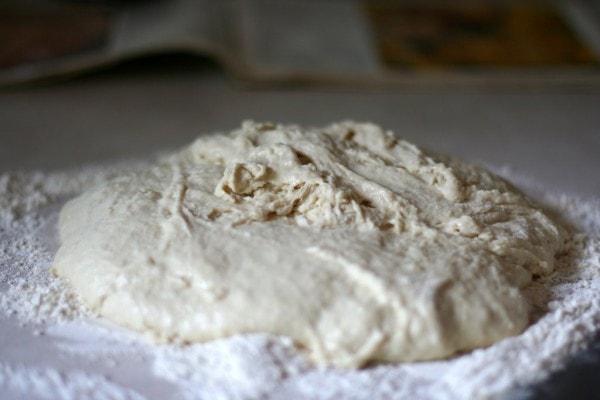
and knead for 3-5 minutes, or dough is smooth and elastic.
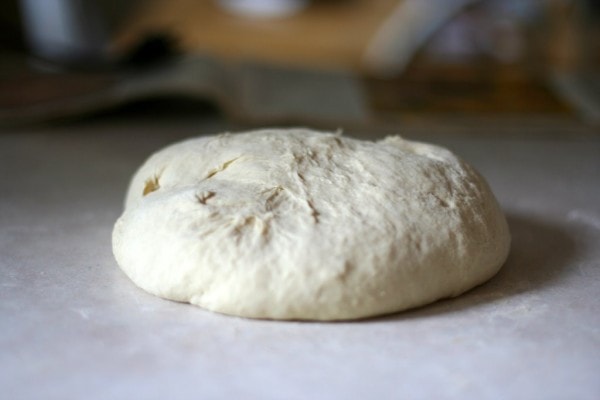
Place the dough into a bowl (I usually just put it back into the messy mixing bowl and call it good.), cover it with a wet tea towel, and let it rise for an hour.
Punch the dough down, and divide it into half. Let the dough rest for 10 minutes or so. This will relax the gluten in the flour and will make the dough much easier to roll out.
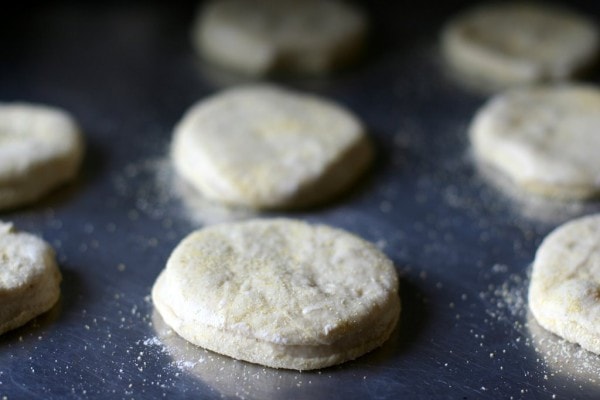
Sprinkle your counter generously with cornmeal. Place each dough half on the cornmeal and roll or pat it out into a ½ inch thickness.

Now you'll need a biscuit cutter or something similar.
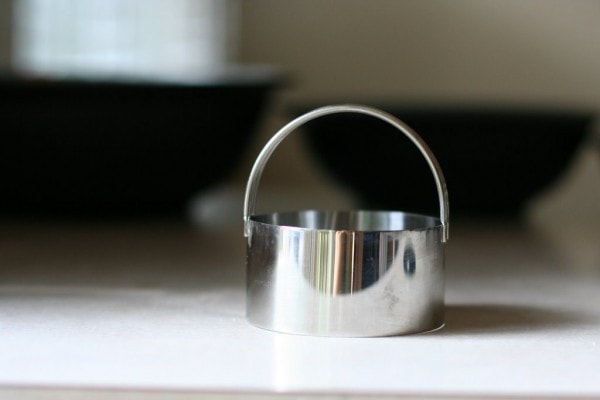
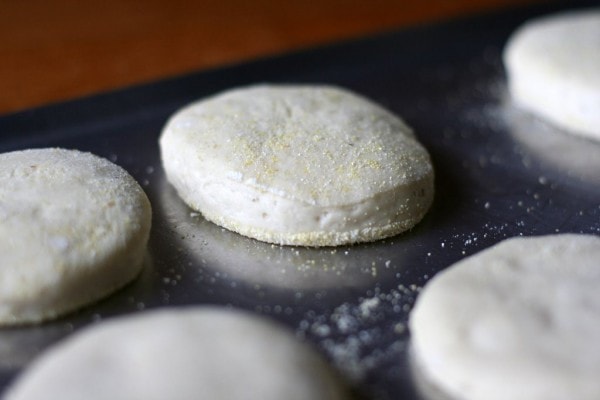
Dip it into flour, and use it to cut rounds out of the dough. I dip it into the flour between each cut. Place the cut muffins onto an ungreased baking sheet. Do. Not. grease the pan. It'll bring you grief later if you do.
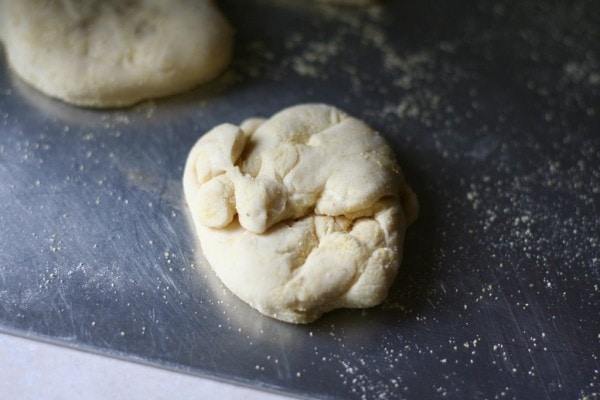
When you're finished cutting out the rounds, you'll be left with some scraps.
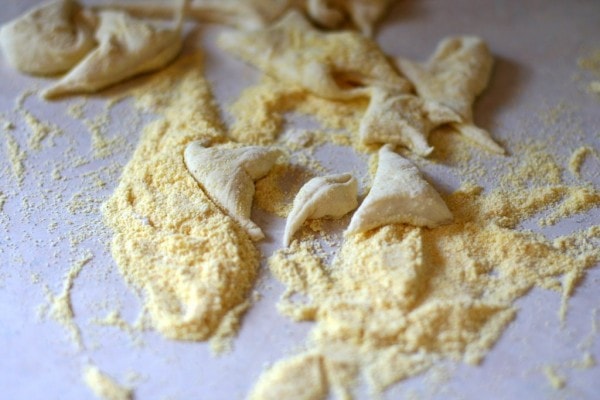
Shake them off, and combine them together to form a ball. Let the ball rest for a few minutes to relax the gluten and then pat out the scrap ball to make more muffins. Your very last muffin will probably look all gnarly like this, but it'll be ok.
Cover your pans of muffins with a dry tea towel. Normally I use wet tea towels to cover dough, but if you use a wet one for English muffins, it'll be really, really hard to transfer them to the griddle. You want to keep them dry. Let the muffins rise for 30 minutes.
Heat a skillet or griddle to medium hot. Before I got my awesome electric griddle, I used to use multiple skillets on the stove. An electric griddle is SO much easier, though.
Gently place the muffins, cornmeal side down to the griddle. This will not be an impossible task as long as you've (1) covered your counter with cornmeal before rolling the dough out, (2) have not greased the cookie sheet and (3) have not covered them with a wet tea towel. Trust me, skipping those 3 steps will make the transferring stage an exercise in frustration.
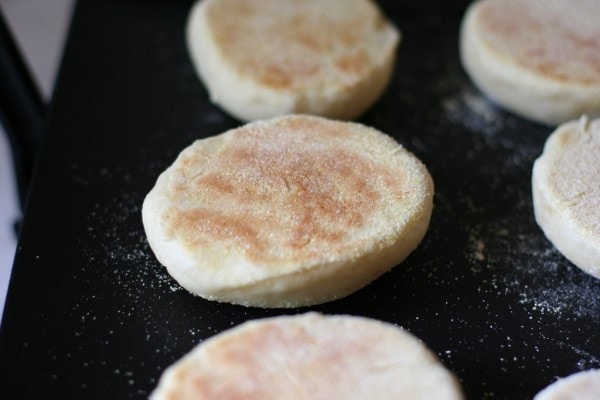
Cook the muffins for about 10 minutes on the first side and then flip them over and cook them for another 10 minutes on the reverse side.
The first side will look more flat, like this.
And the second side will have a nice brown circle.
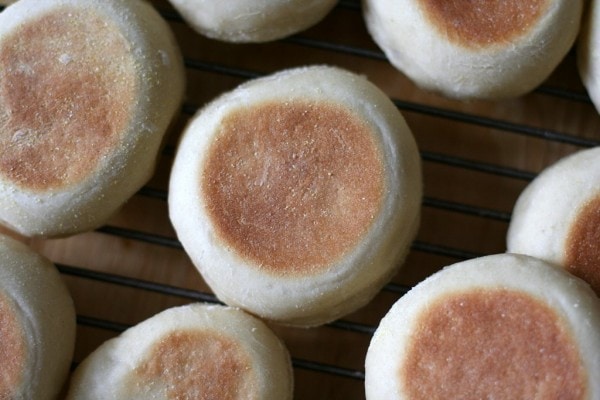
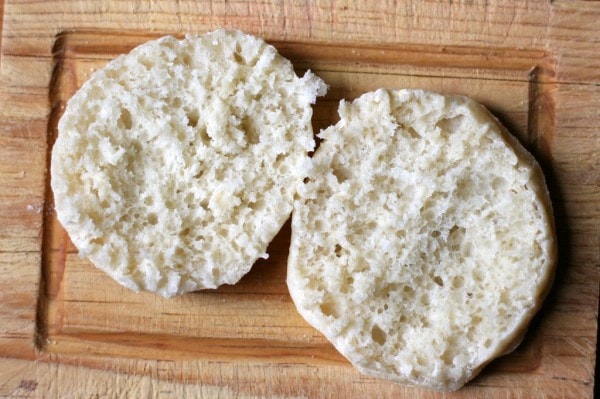
Cool the muffins on a wire rack. To serve, you'll want to split them in half. Simply take a fork and insert it into the side of the muffin, repeating all the way around the muffin.

Here's what the inside should look like.
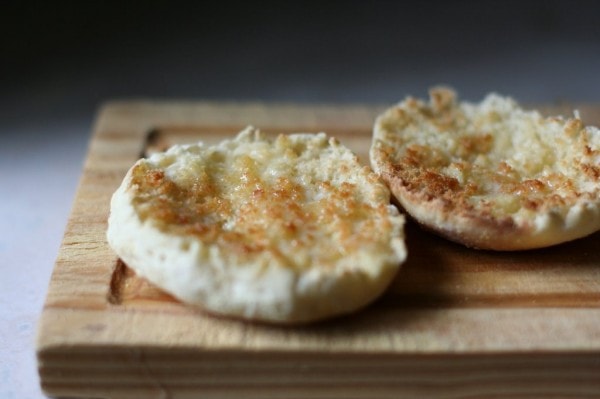
Of course, English muffins are not meant to be eaten all pale like that. You really should toast them first. When I'm serving these to our whole family, I like to place them on a baking sheet and put them under the broiler, as that's a much faster way to toast multiple muffins.
If you prefer flavored English muffins, you can replace some white flour with whole wheat flour, or you can add a teaspoon of cinnamon and ½ cup of raisins.
Store any leftover muffins in a plastic bag for no more than a day or two. Since the dough has very little fat and sugar (those are preservatives), the muffins will not stay fresh for longer than that, so freeze them if you're not going to use them up quickly.
Homemade English Muffins
printable English Muffin recipe
Printable English Muffins with step-by-step photos (thanks, Zaheen!)
1 cup warm water (105 F)
1 pkg (2 ¼ teaspoons) active dry yeast
1 cup milk
2 tablespoons sugar
1 ½ teaspoons salt
3 tablespoons butter
5-6 cups all purpose flour
Dissolve yeast in warm water in a mixing bowl. Combine milk, sugar, salt, and butter, and heat to 110 F. Add to yeast mixture along with 3 cups flour. Beat for 3 minutes. Add enough remaining flour to make a soft dough and turn out onto floured surface. Knead for 3-5 minutes, or until smooth and elastic. Place in a bowl, cover with a wet tea towel, and let rise 1 hour.
Punch dough down, and divide in half. Let dough rest for 10 minutes. On a surface generously sprinkled with cornmeal, pat or roll dough to ½ inch thickness. Cut into circles with a floured 3-inch biscuit cutter. Place circles onto ungreased baking sheet. Cover with a dry tea towel and let rise 30 minutes.
Place risen muffins gently onto a medium-hot griddle or skillet and cook for 10 minutes on each side. Cool on a wire rack. Split with a fork and toast before serving.

Very cool. But time consuming. Maybe one day, when nothing is going on.
Keep them coming!
You have made my day! I have wanted to make homemade English muffins for some time and never could find a recipe that I knew would turn out. Thank you so much for sharing this. It might me a little sad that I am so utterly excited about making these! Do you ever freeze them? Thanks again!
AWESOME! I'm so excited to try these. I knew if I kept reading this blog long enough, I'd get my English Muffin instructional photos 🙂
I too read cookbooks as a teenager. ha. I tell my husband that I read and re-read cookbooks like novels. I love getting new ones out of the library. I think the older a cookbook is, the bester (normally). I am so excited about this recipe. I have been meaning to make english muffins for a long time. Now I have a recipe that I know will work and be delicious!! YAY.
I made English muffins once a few years ago and they were wonderful. I don't bake bread stuff at home that much because I have NO counter space so kneading is a challenge. But I'm really glad you mentioned the bit about how the dough will be more like batter at first. I remember getting to that point and being REALLY worried that I had ruined it, but pushed through anyway and had fantastic results. Have you made a couple big batches at once and frozen some? I'm wondering how well the homemade version keep in the freezer.
Get a card table that folds up...can be used to have more space to cook or bake...can be folded when not in use ...
This was one of my dad's special treats for us, when we were growing up. We even call them Dad's English Muffins. . . I've never made them myself, but request them whenever we're staying at my parents. Given that my dad is now 66, it might be time for me to learn to do them by myself 🙂
Back in my 4-H days, I would make my homemade jelly the day before I planned to bake my bread/biscuits/english muffins, etc. Nothing better than a still warm english muffin with a jar of just set plum jelly.
I tried English muffins many years ago but probably had my griddle too hot since they were too brown on the outside and not done enough on the inside. Maybe it's time for another trial? Thanks, Kristen. You really seem to have these down pat.
Yes! If you have your pan too hot, that's what will happen. Lower the heat if they appear to be getting too dark on the outside.
I was hoping you would post the recipe after you posted the picture!
woo hoo! i made english muffin bread a few months back but these look way better. i can't wait to try them!
My mom never used a biscuit cutter - always just a plain glass turned upside down! It gets kind of suction-y inside but it still works perfectly!
THANK YOU!!! I really appreciate this! - Rose 🙂
THANK YOU! Ever since I saw your perfect english muffins I had to have the recipe. 🙂
I love english muffins but hate spending the money on them. Now, I have a good reason to make my own, and I won't have to drop a chunk of change on fancy breakfast bread at the grocery store. WIN!
I love these, and yours look more 'muffin-y' than the recipe I usually use, so I'll try this, thanks.
BTW, I'm English and we just call these muffins. But then we also call American muffins just 'muffins' too- I guess we're expected to know intuitively which type is meant! One type is usually toasted and the other is generally chocolate or blueberry, so that helps!
My point is that I think these are English. They come from a long tradition of griddle cakes- every area would have had it's own version. Some just yeasted, like these, and others with baking powder (soda) in too, like crumpets, which is why they have the bubbles. Those from the North East are known as Singin' Hinny's because of the sound they make when they cook 🙂
I read (and re-read) the Katy Did books as a child, and in What Katy Did Next she visits England and is very keen to try muffins with gooseberry jam because they don't have it at home. (I seem to remember they decided it tasted like buttered ironing blanket! And they're not very impressed with gooseberry jam either.)
I read cookery books cover to cover too- hope you don't mind me adding my two pennyworth...
Well, my cookbook must have been wrong then! lol I stand corrected. 🙂
I've just re-read my comment , and I sound a bit pompous...I didn't mean to be! Sorry if it sounded like I was telling you off!
I'm confuesd: aren't these scones, which are quintessentially English? You know, the ones you spread with cream.
(uhmmm)
Scones don't contain yeast, only baking powder and they're baked in the oven. Also, they're not toasted before you spread the cream and jam.
BTW, scones are delicious if you use molasses instead of jam with the cream- they're known as Thunder and Lightning.
Thanks for clarifying. 🙂
If I happen to be in the UK again I'll try this combination, but for now I can only dream. (uhmmm)
This is the recipe I use
http://munchkinmail.blogspot.com/2009/05/cricket-tea-part-2-perfect-scones.html
Have a go 🙂
I sometimes make cheese scones for my children's packed lunches- add 75g grated cheese and serve minus jam or molasses...
YES! I was hoping you'd post an English muffin or a bagel recipe. I have an English muffin recipe that calls for shortening and clean empty tuna cans. This is much easier.
Thanx
I need to get a griddle and some more time since english muffins are a favorite for Chris and I.
Alton Brown made some english muffins a few weeks ago and baked them. I have been meaning to make them as I thought it would be easier than making on a griddle. I will try yours and his and see how they turn out..
Thank you for a recipe using an electric griddle - cannot wait to make homemade breakfast sandwiches with only one cooking implement! I've been talking about making English muffins lately, since we've stopped eating shelf-stable bread products - your timing is impeccable.
I love english muffins so will have to come back and try this post a bit later.
I am creating a sourdough starter from scratch right now so when that is ready and working I am going to try sourdough english muffins.... Could work well or could be a disaster!!!
I always wanted to make homemade English muffins! Thanks for the recipe. I like to try recipes that I know have been tried and true. I made them last night and they seemed to be a hit. I can now add English muffins to my homeade breakfast menu along with yogurt, bagels and bread. All I need now is a griddle like yours. My little "waffle" maker takes way too long.
Thanks again!
I really want to try these, but jsut realized i don't have a thermometer. IS the 110 degrees really important, or is there a way to watch it and know when it's about there (like right before the boiling point, or something like that...) Just wondering. If not, i'll go buy a thermometer 🙂
Thanks for posting this recipe! I made them this week and they turned out wonderful. So nice to have a "bread" recipe that won't heat up the house. We made a bunch and put them in the freezer for lunch sandwiches at work. They work well if you split them before you freeze them. Then you can take them out of the freezer, make your sandwiches and they are thawed by lunchtime. Also, you don't need a fancy cutter. I use a tin can that I cut both ends off. A glass works ok, but you have to pry the muffin or biscuit out sometimes.
Wow! I will definitely try this!
I am also a confirmed cookbook obsessed woman; my ever-growing collection gives me great pleasure!!!!
Geezzz, Kristen..... you are bringing back such "warm" (no pun intended) memories from my childhood. My grandmother, "Mer-Mer", used to make english muffins from scratch. And, yes, friends and family totally enjoyed them. I can remember taking bags home to my father after a visit. He couldn't wait to toast one up! How fitting that I stumbled onto this on St. Patricks Day.... that side of the family has the name "Magill"..... quite the irish/scottish name 🙂
I made these on a whim a few months ago, and have yet to hear the end of them from my co-workers! Wow, SO good! I'm making them to auction off at this weekend's church bazaar.
HI , These look so great! I live in Budapest and we do not have good english muffins here, even if we find them they are terrible. I will make these on the weekend and blog about them !
thanks for sharing .
WOW!!! These english muffins are better than the store bought ones!
Delicious, cheap and easy! I won't buy english muffins again.
Thanks for sharing the recipe.
How do you freeze them? Ziploc bag? Do you thaw it before toasting?
Yeah, I just freeze them in a plastic bag.
I baked the English Muffin yesterday but it didn't look like yours. You can hop to my blog to have a look. I cooked it on a skillet. Do you oil your griddle before grilling?
Nope, I don't oil it...I just put them on with no oil. So it's more like baking than frying, I suppose.
Your muffins look great other than that! It looks like they rose perfectly.
Did you split and toast yours after you cooked them?
No wonder, I will try again without oil.
Another thing that I noticed was your cornmeal was finer than mine, looks like flour. I couldn't find finely ground cornmeal in where I stay so I ground them but they were still coarse.
I didn't split and toast. My children couldn't wait further. They couldn't even wait for me to make my coffee. 😛
How much English muffins does this batch make?
I'd say about 24, but it does vary some, depending on how thick or thin you roll your dough.
English muffins dear ARE English. Americans call them English as opposed to what we cal American muffins which are really large cup cakes. They have been eaten in England since the 16th Century.....and I know because I have not had to read 'way too many baking cookbooks' on the matter
My cookbooks must have been misinformed, then! 🙂
Hello,
I just wanna say that these are so good. We made these yesterday and they tasted just like the English muffins we buy at the store, the good ones, not the cheap ones. These taste much better than the cheap ones. I know exactly what you mean when you say you "channeled your inner Thomas" and "Thomas would be proud" These phrases kept playing over and over in my head as I was mixing these up, rolling and cutting. Thanks for sharing your recipe. We definitely plan to make them again and again!
Has anyone ever tried this recipe with whole wheat flour? I mill my own flour from hard white wheat berries and I'm wondering if I would need to alter anything else.
I opted out using whole wheat flour because I have had problems in the past with whole wheat flour and I didn't want the whole recipe to be a flop since it takes quite a bit of time to make these.
Hi:) Most bread recipes say to oil the bowl before placing the dough so that the dough wont "dry" while it's rising? Just to be sure, is it not necessary to do that for this recipe?
And also, can I use a regular pan instead of a griddle?
As long as you cover the top of the bowl while the dough is rising, it won't dry out. But oiling the bowl will make it easier to get the dough out, so you certainly can go that route if you wish. I'm usually just too lazy to do it!
And yes, you can cook these in a regular frying pan on the stove. It'll just take longer since you can only do a few at a time.
I made these a couple nights ago and they are slowly disappearing, quickly! I didn't realize how much time it would take to make them but it was absolutely worth it! My boyfriend can't stop eating them and now I am stocked up for quite awhile...My boyfriend said they taste like pretzel dough and they aren't as crispy as the english muffins in the store but they worked perfect for a breakfast sandwich this morning! Next time I plan to try to make them a bit bigger but until then...Thanks for this recipe! 🙂
PS: I also used Almond milk because I can't drink regular milk and it didn't seem to affect the outcome.
They are amazing. Thank you for the fresh tast.
Hi Kristen!
I tried your English muffin recipe yesterday, and this morning we enjoyed "Egg McMuffins" for breakfast. Yum! We live in a country that doesn't have a McDonald's, so that was an extra special treat!
Thanks for sharing a delicious recipe!
Yay! So glad they turned out for you.