
Furniture Painting FAQ
My How to Paint Wooden Furniture post is hands-down, the most popular post on my blog. In fact, if you type "how to paint wooden furniture" into Google, my blog is the first result. Crazy stuff!

(take that, people-who-say-SEO*-is-the-most-important-thing ever. That right there happened without me researching a single keyword.)
*SEO is Search Engine Optimization, a process of writing in a way that search engines like. Which is a lovely concept except when it gets in the way of writing in a way that people like. So, I just write for people, and hey, it turns out that search engines like that too sometimes!
Anyway.
A lot of people find my blog through that post, and since it's so highly-trafficked, I get a lot of questions about the painting process. So, I though it might be smart to make a painting FAQ post.

Do you put a topcoat on your pieces?
Thus far, I haven't. However, none of the pieces I've painted have been super-duper heavy traffic pieces, like a kitchen table. If I were to paint something like that, I would definitely put a coat of varnish on.
You can find brush-on varnish at any home improvement store, and it comes in a variety of sheens. So, if you were anxious about varnish because you were thinking it would give your lovely matte paint job a cheesy sheen, worry not! You can get very low-gloss varnish.

Can I follow your instructions if my furniture isn't exactly, uh, wood?
That depends.
If your pieces is laminated with a thin piece of real wood, you can totally paint it! Just be careful not to get too crazy with the sander, because you'll go through the laminate and hit particle board.
If your piece is fairly sturdy and has kind of a fake wood finish on it, you can probably paint it. You'll want to use a light hand with the sander, though (just enough to evenly scuff the shiny surface). Be forewarned that the paint probably won't stick quite as well to this sort of surface. I painted a desk of this sort, and I've had to retouch some areas of it. That rarely happens with my real wood pieces.
If you've got a super-cheap, flimsy pieces of furniture that appears to be particle board with a thin foil/plastic finish, the steps I outlined probably aren't right for you. You could maybe try using some spray paint and primer that's meant for non-wood surfaces, but the brush-on paint I use wouldn't be a good choice.

Where can I find good, cheap furniture to paint?
Freecycle is my very first recommendation. Why? Well, for starters, everything there is free. And when you're painting a free piece of furniture, there's very little pressure on you...if you mess it up, at least you didn't waste any money on it!
I've gotten loads of great wooden furniture from freecycle. Just make sure to ask if the piece is real, solid wood. If you're going to go to the effort of painting it, you want to be certain you've got real wood on your hands.
Craig's List is also a great resource. That's where I got this awesome wooden bed with drawers underneath it (plus a nightstand!) for $50. Schweet.

Your local thrift stores will also probably have some pieces worth painting.
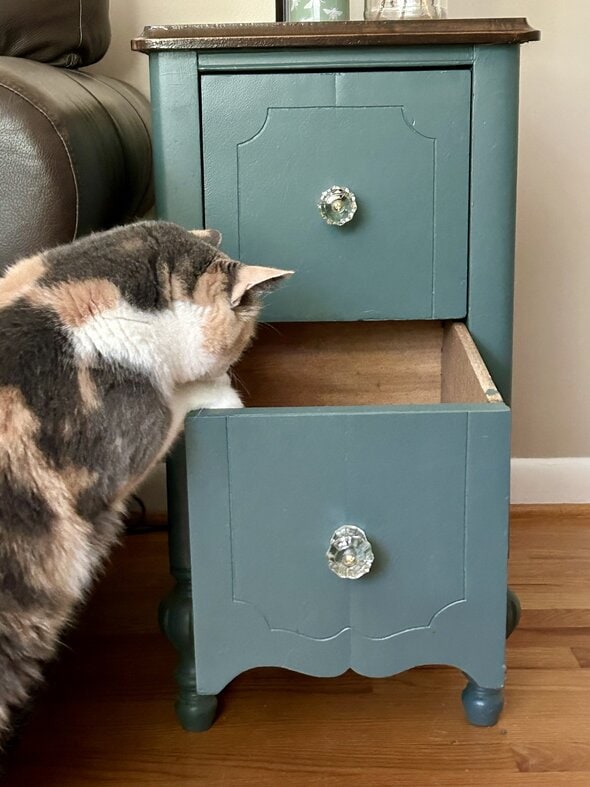
The key, I think, is to have a good imagination when you're looking at an old piece. You really have to visualize the way it will look with a coat of paint, and the more pieces you rehab, the easier it will be for you to see the potential in something really ugly.
Why didn't my finish come out nice and smooth like yours?
The most common culprit is thick coats of paint. You want each coat to be very, very, thin. This takes more time, yes, but it'll get you a smooth, durable finish.

You also need to make sure to use long brush strokes. If possible, go from one end of the piece to the next before lifting up your brush.
Make sure each coat is thoroughly dry before you add another one...slightly tacky paint will pick up the texture from your brush.
Also, your paint might be too thick. My last can of Painter's Touch paint was on the thick side, so I added some paint thinner to make it a bit more soupy. If your paint has sat for a while since the last use, it'll probably need some paint thinner.
Lastly, if you used paint and primer that are different than what I recommended, that could change your results.
Will you paint my dresser/bed/table?
I'm so honored that a number of you have asked this, but I'm sorry to have to say no. Painting furniture is a bit of a time-consuming process, so I'd have to charge an arm and a leg to make it worth my while.
Plus, I'm most passionate about this when I'll get to own the refinished piece, so I don't think I'd be inspired enough to paint furniture for other people!
____________________________
Do you have any great furniture painting tips to add to mine? Share in the comments!
And feel free to add a question if you've got one.
____________________________
Psst! Learn how to make Nanaimo Bars over at Baking With Lisey.

Joshua's 365 post: Alien
Good, focused writing beats SEO every time.
Yes, indeedy! Because without that, even if you write something that search engines adore, the people that use those search engines won't want to stick around.
Hi Kristen,
Your blog post on how to paint wood furniture was how I found found you originally. Doesn't seem like over three years ago. I got hooked on your painting furniture, recipes, ideas and kids ever since!
Patti
I will bookmark this page for when I finally get around to painting some of our more ugly furniture. Which to be honest probably won't be until we move into a house, since we have carpet and live in a second floor apartment.
I have painted some small things like photo frames in the garage and they have turned out well, although after reading this I probably put the paint on too thick.
Your post was also how I first came across Frugal Girl. Since then I have painted A LOT of furniture, and feel so much more confident when faced with furniture that is solid but not beautiful.
I've benefitted a lot from just practicing and being willing to experiment with my style. In our new house, we chose a color palette, bought some basic paint and varnish, and are gradually bringing old furniture into a unified set of colors. It's much, much cheaper and more fun than buying things new. There's really no secret to it. My husband swears by good brushes, and I'm glad we invested in a sander. Your tip to use thin coats was also a good one.
My first piece of painted furniture was a cabinet picked up on the street. We used it for a few years then, when we immigrated to South Africa, our friends took it and love using it.
What you mentioned is something I've talked about before too...namely, that you can make mismatched furniture look quite coordinated as long as you paint it all the same.
I have painted particle board and it turned out decent enough. You can not tell that it's particle board under the paint, FYI. It's a kids' desk (was from a free pile), so had large flat surfaces. It had that thin, fake plastic wood grain that my husband removed. I think he sanded it off, but this was so long ago I don't remember. It took him one afternoon to remove.
I then painted it and added some cheerful floral and leaf decor on top of the paint. And I did varnish the top, since it's a desk and gets a lot of use. My daughter still uses this desk in her room. Since it was free to begin with, and it was for a child's room, I felt no trepidation about this project. I knew it didn't need to be perfect. And my "investment" was some acrylic paints for the flowers and leaves, plus new hardware (I had the white paint and varnish). I spent in the neighborhood of $15 for everything. I could've just left it as is, and it would have cost me nothing, but I like pretty:)
The Food Waste link isn't work for me - I get a 404 error.
Ack! Sorry about that...it's fixed now.
I'm still getting the error, when I click "Food Waste Friday is over at Simply Being Mum today." The rollover url is https://www.thefrugalgirl.com/2012/09/furniture-painting-faq/simplybeingmum.com/2012/09/28/food-waste-friday-a-full-friday-fridge/
Ack! I really DO know how to make hyperlinks. =P I think it's fixed now...let me know if it's still not working.
I have to be honest, the painting article is EXACTLY what brought me to your site. After I read that article, I read others and thought, huh, here's a Mom a lot like me with great ideas! So, I've stuck around. LOL
Great post! I've always been a little nervous about painting furniture, but your post certainly makes it seem less scary 🙂
I have not painted any pieces that I have recieved as hand-me-downs. But I have sanded and refinished 1 of 2 beds (that were my dad's when he was young) for my son's room. I love the look of natural woood in a boys room. I have to say though...your pieces look great! There is nothing more fullfilling then repurposing a piece at little to no cost.
Did you add paint thinner to water based paint?
I did, but I just was reading that you can actually just use water. Huh. You only NEED to use real paint thinner when the paint is oil based. Good to know!
I use 2 coats of poly on heavy traffic furniture it works well. I used it on the wooden floors I painted in one of our rentals and it holds up well.
Timely post, as I painted my first piece this week! I had an old bookcase in my sons' room that I bought unfinished about 15 years ago. I let my son pick the color (Bijou Red....think fire engine!) and I wiped it down and we went to work. It came out great, in spite of the lack of sanding, using rollers, and the assistance of a 6 year old 😉 I've been wanting to do my hand-me-down bedroom set, but I was too intimidated...now I know I can totally do this! Of course, the bedroom set is in MY room, so my standards will be a bit higher, meaning I will do it without my helper.
Incidentally, is the reason you don't use a roller that the brush highlights wood grain better? I feel like rolling makes even coverage easier, and I used a roller that is specifically designed semigloss/gloss paint for cabinets and doors.
PS I found you through your 2nd most popular post, magicking yogurt from scratch! Of course, I then figured out my son is lactose intolerant, so I've never actually used that recipe!
Hi Kristen,
I also found your blog researching furniture painting. I haven't got too far with my project yet though! : ) I bought a second hand set of bunk beds and have been sanding them back whilst researching how to paint them. I couldn't find a black latex based paint like the one you were using, just a high gloss oil based one or a flat black wall paint. After talking to the guy at a specialized paint shop and showing him your blog he sold me a black tinted decking oil. But, even though I stressed that I didn't want to have to rip the wood right back to bare ( the bed was varnished) he said that it would work fine if I had taken
most of it off. But it hasn't let the tint through.... But yesterday I did a rash thing!! I had tested the tinted oil on a weather beaten and partially sanded garden bench and again it seemed like the color wasn't getting through the remaining varnish. But I decided to try painting the whole thing with it anyway because I knew that the oil would do a good job of protecting the bench anyway. Wow!!!!! It came up beautifully!!!! I love it!!!!! I will test the stuff on the bed wood again. Maybe I didn't mix it right. Otherwise I was thinking of painting the beds with black wall paint and going over it with a lo-
sheen varnish. Any suggestions?? Thanks Kristen,you encourage me...
Black paint is definitely going to work better than a black tinted oil. The black paint is opaque, so any bits of the previous finish won't show through, whereas with the decking oil, you'll see the remains of the old finish.
I read that you can use a primer made for painting wood so you don't have to sand it. Do you know if it really works?
I have not used a product like that, so I can't say for sure. However, I'd be a little bit wary of it...my gut tells me that the finish wouldn't hold up as well that way.
It might work ok on a piece that doesn't get a lot of traffic, though, like a picture frame.
Thank you for the painting how to, you made the steps very simple and easy to follow. What do I do if there are gouges/deep scratches on a piece of furniture? Do I fill it with wood putty before or after I start sanding?
Yep, I fill mine after I sand. Once the filler dries, you can sand it down to be even with the rest of the surface and then you can prime and paint.
This is fab for a beginner. Quick Question: What Type of brush? Do you ever use a roller?? Thanks!!🌼
I use a medium-grade brush, and I've never used a roller. Most rollers will leave a stippled surface, and I prefer the clean look of a brushed finish.
Kristen,
Great website! I like the idea of repurposing items and giving them a fresh look. I am currently in the process of painting an oak dining room set your favorite color - black! I was going to go with a black satin, but after checking your website reconsidering a black semi gloss - my only concern is that it will look too "shiny" - your advice please on what finish to go with? Thanks!
I painted a dresser brown. I didn't like the finished product and asked my paint dealer if I paste waxed it would it add depth. It had no texture. She told me to wait 4-6 weeks. Do you find that necessary? Do you like painting with brown paint? I don't think I'll do another one in brown.
I've never used brown before. Are you wanting a glossier finish than what you've got?