Today’s recipe is a recent find from the newer of my two Fleischmann’s Yeast cookbooks…I’ve made it twice now, and both times, my family has delightedly eaten almost the whole batch. So, I thought it would only be fair to share the recipe with you. These are pretty similar to the braided cheese bread recipe I posted here a while back, but they’re a nice individual size.
Start by grating 1.5 cups (6 ounces) of cheddar cheese. You can use sharp or mild, depending on your preferences, or you could even substitute another kind of similarly-textured cheese (Swiss, Monterey Jack, etc.).
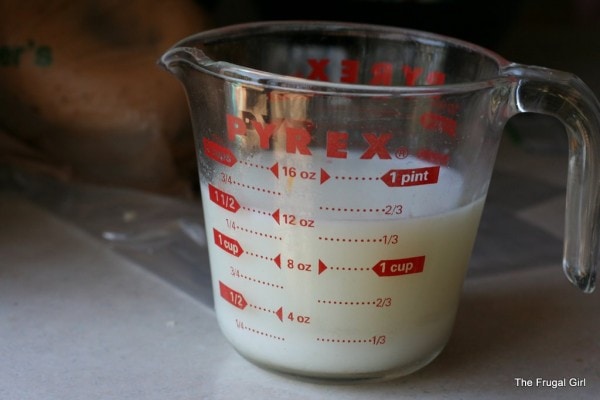
Heat 1.5 cups of milk to 120 degrees.
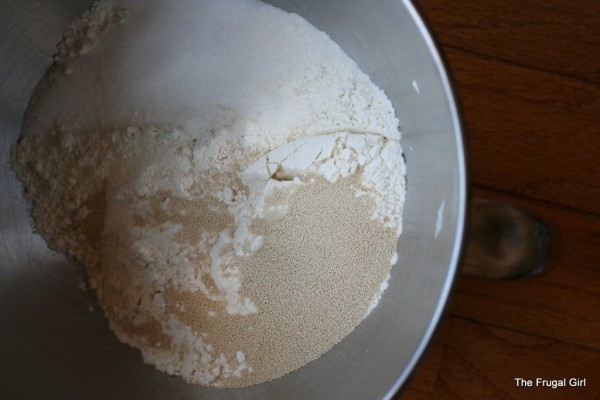
In a mixer bowl, combine sugar, yeast, salt, and 2 cups flour.
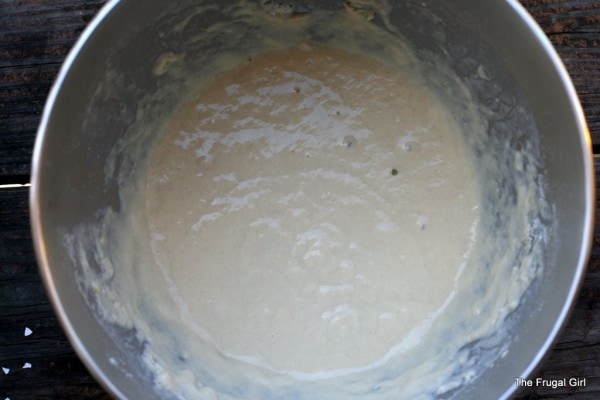
Add warm liquid ingredients, and beat for 2-3 minutes.
Add grated cheese and enough flour to make a soft dough.
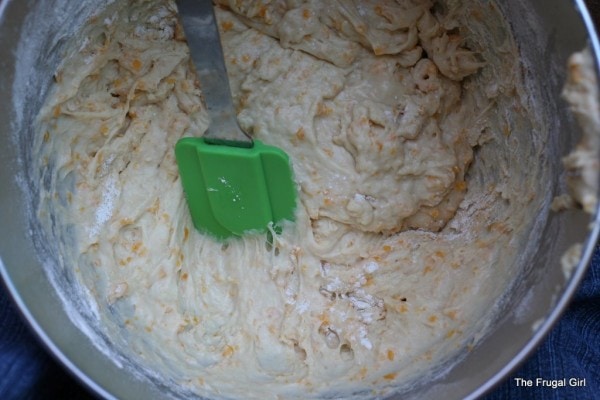
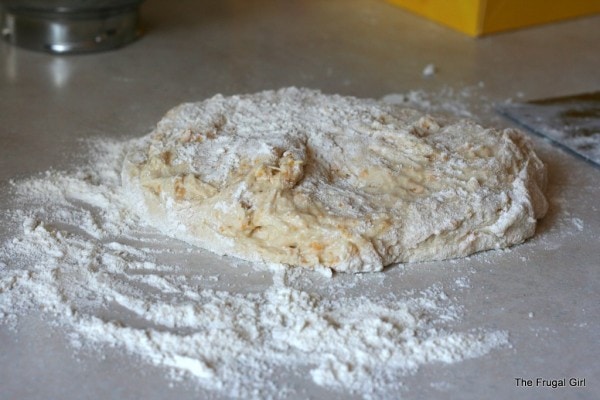
Turn out onto a floured counter.
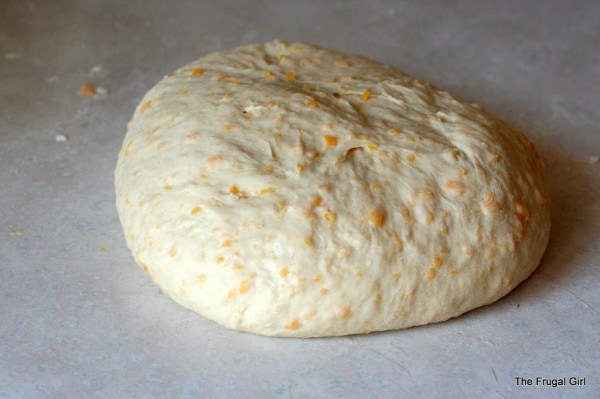
Knead for 3-5 minutes, or until smooth and elastic. Cover and let rise for an hour. On this particular day, I put the dough in the fridge, took my kids to the park for a few hours, and then came back to finish the recipe.
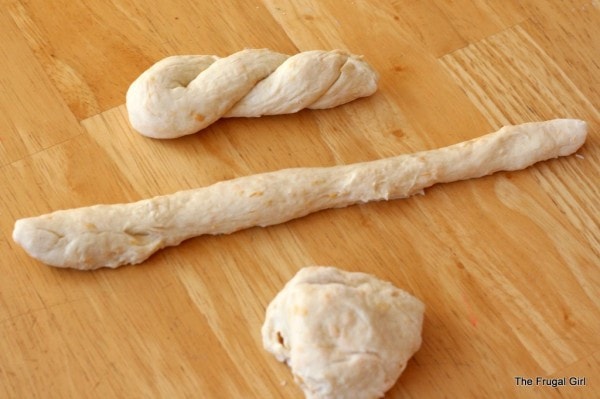
When the dough has risen, punch it down, and divide it into 18 pieces. Roll each piece of dough into an 8-10 inch rope. Fold rope in half, and twist 2-3 times.
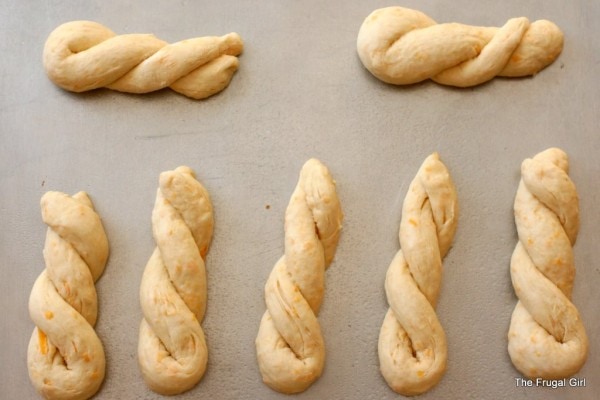
Place on a greased baking sheet, cover, and let rise 20-30 minutes, or until doubled.
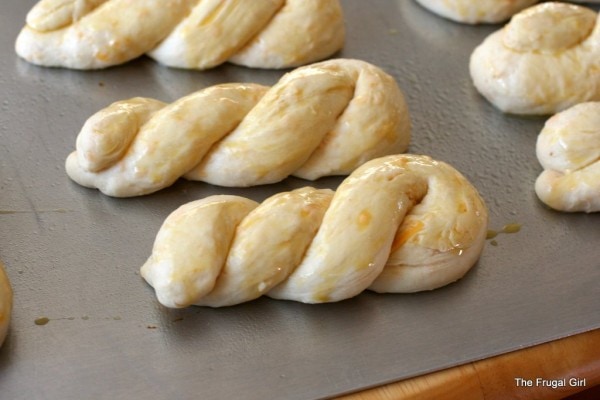
Here’s what they look like before rising…
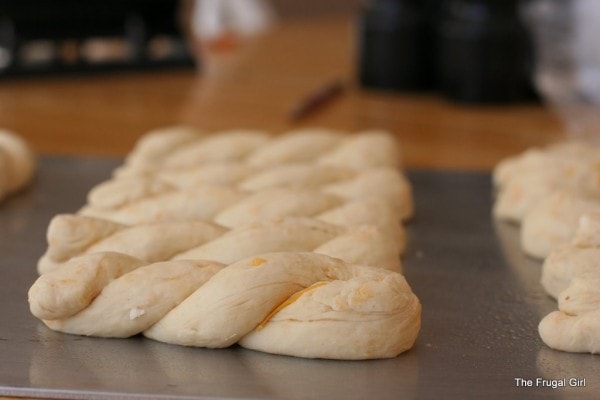
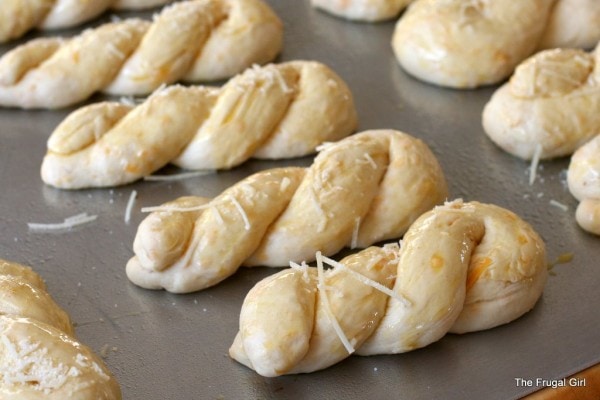
And these ones are done rising. When the twists have doubled, brush with a beaten egg. This gives the twists a lovely sheen.
If you want, you can sprinkle the twists with a little bit of grated Parmesan cheese. This is completely optional, though, and is mostly for looks.
Bake the twists in a preheated 350 degree oven for 12-15 minutes or until lightly browned.
These are at their best warm, I think, though leftover cheese twists are still very edible.
Printable Cheddar Twists Recipe
Cheddar Twists-makes 18
3-3.5 cups flour
3 tablespoons sugar
2 packages (4 1/2 teaspoons) active dry yeast
1.5 teaspoons salt
1.5 cups milk
1.5 cups shredded sharp Cheddar cheese (6 ounces)
1 egg, lightly beaten
In a mixing bowl, combine 2 cups flour with the sugar, yeast, and salt. Heat milk to 120 degrees, and add to dry mixture. Beat for 3 minutes. Stir in shredded cheese and enough remaining flour to make a soft dough.
Turn out onto a floured surface and knead for 3-5 minutes, or until smooth and elastic. Place dough in bowl, cover with a wet tea towel, and let rise in a warm place 1 hour.
Punch dough down, divide into 18 pieces, and roll each piece into a 8-10 inch rope. Fold each rope in half, and twist 2-3 times. Place twists on a greased baking sheet, cover with a wet tea towel, and let rise 20-30 minutes, or until doubled.
Brush twists with beaten egg, and if desired, sprinkle with shredded Parmesan cheese.
Preheat oven to 350 degrees, and bake twists 12-15 minutes, or until lightly browned. Cool on wire rack.
Nancy says
These sound and look wonderful. I need to schedule some weekend time to try these.
Stacy S says
Is there a reason you add 4 1/2 tsp yeast? It seems like a lot, every recipe I have with this much flour adds only 2 1/4 tsp. Thought I’d check, since I’d love to try these soon – your bread recipes are always a hit at my house!
Kristen says
You know, I don’t know why these call for so much. I’ve only made them twice before, so I haven’t done a lot of tweaking yet. Next time I make them, I’ll try using less yeast and see how it goes. The rising time might just need to be a bit longer. I’ll keep you posted!
WilliamB says
Maybe because of all that cheese?
The exigencies of life often force me to do an unplanned low&slow rise in the fridge, as Kristen did with this batch. The interesting thing is, those are my most popular breads. Seems people like the slight tang and dense crumb that results.
The cheese on top may be only for looks but it sure looks good!
Kristen says
I know the reason there’s no butter or oil in the dough is that there’s plenty of fat in the cheese, but I suppose the cheese could also be the reason for more yeast. Cheese is heavy and has fat, and both of those properties inhibit rising.
beany says
Do you think the bread would be affected by using a low fat cheese? I have a 2% block of cheese that would be perfect for this, but I never thought of the role of the fat in the cheese.
Also Kristen, thank you for replying about the Tramontia Dutch Oven yesterday, for some reason I wasn’t allowed to reply to your reply.
Kristen says
I think it would be fine…yeast bread doesn’t need a lot of fat. It just has problems if there is too MUCH fat.
My blog is set to allow comments to be nested 5 deep…so if our comments were at 5 yesterday, that is probably why you couldn’t reply. If that happens again, just respond to the comment one level before (if that makes sense).
Kristen says
For instance, you can’t reply to the comment I just left, but you can do what I just did and click on the reply button to the comment prior (your comment).
beany says
Makes sense, thanks
I really love your blog Kristen, baking is a whole new world to me, and really its all because of you. You’re really doing such an amazing service.
Simple in France says
Oh yum. . .those look seriously good. (Great photos by the way, my recipe photos tend to be kind of lame . . .)
I just started to ‘refresh’ my sourdough starter for some bread tomorrow, I was thinking raisin, but cheese sounds good too.
Thanks for the recipe.
Kristen says
You should go check on the posts I did on photography (there’s a photography category in the drop-down category list). I did a post on taking pictures of objects that might help you. The most important thing is to put your food near natural light, like a door or a window, even if you don’t have a door or window in your kitchen.
Steve says
Well, now armed with my measuring cups, I’m all set to make this on Saturday morning. We have visitors, so they will go down well I am sure
I much prefer making rolls than a whole loaf and so didn’t do the breaded cheese bread that you had before. That and my plaiting skills!
Jen says
When you said you stopped after kneading to take the kids to the park, did you let it rise and then put it in the fridge or did you put it in the fridge after the kneading take it out of the fridge and then rise? I would like to do the same, that way I can do the final steps right before dinner, and can I do this with your other bread recipes? Thank you so much. I love love your blog, look foward to it every morning.
Monica says
Wow – they look SO good! Have got to make them soon!
Desirae says
I’m making a ham tonight and had planned on cheesy potatoes…. now they’ll just be mashed so I can use the cheese for THESE. lol
Thanks, Kristen.
Melissa says
I gave you an award on my blog.
These look great! I am going to try them next week.
erin@tinytwistcreative says
mmm, the cheese bread is a favorite in our house, so I’m definitely making these. Thanks Kristen.
Jill says
These look so good! I loved your recipe for the cheesey braided bread, maybe the smaller sizes of this recipe will have me eat less
Erika says
Ooh these look so yummy! Question – can you always let the dough rise in the fridge? If so, for how long? I’m trying to figure out how I could schedule yeast-bread making without having to stay at home for first rise/second rise/baking that can take up to 3 hours.
Kristen says
Yep, most doughs can work fine in the fridge. You can either refrigerate the dough after the first kneading or after you shape the dough. Refrigerating the dough after you shape is mostly a problem if it’s rolls that sit on baking sheets…those are hard to fit into most people’s fridges. So, I generally opt to refrigerate the dough before it’s shaped.
You can leave most doughs in the fridge for up to 24 hours without a problem, though I have not personally left this dough that long.
Erika says
Oh that is great news! I didn’t realize you could do it with all bread doughs. Now I can plan to make my dough one night and bake and eat the bread the next!
Emily says
Something I learned from my mother-in-law–she does this with storebought breadstick dough, but you can do it with homemade too–instead of a beaten egg, she brushes on a beaten egg white, then sprinkles with grated parmesan cheese and some italian seasonings. I like to add a sprinkle of salt too (I put some in my hand, take a pinch with the other hand and sprinkle on–I can control the amount better that way than straight from the salt shaker). Using the egg white makes it shiny and gives it a very light crispy surface.
Lucy says
This looks delicious, I cannot wait to give it a try!
Liz says
OK – I’m tempted to try these as my 1st yeast bread – do I need a themometer for milk temp???
TIA
Kristen says
It’s really helpful to have one. However, you could get by without one. 120 degrees is about as warm as hot water from a faucet, so you could kind of guesstimate the temp that way.
A thermometer isn’t that expensive though…you can get a simple one for a few dollars.
Sabrina says
OH you naughty little baker! Your photos make me want to lose all control and eat an entire recipe of these yummy buggers. Thanks.
Cynthia says
Kristen, First I want to say again thank you for The Frugal Girl website. About the time I saw your story on the 700Club I was starting a 21-day financial fast. One of the things that helped me do the fast was to do a daily journal and the other help was your website. It is challenge to break bad habits. I confess I didn’t do the financial fast perfectly, but I did get something to continue and build on.
The Cheddar Twists look great. I’m going make them as soon as I get the ingredients I don’t have.
Rhona says
YUMMM!!! I am making these this weekend for a soup party I will be attending. They look so lovely, fluffy and delicious! Thanks for sharing.
Melissa says
I found your website via Almost Frugal and I love it! My roommate and I made these with some pasta last night and they were fabulous. Now we wish all recipes we tried came with step by step photos. It’s so nice to have a visual when you’re not sure if something should be mixed a few more minutes or not.
Kari C says
Just had them with dinner and them were soooooo good! I couldnt really taste the cheese in them though. Next time I’ll probably leave it out and make a oil/herb dip
Thanks for sharing the recipe!
Lisa O Shea says
This weeks bake looks lovely!I was baking there myself and thought id post you a link for bagels i just made!They came out lovely!!
http://hubpages.com/hub/Homemade_bagel_recipe_Make_great_nadrolled_water_bagels__its_as_easy_as_baking_a_loaf_of_bread
The only different thing i did was i rolled them in balls, dipped the end of my fork(as its round) in flour and made a hole and stretched it a bit!And after boiling when i was utting them in the oven, i sprayed the tray with PAM and then sprayed the bagels with PAM lightl!Delicious!!!
Kristin says
Made these with our frozen from scratch lasagna I made a month ago, yummy! We fought (not literally) over the 5 that were leftover . Thanks Kristen for making my meal planning simple lately, Beef Au Jus, French Bread, Cheddar Twists, Braided Cheese Bread, Texas Cupcakes…..
Joyce says
I don’t have a stand mixer like yours. Should I just use my hand mixer?
Deena says
Just made these tonight for the first time and had to write to tell you that they turned out absolutely GORGEOUS! Thank you so much for this recipe and for your blog.
I’m new to the USA and the first few times I tried to bake bread or buns here I had absolutely no luck so I kind of gave up. I came across your blog and decided (rather halfheartedly) to try out your whole wheat buns. They turned out very good and I was so pleased that this really got me back into baking and I’ve been baking up a storm since (buns, bagels, muffins, etc).
One of the lovely things about baking is that even we are on a very very very tight budget, it doesn’t feel like we’re deprived. We’ll only be able to afford to eat meat once or twice this month, but our meals seem downright extravagant when they’re served up with delicious fresh-from-the-oven bread.
So thank you, again, for your blog and for adding some cheerfulness to frugality.
– D
Ashikin says
Thanks, tried it today. Turned out great!!
My kids loved it
Anusha says
Hi Kristen,
Followed this recipe and loved the Cheddar Twists !
They are so soft – better than store-bought.
The step-wise pictures are a great help !!
Thanks a lot for sharing your recipe.
P.S. Will these twists remain good at room temperature for a day ?
I hope to carry them during a long flight to India for my daughter who has food-allergies.
Thanks,
Anusha
Kristen says
I think they would be fine for a day, yes. Just make sure they don’t get squished!
Anusha says
Kristen,
Thank you so much for the reply
Love visiting your blog every morning- truly INSPIRING !
Appreciate all the effort behind your UNIQUE blog.
Have a great day.
Anusha
corin says
my family loves these, thank you.
CharlesEi says
There’s nothing like a Wednesday night treat to get you through the mid-week slump.