 Every Wednesday (ok, most Wednesdays!) I share a baking recipe. And lots of pictures of said baking recipe. I don’t call this Wednesday Baking because I bake solely on Wednesdays…no, my oven gets a workout much more frequently than once a week! Wednesday just happens to be the day I share baking recipes with you. All the past baking posts are archived in the Wednesday Baking category, which can also be found in a tab underneath my blog header.
Since most of you are probably kind of baked out by now (I know I am!), I thought that I’d talk about some yeast bread troubleshooting instead of sharing a new recipe.
First, if you’re having trouble getting your yeast bread to rise, my very first recommendation is to use less flour. 99% of the time, yeast bread trouble is caused by too much flour, not by bad yeast.
Yeast is pretty powerful, but it has its limits, and it struggles to lift a really stiff dough. A softer dough has much more “give” and the yeast will be able to lift it more easily.
If your dough isn’t at all sticky, you’ve probably added too much flour. If you can make your dough into a ball, put it on the counter, and have the dough stay in a round ball shape, you’ve probably added too much flour (when I mound mine into a ball, it flattens out some as it sits on the counter). Your dough should feel soft and squishy, not firm.
The flour measurements in yeast bread recipes are almost always approximate, so don’t get stuck on those. The amount of flour your need can vary, depending on the humidity level in your air and in your ingredients. I actually never measure my yeast bread flour…I just add flour until the dough looks right.
So, if your recipe calls for 6 cups of flour, don’t just blindly dump the six cups in. Start with 3 cups, mix the dough up well, and then gradually add flour until the dough reaches the proper consistency. Always, always start with less than the total amount of flour. You can always add more flour, but you can’t take it out!
(please note that I only recommend using this loosey-goosey flour “measurement” style with yeast bread. With most any other kind of baking, you should measure your flour precisely!)
_________________________________________________________________
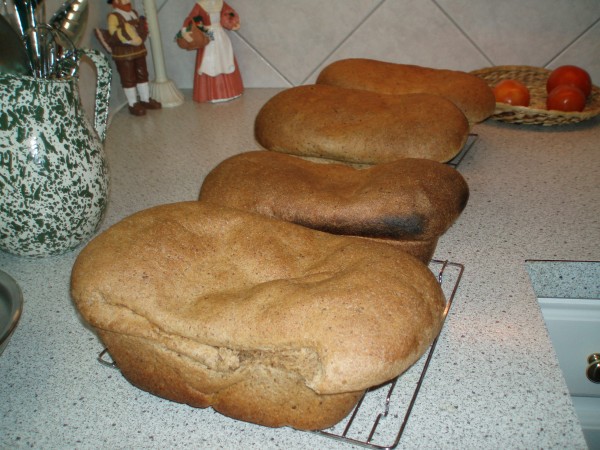
Secondly, a reader sent me these pictures to ask if I could help her figure out what’s going wrong here.
My thought is that these loaves look over-risen. When I let my dough rise too much, the tops look lovely and round while they bake, but then settle into this unhappy looking shape as they cool. If I saw the inside of these loaves, I’d guess the texture would be very open and airy because the yeast was allowed to grow for too long.
It also looks like these loaves might be a little too big for the pans they were baked in. A properly risen loaf in a properly sized pan should not be overflowing the edges, before or after it’s baked.
_____________________________________________
Thirdly, let me tell you about my favorite bread pans.

The reader that sent in the pictures uses glass plans, but I have to tell you guys, glass pans are really not my favorite thing for baking yeast breads. I’ve had such trouble getting my loaves to come out of those pans neatly, and I’ve had difficulty getting even browning and cooking with those pans.
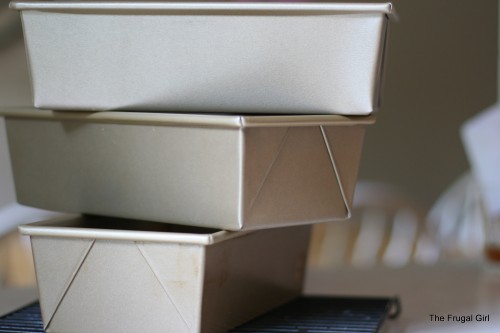
My very favorite loaf pans are Williams-Sonoma’s GoldTouch pans. They’re pricey, but so worth it. They cook breads evenly, and the nonstick coating is incredibly durable. I’ve owned a lot of nonstick bread pans in my lifetime, and the finish has always worn off. I’ve used my GoldTouch pans over and over and over, and the finish is in perfect shape. Not only that, the finish is incredibly non-stick…I don’t use any grease or baking spray when I use them for yeast bread (I do grease them for quick breads) and my breads pop out with nary a problem.
If you’re wanting to do any serious amount of yeast bread baking, do yourself a favor and save up for these pans, or ask for them as birthday and Christmas presents (that’s how I’ve gotten most of mine). I’m certain you’ll be happy with them!
___________________________________
If you’ve got yeast baking troubles or questions, feel free to email me (the frugal girl at gmail dot com) or leave me a comment here, and I’ll try to troubleshoot your problem in a future post. If you email me, including a picture of your bread or dough would be really helpful.
Today’s 365 post: Squeaky


joanne moser
Saturday 15th of January 2011
I am putting this incase someone checks back on this. I found a great blog http://dealstomeals.blogspot.com/2010/02/french-bread-brought-to-whole-new-level.html she is amazing!!! Her recipes for bhread have ALWAYS worked out for me. I have made many many may loaves of french bread and rolls that I have NEVER had a problem with rising and I follow her directions to the T. She does not live in Arizona and I did not know that you should not dump all the flour in I did what she said. I even make her homemade cinnamon rolls and they rose beautifully!!!
Dmarie
Wednesday 5th of January 2011
oh, I so have bread pan envy now!! wish someone had told me when I was young to invest in high quality pans in the first place...
Mindy
Tuesday 4th of January 2011
I'm wondering if someone could advise me in what the texture of homemade bread should be..? I've never had homemade bread, and I made a few loaves here recently (white sandwich bread) but it seems kind of chewy and a little hard- it's not the same texture (soft and airy) as store bought bread by far and I don't really care for it. Is homemade bread something you just have to get used to, or am I doing something wrong with my bread?
Tipper
Saturday 1st of January 2011
Funny - I've had problems with browning with any metal pan I've used, but my new Pyrex pans brown bread delightfully, and if I add plenty of oil, the loaves are easy to remove. I've made yeast and quick breads in them and I'm very pleased. Plus, I don't have to worry about any problems with the finish or integrity of the pans when I put them through the dishwasher, unlike the metal (rusts!), nonstick (coating comes off, and I try to avoid nonstick things as a rule), and stoneware (no good in dishwashers) pans I've used.
Julia
Thursday 30th of December 2010
My mum taught me to bake bread. On the subject of pans, they should be metal and never washed. Yup, they are to be treated like cast iron and develop a seasoned surface that is naturally non-stick. So my basic loaf pans get a thin coating of lard before the dough goes in, and after I tip the loaves out, they cool and go back into the cupboard. This won't work for sugary or cheezy bread, but I use different pans for those, so I never wash the regular bread pans. Just wipe out any crumbs and away they go.