
A Freecycle Nightstand | Before and After
Post originally published in 2009; updated September 2020.
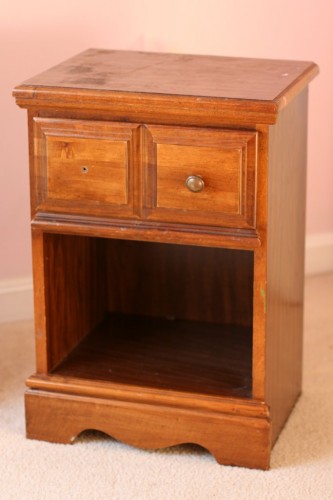
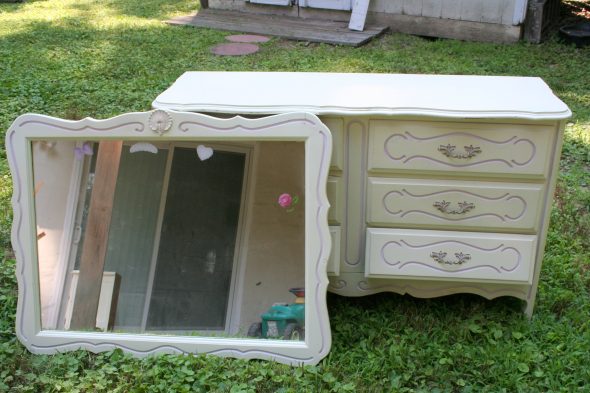
I got this nightstand from freecycle for exactly $0.
(it IS freecycle, after all!)
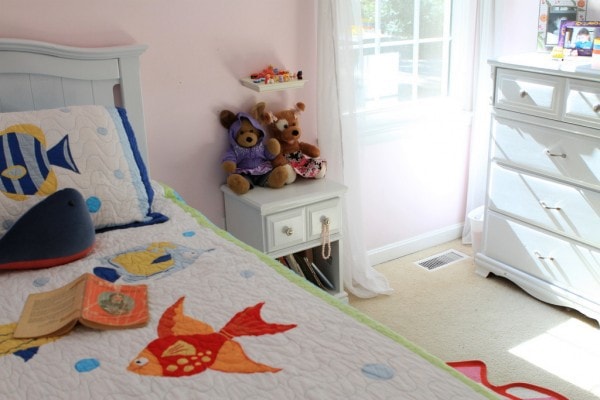
Zoe already had a nightstand from freecycle, which I'd painted white:
but it didn't really match her dresser (uh, also from freecycle!) that well.
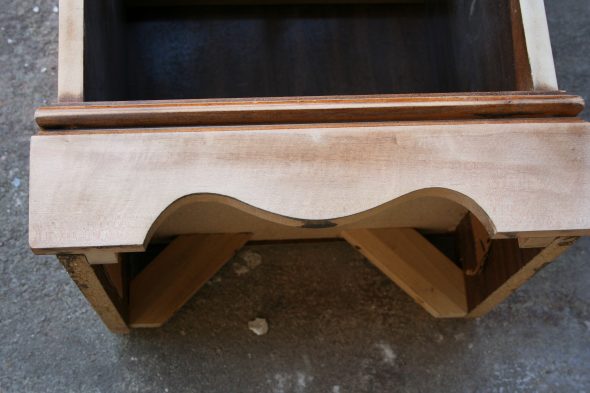
The lines of this one were much more similar.
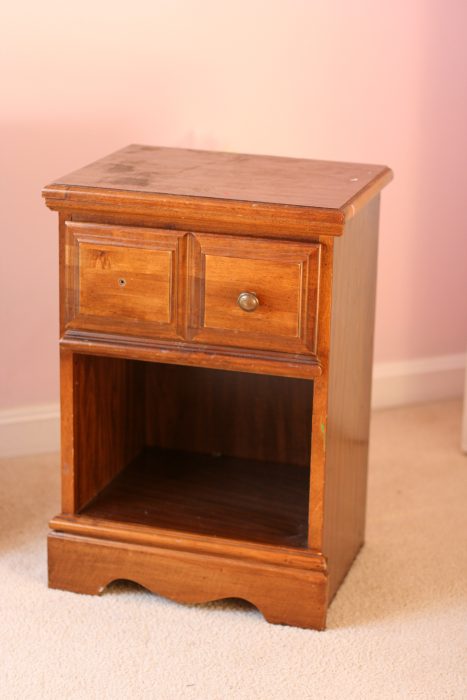
This new one was a little rough looking, but I knew it would be fine with some paint.
If you'd like a summary, here are all the details on how to paint wooden furniture.
Let's walk through the process!
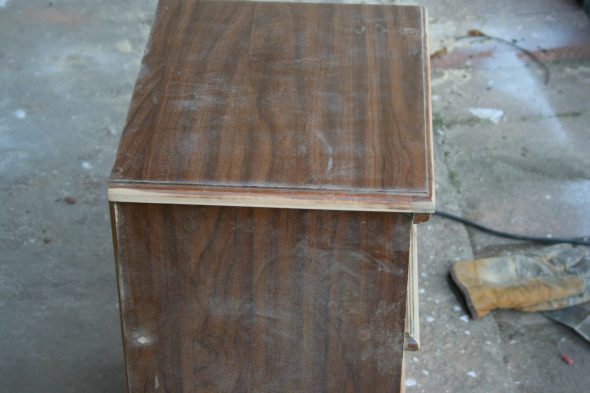
I sanded it first.
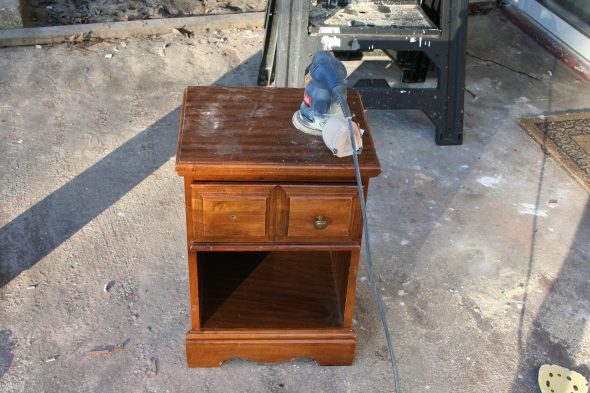
The actual wood parts sanded up very nicely.
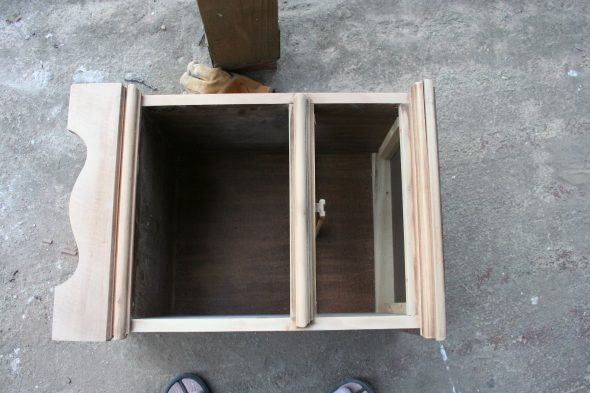
The top and sides were more of a plasticky veneer, so I could only scuff those. But that's fine; as long as the shiny finish is removed, the primer will stick.
I sprayed some primer on next.
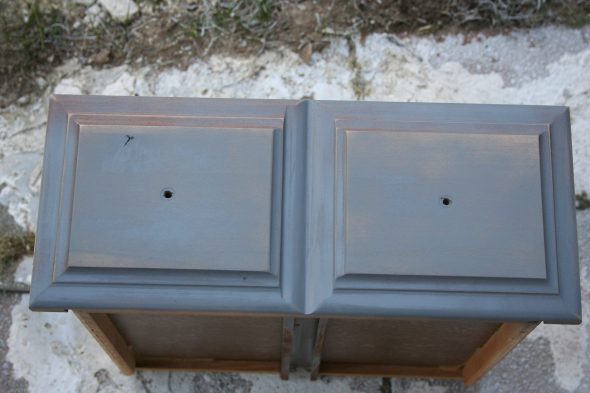
Why did I use gray primer instead of white?
Umm, I don't know. I should have used white primer.
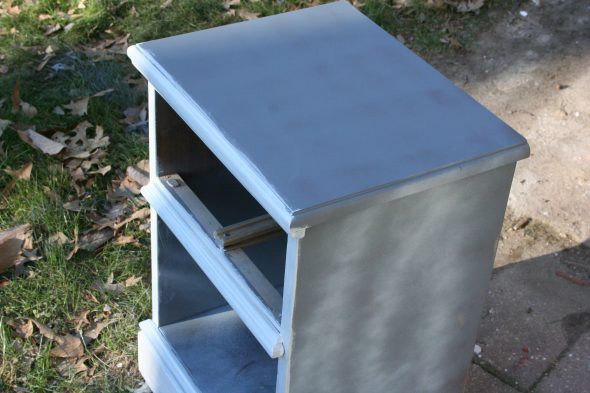
Once the primer dried, I brushed on two coats of paint.
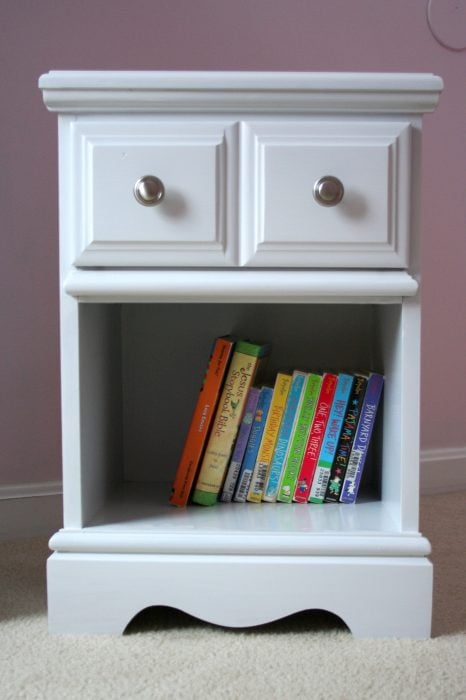
Since this was missing a knob, I obviously had to replace the hardware.
I poked around in the toolbox and lo and behold, there were two silver knobs that matched the two silver knobs on the larger dresser!
I had to do a little caulking to fill in some gaps. See the dark area on the left side, right below the top?
I filled it with caulk, let it dry, brushed some paint over it, and then it looked much better.
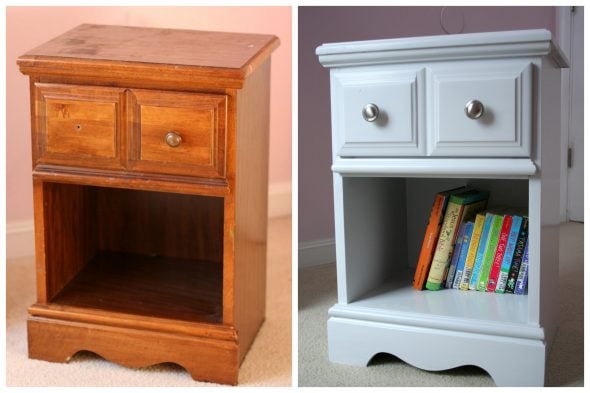
As a reminder, here's what it looked like before.
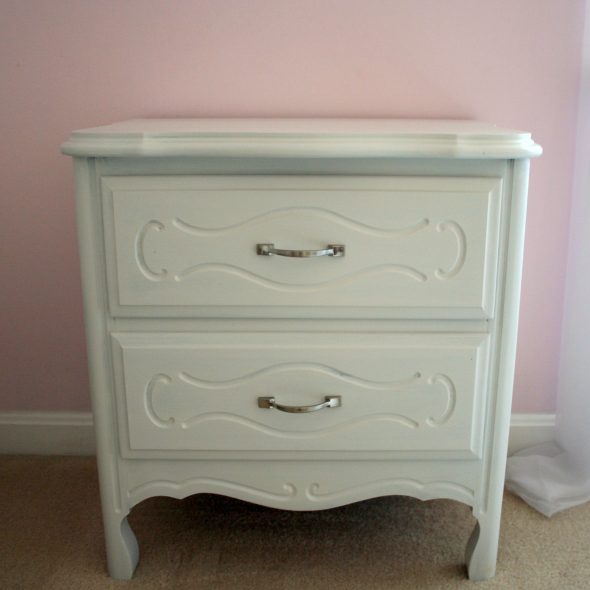
After sanding, priming, and painting(and also a bit of caulking), here's what it looks like now.
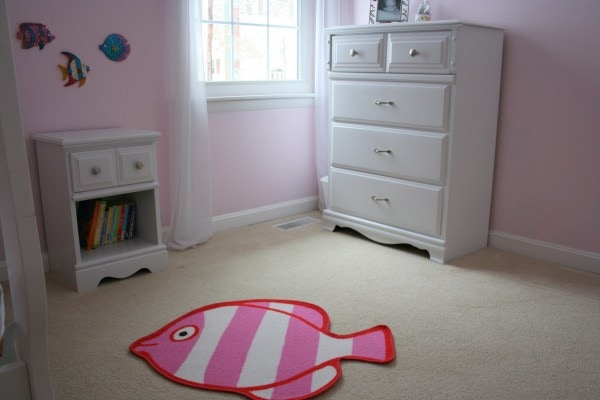
Here's what the old nightstand looked like in her room.
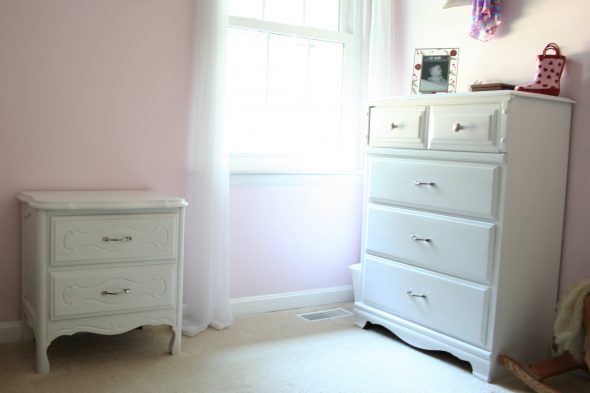
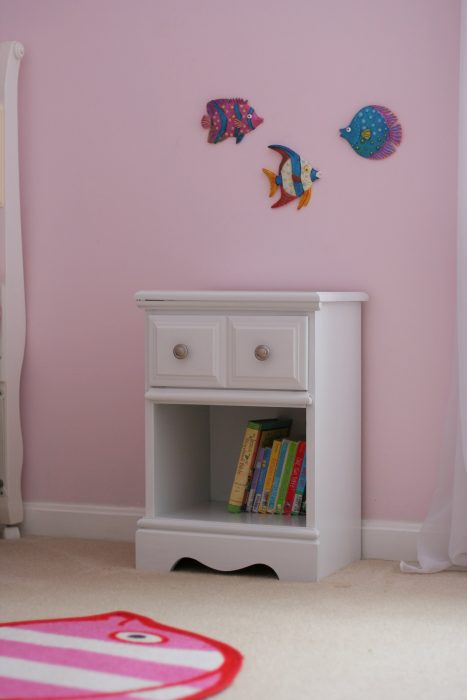
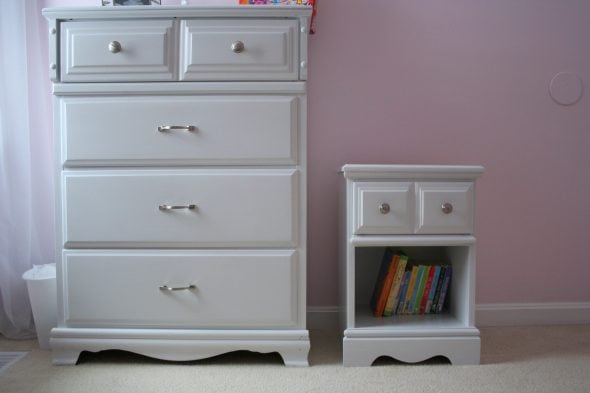
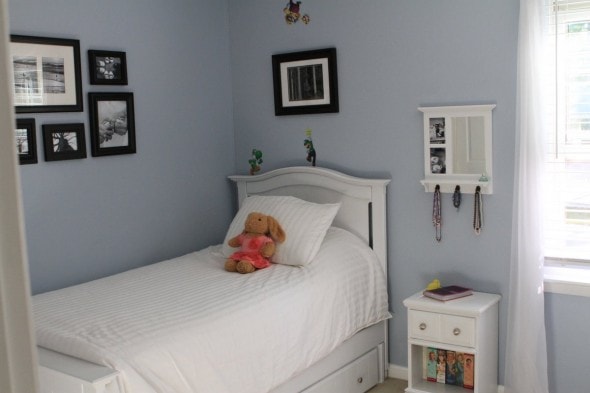
And here's what the new one looks like.
Just to show how surprisingly well they match...
Happily, this project cost me nothing out of pocket.
Nightstand: $0
Sandpaper, primer, and paint, already had on hand: $0
Hardware, extras from the toolbox: $0
Never fear: the old nightstand went to a good home! It was part of a set I'd gotten from freecycle, and I'd painted the dresser to give to my sister in law.
So, now that we didn't need the nightstand, I sent it off to her and now she has a matching set.
Updates!
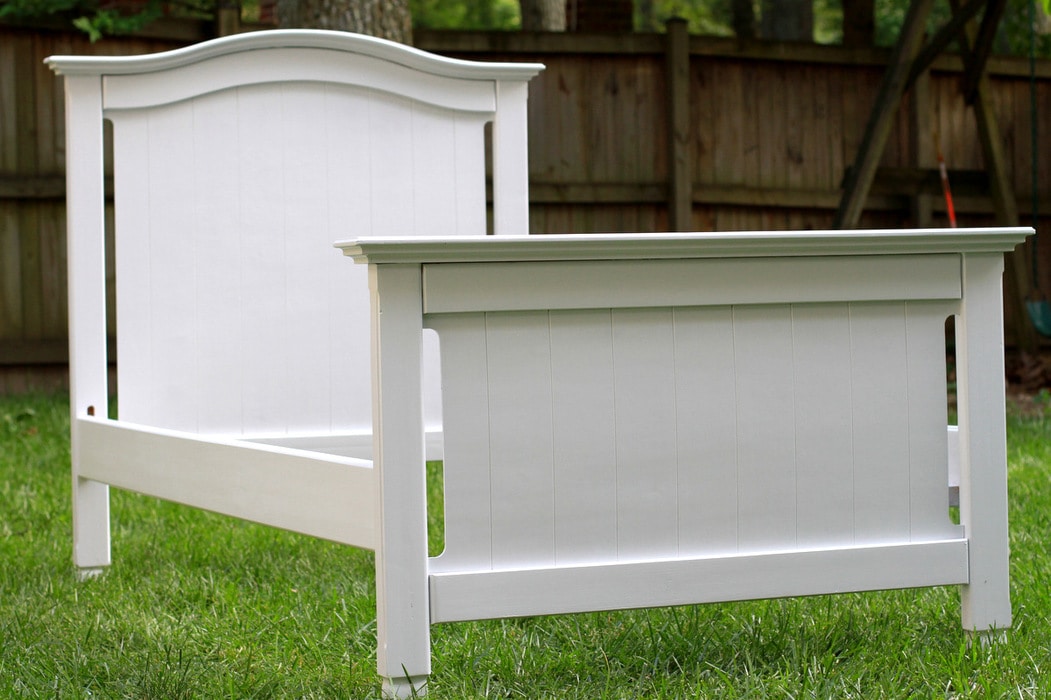
Here's what Zoe's room looked like once I added a craiglist bed (which I painted white, of course).
That room now belongs to Lisey (it's redecorated, but still has the white painted furniture.)
Before and afters from us turning it into a teen room are all right here.
P.S. Here's the painting method I used on this nightstand.


You did such a wonderful job! Cant wait to see the tutorial for some painting tips!
Unbelievable!
Awesome job!! I can't wait for the tutorial. I found two great finds(a dresser and twin bed) and I am waiting on your tutorial to fix mine up!
Looks Great!! 🙂 And matches nicely!
It came out beautifully!! I love it. It's amazing to me what a great match it is for the dresser.
Absolutely beautiful, Kristen! I have an entire bedroom set consisting of two twin beds, a nightstand and a large dresser with mirror. I've been tempted to paint it white, and you are tempting me further. I'm looking forward to your tutorial, as you do such a wonderful job on yours.
Well done! So profesh!
Really impressive...and inspiring!
Nicely done! And yay for finding 'free' hardware!
Thanks for sharing your nightstand story. I appreciate your honesty. When you aquired the piece saying you'd have to wait until spring to refurbish it. Yet you took the first opportunity of nice (well a tad above freezing) weather to work on it. It motivates me to get projects done at the first opportunity, rather than use excuses and put them off. Your nightstand looks great!
That looks very professional! Great job!
Looks so great! The whole room is very pretty.
Great job! And I love the new fish in her room too! 🙂
WOW Frugal Girl...it looks so beautiful!! I love to paint furniture, I used to paint everything white, now I paint everything black. Black is much easier. You continue to inspire and impress me.
Thanks, everyone. 🙂 Dana, I've painted almost all of my furniture black(a chair, a table, a desk, two dressers, and a file cabinet), but I've done white for everything in Zoe's room. Somehow, I didn't think black would work with her light pink room. lol
That looks terrific!
Kristen,
The lil' dresser turned out perfect! I have a very similar one that my neighbors put on the curb. I'm trying to locate some free primer, and I think I'll step up that search now! My 13-year-old needs a bedside table.
Okay, I have to ask . . . Is your daughter's room really that free from crap?
Frugally yours,
Katy Wolk-Stanley
"Use it up, wear it out, make it do or do without."
The Non-Consumer Advocate
I can't be the only one who sees faces in both pieces. The nightstand is all like "nom nom nom" while the dresser is more "serious dresser is serious."
Ok, I need a nap.
Great work though. I do have to wonder how your daughter keeps her room so clean. I know for a fact that no matter what my parents did, I never had my room that clean.
LOL Battra...I can't say I've seen faces there before. Perhaps I'm too well-rested. :p
Regarding the cleanliness of the room, yes, her room does look like that a lot of the time. But, that's because she's the youngest one, so I'm mostly responsible for maintaining her room. Plus, most of the toys are stored in my son's room(his is the biggest room by far). Katy, you'd feel much better if I posted pictures of Joshua's room...he is SUCH a clutter magnet, and he never gets the cleaning urge. I do make him clean it up every day, but it's a struggle for sure.
Wow! That looks fabulous!
Freecycle is awesome! I am looking forward to the painting tutorial. It seems like everytime I attempt to paint a piece the paint scratches off easily 🙁 Yours looks professional!
Hi Kristen,
Thanks so much for sharing your experience with us, I love your blog!
I have a quick question for you: when you sand and paint a dresser, do you actually take it apart first? It seems hard to reach some of the corners and sand them properly if you don't.
Thank you!
Nope, I don't take them apart. I do as much sanding as I can with the orbital sander, and then I hand-sand the corners and edges.
Hi! I'm painting an old dresser of my Dad's and was wondering--do you put laquer on top of the paint? Your work is so beautiful. Thanks, Barbara.
I haven't ever done that. As long as you use the type of paint that dries to a hard, durable finish, it seems to work fine to skip lacquer.
I used a latex paint on this piece, but I now tend to use Benjamin Moore Advance paint, which holds up even better.
Do I use a semi-glosspaint when I want to add some darker color rubbings to make it look old or add gold triming?
Thank you
I'm really not too sure...I haven't ever distressed my pieces.
Distressing furniture is fun! I asked the guy at the hardwared about that and he suggested to use flat paint so the rubbings (stain)will adhere to the surface.
Can you tell me how you painted the night stand? I have to paint one to and yours looks great. Do I use oil based paint? What type of primer does one use? How much sanding is needed? Thank so much!
Here's a post I wrote all about that! https://www.thefrugalgirl.com/2009/03/how-to-paint-wooden-furniture/
I made a 3 cabinets.and one one them I had already painted..well I don't like the end results at all..the cabinets r really nice..but I need a nice finished look to it....I would like the color to be a medium to dark color.. But not to dark..what primer do u recomme..nd
Here's the low-down on how I paint all of my wooden furniture: https://www.thefrugalgirl.com/2009/03/how-to-paint-wooden-furniture/
What brand of primer did you use when you painted the dresser black?
I use the Rustoleum gray spray primer.
Great job on painting old furniture! I just started this week and love it. After priming and spray painting (bc it's faster and I don't want streaks from a brush-which always happens to me) should I put polyurethane on it? Do you? Like for your girls furniture? And what type do you use, gloss, satin? Thank you!
I have an old bedroom set, (dresser, night stand and headboard). This is of wood and its color is like oak. What paint will be good for it ? Thank you so much.
Here's a post all about the method that I use: https://www.thefrugalgirl.com/2009/03/how-to-paint-wooden-furniture/ It includes paint and primer recommendations.
very inspiring for my first piece. Thanks again!
Hey Frugal Girl,
I like making things pretty! My friend is giving me a dresser for my twin grand daughters. My dauther does not like to recycle, I do. I have my before picture and I can't wait for my after picture.
The tutorial was straight to the point. I can do this. . . However the sanding part I may need my husband.
I found you via pinterest when I was searching how to refinish old furniture. I love how this turned out!
In the process of looking through the pictures I also noticed the paint color on the wall. It seems like a very light pastel pink. Any chance you remember what color you used? I would love to use this color in my daughter's room. Thanks!
I have a wooden garbage holder with a rooster in the front of the "lean out" bin. I want to paint it white and rub off the paint covering the rooster to make it look French country. Any suggestions?
Boy, I'm not a good resource for that sort of thing...I do just plain painted surfaces. I'd google for help with weathered paint finishes, or distressed paint finishes.
Very beautiful, I like your old furniture paints. Why don't you use spray paint? (do I sound lazy;-)?
thanks
I've always had trouble getting a consistent sheen on my furniture if I use spray paint. Also, spray paint gets expensive when you're dealing with a big project.
Nearly all of my furniture would be painted if I had my way. I don't have my way completely, so part of it is painted, part isn't. It's amazing how that nightstand and dresser went together.
The freecycle gods really smiled upon me!
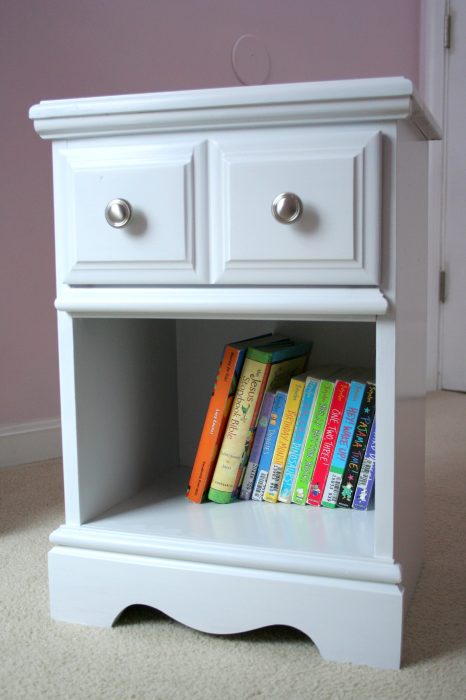
Love the book choices on the shelf once you finished it. They're some of our favorites. 🙂
You can never have too many Boynton books. 🙂 I didn't keep many baby/toddler items, but I could not bear to get rid of our Boynton books. I have so many memories wrapped up in those; I put them in a plastic bin up on a closet shelf.
Absolutely! This summer our library was giving out books as prizes as I convinced my 4yo to pick Birthday Monsters because it was one we didn't have yet. I don't know that I'll be able to part with ours, either. Pajama Time is probably our all-time favorite one of hers.
"Pajammy to the left, pajammy to the right..." Ah, we loved that book!
I wish I had your patience, interest or skills to paint stuff, but I have none of that, ahah! I leave it to the pros. Great results!!
Thanks for mentioning the plasticky veneer. We have some furniture that, in my more ambitious moments, I contemplate painting and I've always been concerned that it won't work with the veneer. Sounds like it did just fine for you.
Yep! I've painted a number of things with that type of finish (including the sides of my kitchen cabinets) and they've held up great.
The unfinished piece looks like it is winking 😉
The cost for the supplies wasn’t zero (unless they were free at start), it just decreased the cost per usage. A college professor explained this when discussing food leftovers :). Or, as my friend says about clothes, CPW Cost Per Wear.
Oh yes. That's why I said it cost me nothing out of pocket; I'd already bought the supplies.
It's a little tricky to figure out exactly how much each project costs in sandpaper, primer, and paint. But it's not a whole lot, because I've gotten multiple projects done with a pack of sandpiper and a bucket of primer and paint.
Hardware, though, can definitely get expensive in a hurry!