
How to paint a room | step by step
This post contains affiliate links.

Lots of you have asked for a post about how to paint a room. So when I painted my bathroom this summer, I took some photos for you.
Painting walls is not rocket science. And as with most types of painting, prep work is key.
If you're willing to do the prep work, you can turn out a pretty professional result even if you're not really experienced. It's a great DIY project!
1. Clean + remove wall stuff
Get any extra stuff out of the room so that it's easier to work!
Then vacuum, dust the moldings, and wipe any messes off the walls and trim.
And you'll need to remove anything that's hanging on the wall...switch plates, art, towel racks, etc.

It's tempting to avoid removing things like towel racks, but you guys, listen:
It's SO much easier to paint when almost everything is removed.
Take it all down!
2. Spackle holes and caulk gaps
If you've got drywall damage or old nail holes in the wall that you won't be using, fill them with spackle. Let the spackle dry, re-spackle if necessary, and sand until smooth.

If you've got gaps between your moulding and wall, run a bead of caulk over those.
And if the area where your ceiling meets the wall is a little wavy or bumpy run a bead of caulk there too. That's done wonders for me in some rooms of my house.
(This brand is my favorite caulk. Definitely better than the cheap no-name type.)
3. Paint the ceiling and moulding without taping the edges.
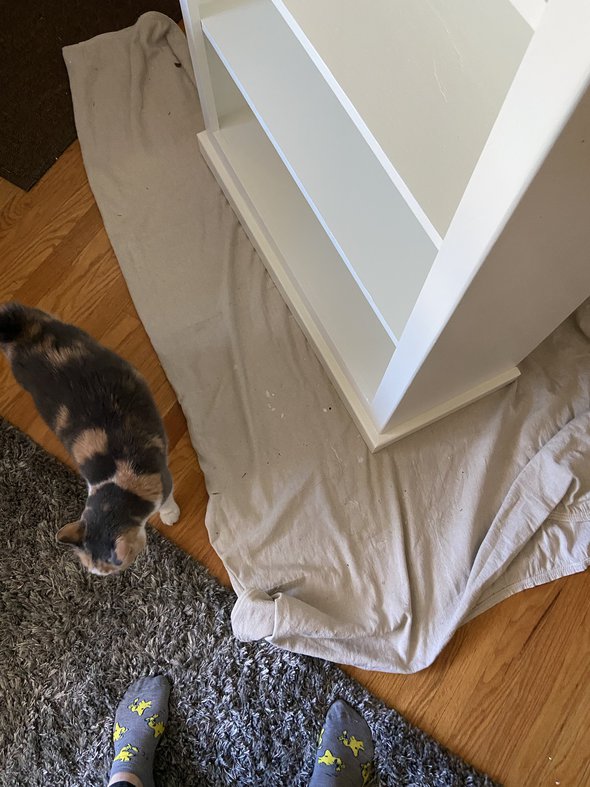
(Do put down a drop cloth before you start painting. No matter how careful you are, a paint roller is a splattery tool, and you ARE going to make a mess.)

Before you paint your walls, paint the ceiling and the molding and go ahead and overlap the paint onto the wall.

This is easier than taping twice (!) AND it'll help you get a neat, clean line when you paint your walls.

Let the ceiling and wall get completely dry before the next step.
4. Tape edges.
I know some people can manage to do a great job of painting without taping, but I am not one of those people.

I hate taping, but boy, the results really are better when I use tape.

I do not ever use cheap painting tape. It's so, so worth it to spend a little more and get tape that'll seal better.
This is my favorite kind. So much better than cheap masking tape!
Once you've taped all of your edges, you can finally....
5. Paint!
To minimize brush marks, I usually like to cut in and paint sort of at the same time.
So, I use a variety of small brushes to coat the edges of an area, and then I use my roller to fill in the middle.

A small roller is so super handy for getting into small places and also for evening out brush marks you may have left while cutting in the edges.

As with furniture painting, it's best not to do super thick coats. It's ok if your first coat doesn't cover completely...you'll likely be coming back with a second coat anyway.
(I don't think I've ever finished a room with just one coat of paint!)
In between coats, I put my paintbrush and roller into these plastic covers. They are such a tidy way to keep your brush/roller wet between coats, and I cannot recommend them highly enough.
6. Remove tape.
I don't usually let the paint completely dry before I remove the tape, as that generally causes more problems for me than it helps. Instead, I take it off right after the second coat goes on.
7. Do touch-ups with a tiny brush.
No matter how carefully I tape, there are always some small spots that need touching up. A teeny paintbrush is perfect for this task.
8. WAIT before you hang things back up.
It is craaazy tempting to put your switch plates and all back on the walls because you want to see what your fabulous new room looks like all put together.

But it's really better to wait overnight before you do that because paint remains a little tacky at first, and your switch plates will tend to get a little embedded into the paint.
Same with things like picture frames and towel racks.
So, hold your horses and hang all that back up the next day.
9. Enjoy your newly painted room.
Look at you and your fabulous, I-painted-a-whole-room self! Woohoo!

______________________
Let me know if I missed anything you were wondering about, and I'll answer in the comments.
P.S. I didn't mention this earlier, but you'll obviously need to clean up your painting supplies. I like to do this outside with a hose and a sprayer because then the mess is not in my house. Also, sometimes I like to soak my roller covers and paint brushes in water overnight before I give them a final spray. The overnight soak seems to encourage the last bits of paint to come off better.
You have such amazing painting skills! I once tried to paint spray one of our window frames in the basement. I failed so badly that I don't even want to think about trying it again. It sounded really simple in my mind, especially after I saw all the amazing painting work and instructions you've mentioned before. But the practice part didn't work out so well.
That said, I will definitely reference this post in the future if I decide to take on a painting project. 🙂
Wait, did you spray paint it while it was still on the wall? I can definitely see that going badly.
I feel like wall-painting is a little simpler than spray painting in some ways. It's easier to get even coverage and sheen.
Haha- you are systematically taking down all of my excuses for not painting a few rooms in our home. Thank you for the great tutorial, I will have to take a look and maybe give my artistic side a little breathing room!
The paint job looks good, and what a handsome wall color! Our bathroom window needs to be replaced, so I suspect that painting the bathroom is in my near future. I can't decide if there is enough ventilation in there or if I should use a more expensive mold-resistant paint. I don't know what the previous homeowners used. Haha, at least I have the color picked out. Usually THAT's the hardest decision!
1. Taping ceilings, especially ones above a flight of stairs, is much easier if one has a 6'4" friend who is willing to help.
2. How do you remove a medicine cabinet from the wall? I have a bathroom that could use a repainting but removing the cabinet has been a speedbump in my planning process.
3. What is your process for dealing with the toilet? I am reliably informed that removing a toilet is a Big Hassle and I (who am a noob when it comes to home improvement) should not even consider doing it.
4. What kinds of paints (flat, glossy, etc) are suitable for which surfaces?
Thanks!
My medicine cabinet was just screwed to the wall. So, I unscrewed it. And then Joshua assisted me in getting it hung back up (Mr. FG was out of town. Tall sons are helpful in such cases!)
I did not remove the toilet. Way too much headache...you'd need to plug the hole during painting, you'd be out a toilet, you need a new seal when you reinstall the toilet. Nope. So not worth it.
I take the tank lid off (easy!), and just use small brushes/rollers to get as far behind the toilet top as I can. There is a section of wall behind the top of that toilet that is not painted, but it's not at ALL visible, and so I'm not stressing about it at all.
I love the look of flat paint, but it's not generally recommended for a bathroom wall because it's not that great with moisture and it's not scrubbable. So, I got the Benjamin Moore bathroom paint in just the flattest sheen it was available.
I use semi-gloss white paint for trim, and flat white paint for ceilings (I used the Aura BM paint for the ceiling in the bathroom. But I'd only use that in bathrooms...otherwise, regular flat white paint will be fine.)
The gloss level you use in a living room/bedroom is basically a matter of preference. How scrubbable do you want it to be? Do you like a glossy look or a flatter look?
WilliamB - if you take a big piece of plastic wrap, you can stretch it over the back of the toilet tank, between it and the wall. That will keep you from getting any paint on the tank as you reach as far behind it as you can with roller/brushes. Same if you have a pedestal sink.
do you have any advice about textured walls? My "orange peel" surfaces look pretty bad because of many homeowners patch jobs that were never retextured. I wish my wall were smooth but orange peel is what I have to work with. "Popcorn" ceilings too 🙁
Hmm, I'm not sure about retexturing them. I wonder if you could do that with spackle.
Ooh, here's a tutorial: https://www.thespruce.com/five-methods-repairing-orange-peel-texture-4119887
Actually, this one looks better: http://www.texturemaster.com/community/how-to-match-orange-peel-texture/
Check out the section on small repairs. That looks pretty manageable.
I didn't check the two tutorials but we have those (ugh) rough plaster walls too. When we had to fix one of the walls, my husband used plaster, sloppily put it on the wall and then used a spatula-like thingy to swirl it and pull up the plaster for bumps. It's very easy to over think it but it blends in pretty well, especially once we repainted the wall. Good luck!
Yeah, it's probably one of those things you'll never notice again after you do it...you only notice when you're focused on it during the project!
You forgot the step where you want to give up and cry, hahaha. 🙂 When we moved into our house last year I had to paint the place from top to bottom--and that included one room that was quite literally lime green from floor to ceiling. I NEVER want to paint a popcorn ceiling ever again. I'm envious of your flat ceilings! 🙂
It can definitely get overwhelming if you're tackling multiple rooms! One at a time (with a long break between!) keeps me sane.
Our house is pretty old ((1970s), so I'm actually kind of surprised it has flat ceilings. I feel like we dodged a bullet. 😉
I like to paint, and have repainted two bedrooms in this house, plus painted some built-ins and some furniture. I am glad you stressed that prep work is the most important part of the job. The commercials for paints and home improvement centers show a person or couple happily rolling paint on the wall, and 10 seconds later, a fabulous room is all done, hardly a realistic picture for newbies. This is a good tutorial. The only other thing I'd think to add, and it should be obvious, but I have a friend who ran into this problem with professional painters, believe it or not. They painted after dark, with the windows open for ventilation, using big lights. She had to have them come back and sand all the stuck bugs out of the paint and re-paint. Always paint in the best light you can, and at a time when insects are not a problem. And not on a rainy day, if you can help it, just for drying time reasons.
That bug story...oh my!
My BIL paints without taping and his secret is to use an art paintbrush for the cutting in - it gives him that much more control over the angle of the brush. Most impressively, they did one wall in their guest room in 12 inch squares in four different colour....no tape!
Goodness. That IS impressive.
This is so timely you have no idea! As always, you're so encouraging. I wasn't going to do the ceiling or moldings but now I think I may!
Ooh, perfect. I'm so glad it's helpful.
Great tutorial! I have always done the painting around here. Our house was built around 1910 and has a ton of trim work that some horrid person painted many years ago, so my choices are keep repainting or strip layers of paint. Needless to say, I keep repainting. I have always painted the trim (baseboards/doorway trim) after the walls though. I paint the ceiling, then the walls and last the trim. I tape the trim while I paint the walls but just freehand it when I paint the trim. I have different size/angled brushes that I found work best on our shape trim. It takes forever in our house.
I too had always needed two coats until I tried Behr Marquee paint. I've done four different colours/rooms (all over white, to be clear) with one coat and minimal touchups. It's not the cheap but less expensive than Benjamin Moore if you can buy when on sale/with rebates. I'm using the flat finish. Given that I have young kids and a small house I can't keep them out of the room I'm working in, this has been such a huge life/time saver! Also along the lines of adapting to painting with young kids, I do put the switch plates and outlet covers back on ASAP for safety with no significant problems (I would totally agree to wait til next day if you don't have to worry about little ones getting themselves into trouble!).
Our whole house needs a coat of paint inside and I've been dreading it because of the mess and I always seem to do something wrong. I admit I haven't done the prep work and that is probably what has tripped me up in the past. Great detail and visuals, this does help me. Now where to start...
When you paint the ceiling do you use an extension pole? And what type of paint for each surface in the room example trim gloss or semi gloss....ect
I sometimes use an extension pole if the ceiling is super high. For regular ceilings I usually just stand on a ladder.
Gloss is partly a matter of personal preference, but generally more gloss means it's easier to clean and more durable.
I use semi-gloss for all my trim paint and then usually something more like satin for walls. Flat for ceilings!
This was very helpful, thank you so much!