
How To Make Homemade Yogurt

Why should you bother making yogurt at home?
Well, homemade yogurt is ridiculously good, ridiculously cheap, and not very complicated to make.
Basically, you:
- heat up milk
- cool it down
- add a cup of prepared yogurt
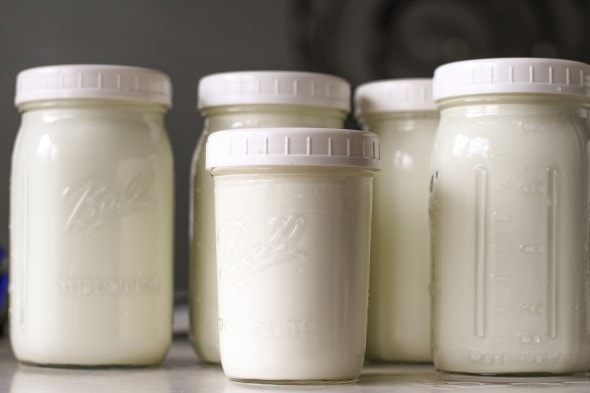
- pour it into jars
- let the jars sit in a cooler with warm water for several hours.
It's not at all fancy. 😉
The first time I made yogurt, I thought it was a total pain-in-the-rear and I was SO never doing it again.
But, after I did it a few times, I realized that it didn't really take that much hands-on time, and that I could get some kitchen tasks done easily while I waited for the jars to boil and for the milk to heat up.
And of course during the three hours that the yogurt sits in the cooler, I'm free to do whatever I want to do as the yogurt requires no supervision.
If you still need convincing, you can read about why I bother with this process each week.

When I can get local milk, that's what I make my yogurt with, but when that's not available, I use commercial whole milk.
Unless you've got a specific reason for avoiding milkfat, I would caution against using lower fat milk products to make yogurt. Whole milk will make your yogurt much thicker and creamier than low-fat or fat-free milk will.
You can feel free to make a smaller quantity of yogurt if you worry you won't be able to use 4 quarts. Just use a half gallon of milk and two quart jars. The yogurt keeps for a month, though, so if you can use a quart a week, just make the whole gallon and you're set for a month!
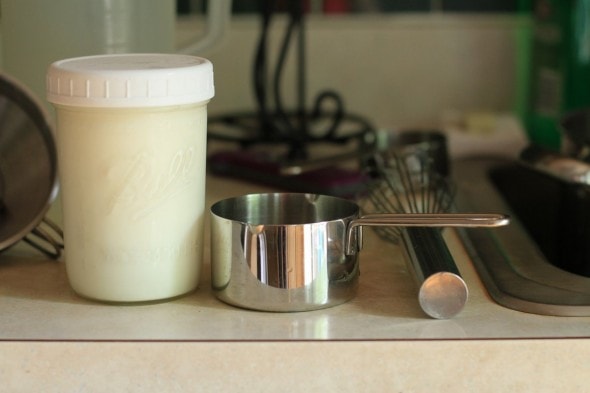
The recipe requires no special machines...you probably have most, if not all of these items in your kitchen already.
Here's the equipment that I use (plus a un-pictured cooler).

The recipe I have suggests sterilizing the jars. I'll include the directions for that, but I have to tell you that I've tried the recipe with and without sterilizing, and I haven't noticed a difference.
If you don't have a dishwasher, this step might be more essential, but if you run your jars through a dishwasher, they should be sufficiently sterilized already.
To sterilize the jars, you just boil them in about an inch of water, along with the bands and lids for 10 minutes.

Next, you need to heat the milk to 185-195 ° F. A heavy bottomed pot works best for this because your milk will be less prone to burning and sticking to the pot bottom while heating.
Edit, June 2014: I now own an All-Clad 8 quart stockpot![]() and it is the BOMB for heating milk. For some reason, I have zero trouble with milk sticking to the bottom of the pot. Highly, highly recommended!
and it is the BOMB for heating milk. For some reason, I have zero trouble with milk sticking to the bottom of the pot. Highly, highly recommended!
If you own two stockpots, you can just leave the jars and lids in the first pot and use a second pot to heat the milk.

Once the milk reaches 185-195 degrees, take it off the heat and place it in a sink filled with cool water until the temperature drops to 120 degrees.
A hot cast-iron stockpot can break if you put it into a sink full of cold water, so at this point I pour the milk into the pot I used to sterilize the jars.

Once the milk drops to 120 °F, it's time to add the starter.
The starter is just previously cultured yogurt, which will spread the yogurt cultures all through your gallon of milk, turning it into yogurt.
If this is your first time making yogurt, you'll want to use 6-8 ounces of plain (or vanilla) yogurt.
If you've already got jars of homemade yogurt in the fridge, though, you can use a cup of that as your starter.
For a purchased starter, I can heartily recommend Yoplait, Dannon, or Stonyfield Farm. Other brands or store-brands might be iffy, though.
I used an off-brand cup as a starter once and my yogurt didn't turn out at all.
Better to be safe than sorry, I say, so pony up the extra $.25 and buy a name-brand cup. 😉
(NOTE: A number of readers have reported failed batches using Greek yogurt. Also, a Greek yogurt starter will not give you Greek yogurt, since Greek yogurt is made by draining whey from regular yogurt.)
Once your yogurt turns out nicely, you should hardly ever have to buy a starter again.

The original recipe I have specifies that you should not open your starter until you're ready to use it. I don't know how necessary this precaution is, but I haven't been brave enough to try using an opened quart of yogurt as my starter. I'll let you know if I try, though!
At any rate, you'll need to whisk the cup of starter into the 120 degree milk. Make sure it's entirely mixed up so that the yogurt culture is spread throughout the whole gallon.
Once it's mixed up, pour the milk into your quart jars. I'm no good at pouring from a pot, so I pour the milk into a clean pitcher and then pour it into the jars, using a funnel.
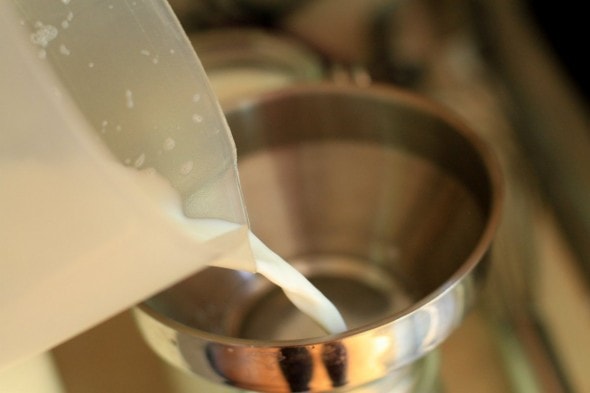
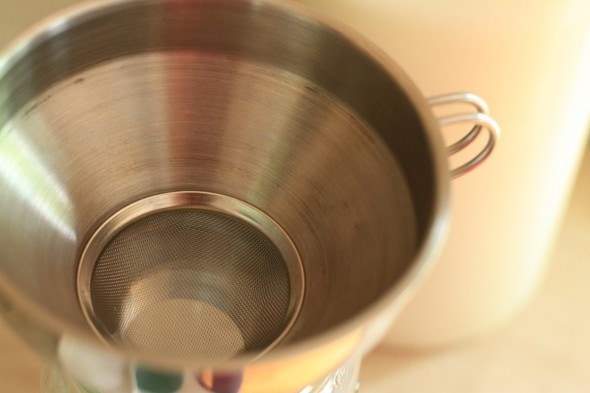
I own this fabulous Kuchenprofi stainless steel funnel![]() . The removable strainer is great because it can catch any bits of milk that formed a skin during the heating process, but if you don't own a funnel like this, you can put a small strainer over top of your funnel.
. The removable strainer is great because it can catch any bits of milk that formed a skin during the heating process, but if you don't own a funnel like this, you can put a small strainer over top of your funnel.
The milk will probably have some bubbles on top, which you can leave if you like.
They won't affect your yogurt one way or the other, but if you prefer a neater surface, you can skim them off.
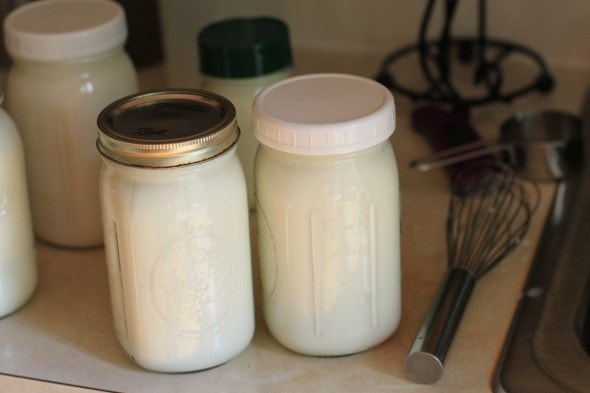
Top each jar with a lid.
You can either use lids and a band, or for $5, you can get a set of Ball Wide-Mouth Plastic Storage Caps![]() , which I just love. They are so very convenient.
, which I just love. They are so very convenient.
For regular-mouth jars, you can use the lids from grated Parmesan containers (you can see one in the background of this photo.)
Place the jars into a cooler, and fill with a gallon of 120 ° water. You want the water to come at least ¾ of the way up the jars, or the yogurt will not stay warm enough to incubate.
So, if you've got a really large cooler, you may need more than a gallon of hot water.
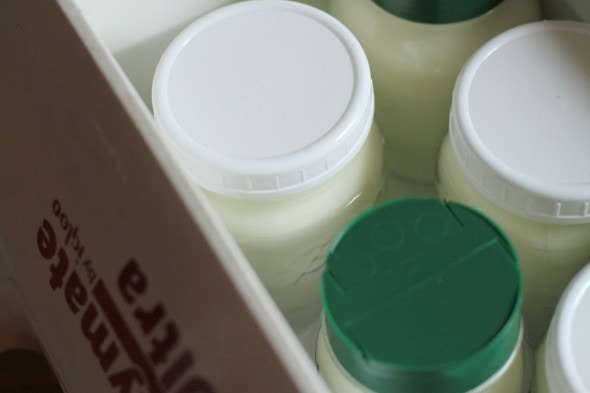
Shut the cooler lid and leave it in a draft-free place (not outside, for example, and not right by your front door in the wintertime) for three hours.
After three hours, remove the jars to the fridge. The yogurt should be fairly firm at this point. It will firm up more in the fridge, though, so don't panic if it's still a little sloshy.
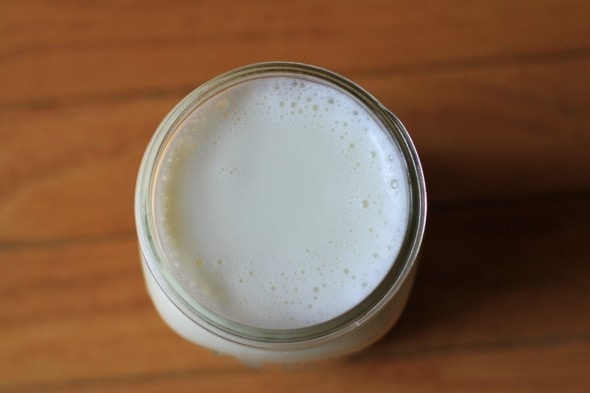
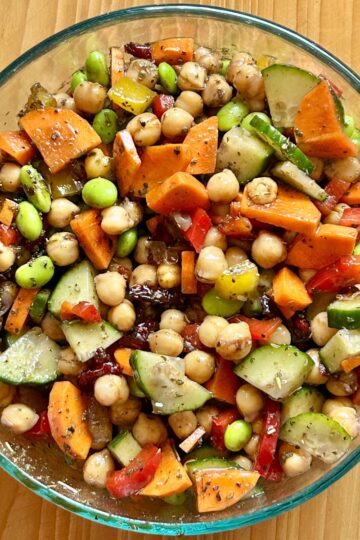
Once it's been refrigerated, your yogurt should be about this thick.

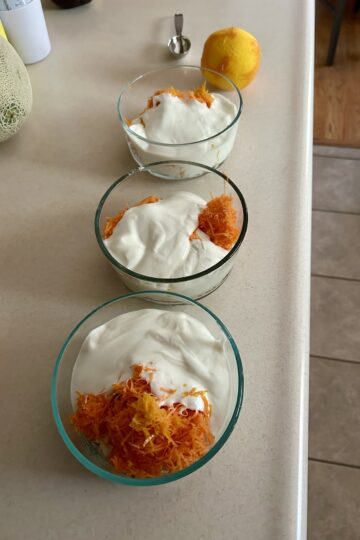
And when spooned into a bowl, it'll look like this, as long as you've made it with whole milk. Yogurt made with lower fat milk will not be as firm.

Homemade Yogurt
Printable Homemade Yogurt Recipe
(makes 4 quarts, which will keep for at least a month in the fridge)
For vanilla yogurt directions, see the bottom of the recipe.
Ingredients
1 gallon of milk
1 cup yogurt starter(you can use a small cup of plain Dannon or Yoplait yogurt, or you can use a cup from your previous batch.)
1. Place four quart glass canning jars, four lids, and four screw-tops in a large pot. Fill with an inch of water; cover with lid and heat to boiling. Boil for ten minutes. Leave the lid on the pot and move it off the heat until you are ready to use the jars.
2. Pour one gallon of milk into a large, heavy bottomed stockpot or Dutch oven. Heat the milk to 185-190 degrees Farenheit(90-90 Celcius).
3. Place the pot in a sink filled with cold water and let the milk cool to 120 degrees fahrenheit(50-55 degrees celsius)
4. Stir one cup of yogurt starter into the cooled milk, using a whisk. Stir well to ensure that the starter is thoroughly incorporated into the milk.
5. Pour the milk into jars, and put the lids and bands on. Place them into a cooler.
6. Heat one gallon of water to 120 degrees F(50-55 degrees C) and pour into cooler.
7. Shut cooler lid and leave in a warm place for three hours. When the three hours are up, place the yogurt in the refrigerator.
To make a delicious vanilla version of this yogurt, add ½ to 1 cup of sugar to the four quarts of milk when it's cooling in the sink. Then stir in 1-2 tablespoons of vanilla, depending on your preference, and proceed as usual with the recipe.
_______________________________________
Here are more of my yogurt-related posts:
Why I Make My Own Yogurt
Cost Comparison of Yoplait and Homemade Yogurt
Yogurt Q&A
Did you have a yogurt failure? Here's a whole list of things that could have gone wrong and what you can do to fix them.

I somehow came across your blog a few weeks back and have been hooked since! You've inspired me to try making a lot of food homemade (my first batch of yeast bread was a success!) and I've been greatly reducing my food waste.
I was wondering if you could tell me how long this yogurt will stay good for (both the sealed jars and then a jar once opened). There are only two people in my household and although we have yogurt for breakfast everyday, I'm not sure how quickly we'd go through this amount of yogurt. Also, is the nutrition the same as the store-bought kind? Thanks!
no it is not the same thing
It is my understanding that homemade yogurt should stay good for 2 to 4 weeks if it is refrigerated. I've never tested this because it is devoured as soon as we make it in our home.
Thank you, Frugal Girl, for showing your readers that yogurt making doesn't have to be a scary process. It seems a little intimidating for those of us who haven't made it before (kind of like making bread).
I found a recipe tucked into one of my grandmother's cookbooks for homemade yogurt and it is by far the easiest, most fail-proof method of yogurt making. No temperature monitoring, no boiling, NO FUSS! (yes it is REAL yogurt). You use powdered milk, water and plain yogurt as your starter, then let it culture in your oven. EASY! You can see the recipe here - It might be a good alternative for those less adventurous souls.
http://poppyjuice-poppy.blogspot.com/2013/04/how-to-make-homemade-yogurt-easy-and.html
Thanks again for such a beautiful tutorial!
if your real frugal some peanut butter covers work on canning jars.saved mine for years.I used this recpie twice and worked well.had no clue when I started
I make yogurt all the time. I don't do the cooler thing. I just put my jars in the plastic bag close the bag. Then cover the bag with kitchen towel to keep it warm. 3 hr. later put it in the fridge.
I wrap the pot in a big towel and put it in my oven with the light on for 12+ hours and comes out perfect every time!
I have not actually make yogurt yet myself but I've been doing a lot of web research in preparation for making it, and the consensus concerning your question about how long it keeps seems to be this:
Unopened: keeps for one month. Opened: a week or so (I think I've read up to 10 days). These numbers match my experience with store-bought Greek/strained yogurt.
I think this is why people will often make a big batch, e.g. a gallon, at a time but store it in smaller containers, often quart containers.
Love this site / blog. Thanks for great info. I started making Yogurt with a commercial yogurt incubator and 7 little glass jars. It worked, but I got in to the science of it all and turned to my lazy side. Now I just heat up 1/2 gallon of 2% milk in the microwave, in a large microwave safe bowl until it is barely simmering (takes about 18 minutes in my microwave). Then I leave it in the microwave with the door ajar for about 1.5 hours and it cools to just above room temperature. I thoroughly mix in one heaping teaspoonful of my wife's store bought Chobani Yogurt and put the bowl in our lighted conventional oven with the interior light on overnight (12-14 hours). The result is a creamy mild yogurt that some might not consider firm enough, but I love it that way. I spoon it into two quart size tuperware containers and store it in the refrigerator for later use. The results are consistently the same and I feel like it takes very little time. Thanks for all of the great info. on this blog that helped me learn how to do this!
Ohhh, thanks for reminding me of that. I'll add that information to the post above. I don't know how I forgot...that's one of the most common questions I get! Unopened yogurt keeps for at least a month, and an opened jar will last at least a week. You can certainly make only a half gallon of yogurt, though, using two quart jars.
The nutritional content of this should be just like commercial yogurt, as I don't believe that most companies fortify their yogurt.
I'm so glad my blog has been helpful to you...thanks for the encouragement.
Kristen and readers, you have posted the exact recipe I've been using for years trouble free. This was shown to me by a Lebanese friend and it's perfect.
I would like to address a few things with you and your readers.
1) I buy fresh made yogurt from a Mediterranean store and use that as my starter culture for the first month. Then I use a 2nd batch yogurt for my starter culture for the next month and keep repeating this until I'm making yogurt from a 4th batch, then I buy new. This will get me 5 months of yogurt making from 1 qt and I use the same open container, but I reserve it only for culture yogurt so it's not opened often. By doing this your starter is always from the most original batch.
2) I use 2% milk. I've made it with everything from skin to whole, taste is the same, but consistency changes with less milk fat. An easy trick to beating this is to take a clean sheet of paper towel, fold it into a small square and place it on top of the yogurt in your jar. It will cleanly absorb extra whey from the yogurt. It only takes about an hour to be completely saturated. You can achieve any desired consistency you like by adding a new paper towel. Don't worry about contaminating the yogurt.
3) My son had terrible allergies by 7 years old and my Lebanese friend told me to try giving him this homemade yogurt. So I started buying this from a Mediterranean store as you can't buy our yogurt from any regular grocery store... it isn't the same. At first he didn't care for it as it is not flavored and sugared up, but with some drained pineapple chunks mixed in he found a favorite snack and loves it. After about a month his allergies drastically improved so I took him off one of his med wroth great success. And then about a month later we stopped all allergy meds and to this day he is allergy medicine free at the age of 14. Our intestines are the tool used to battle allergies and other similar health issues. The high concentration of the good live bacteria and cultures (probiotics) in our yogurt work amazing for helping with many ailments.
4) Back to consistency... I mostly prefer consuming my yogurt as a drink, but sometimes in a bowl plain or with fresh fruits as my son eats it. Since I drink it plain and have to add water to make it drinkable I don't mind the if the batches are lighter in consistency, so I will make both consistencies. If you want to spice it up as a drink, you can add lemon, garlic, herbs and a list of other items to make different drinks. Google the options.
5) If you have never made labneh cheese from this you must try it. It is made by adding a pinch of salt to a qt of yogurt mixing it in then straining it. I put a colander over a medium size pot then line it with clean paper towels (two layers are adequate). Pour the yogurt on top of the paper towels covet with another paper towel and set a plate on top as a weight. After a few hours check the consistency. You are looking for the same consistency as cream cheese. It will have a great unique flavor and you can eat it plain, use it in cooking recipes or roll it into balls and place it in a jar of olive oil with herbs to flavor it.
Mike
my container is 6 ounces is it enough for 2 quarts
Oh yes, that should be fine.
Hello!
I have to tell you I tried the yogurt making with a opened container of store-bought yogurt. It did not set up at all, so do not try! Hahahaha! Not a total loss as I've used the 'milky' mix in smoothies and for making cakes and sweet breads. Worked fine! Going to try again soon according to recipe. Thank you for a wonderful post!
Good to know!
Abbi, that's interesting and I wonder what caused that. I always make my yogurt using an opened container of store bought greek yogurt. I love a nice thick yogurt so if I run out of my homemade yogurt I buy a container of my favourite brand that is made locally, if the store doesn't have that I use whatever brand they have that I like, some are kind of chalky and are out of the question to use as starter. I eat it up leaving myself one teaspoon with which to start a new quart of yogurt which I make with whole milk.
Once in a blue moon I find that my yogurt doesn't set up well, when that happens I just put it back in my cooler/warmer (I use an ancient Coleman cooler that perfectly holds a quart jar wrapped in tea towels) and leave it sit overnight. The next day it's set. And if it's not perfectly set putting it in the fridge seems to get it to the right consistency. Then I strain it ending up with some nice thick yogurt. Often I won't even bother straining it, just drain off the whey before I get a serving. As the jar gets used up it's pretty close to the thickness of a greek yogurt.
I've even forgotten to add the starter before putting in the cooler to culture. Hours later when I go to take out my yogurt it's not set and I realize my error. When that happens I check the temperature and if need be I re-heat to 120 in the microwave, add the starter and let it set again. Remarkably that works just fine.
Over the years I've discovered that yogurt is pretty forgiving.
@Abbi, I used 6 oz of plain greek yogurt to make 4 qts of yogurt. It turned out very thick and creamy. You have to be sure the store bought yogurt has active cultures in it.
Okay, so I HAVE to try this! It looks so easy! I love yogurt, but whenever we buy it I'm always appalled at how expensive it is. For your recipe, all I'll need to buy are some quart jars and a cooler (there's always freecycle!) and milk/a starter, which we buy anyway. Thanks!
You can get a good yogurt maker with jars and automatic cooling for just about $30.
For a small household, the yogurt maker with the jars would work well. Erika, this would work for you! For households in which a quart is consumed within a day or so, the little jars are just too little.
When I evangalize to others about making yogurt I point out that it's about as hard as making canned soup: heat milk, cool milk, add yogurt, wait.
My 2 cents:
- I use skim milk without problem, compensating for the lack of thickness by letting the yogurt sit for longer.
- My yogurt doesn't come out as thick as Kristens, probably because I use skim milk. I strain it through cheesecloth or paper coffee filters to make it thicker. You can use the leftover liquid (whey) to enrich bread by using it in place of water, or to water outdoor plants.
- I have had success using yogurt from an open container. I have not used off-brand yogurt as starter.
- You can make as little yogurt as you want. I've made a 2 cup batch.
- Mine has lasted 3 weeks, unsealed in a tupperware, in the fridge.
- You can add pureed fruit to make fruit yogurt. Watery pureed fruit (such as melon) will make your yogurt thinner.
I think I will try the hot-water-in-cooler trick, see if it leads to thicker yogurt.
Why do you think your cast-iron pot will crack in cold water? Has it happened before? In which case, my hearty sympathies!
Thicker yogurt cannot be obtained by changing the process or leaving it longer in the processing state. It gets more 'tart' if you process longer.If you strain your yogurt after the requires 4 hours / prior to refrigeration, it will be much thicker. I use t-shirt material peggged to my colander. It will look like greek yogurt. Use the 'whey' on your plants or lawn. Hand whisk after straining and put back into the fridge to set. I find that the thickening process only starts after 3.5 hrs and is normally completed in 4 hrs, as long as I keep the temperature around 110F. Hope this helps and doesn't confuse anyone.
Actually, leaving the yogurt to heat longer DOES make it thicker! I leave mine in for 12-14 hours and end up with really nice thick yogurt.
Can you make yogurt using almond milk?
almond does not have lactose. the active culture needs lactose to thrive. so, no. cnnot make yoghurt out of non milk products. But you could make pudding with almond milk.... 😉
That's wrong. There are many recipes for yogurt made without dairy milk. The cultures do fine without it.
That would be considered something else. By definition yogurt is made from milk.
In reply to Vince: the thing that makes yogurt yogurt is the cultures, not the lactose - so any milk works, even if that milk is dairy-free.
Cate, there are almost ALWAYS canning jars at my Goodwill, so check the thrift stores too. I'm so excited that you're going to try it! It's really not hard once you get the hang of the steps. I can do it all by memory now, so it's very easy.
William, I've read that sudden temperature changes can crack this sort of pot. It's hot from the stove, so I'm worried about plunging it into a sink full of cold water.
You should try the yogurt with whole milk. It's really quite delightful. 😉
Thanks for the info about the opened yogurt. Mine is never open and unused for more than a day or two, so I don't have a lot of experience with that!
I occasionally make my own yoghurt but on a much smaller scale.
I bring a pint of milk to the boil, let it cool to blood temperature, stir in a tablespoon of live yoghurt from a carton, and pour it in to a thermos flask to set overnight. In the morning I transfer it to a glass jar or a plastic container and chill it in the fridge.
I sometimes strain it briefly to produce a thicker yoghurt, or for longer to make a cream cheese that can be mixed with herbs and spread on crusty bread.
This is how a whole subcontinent makes yogurt- all of India, Pakistan, Srilanka, Bangladesh and other South Asian yogurt eating countries. you don't need complicated jars or extra vessels. just simply boil milk, cool to luke warm temperature, add in live yogurt cultures, mix and set over night in a warm place- DONE!
I so agree with Shayna.. and equally surprised how so many people don't know how to make yogurt at home..! Boil the milk (fat or no-fat), add a spoonful of yogurt!! I don't even remember buying a yogurt from a store!!
It's definitely a good website, but the recipe looks so complicated with all the jars and what not!
I found the recipe really simple to use, but then I have canned food before and this is the normal process. I think that makes the difference
Misti,
Yes the canned process is normal.
But what some people are saying is- yogurt can be/has been for generations made with less equipment(because canning needs more equipment)
Yes, when I was in Israel - they made yogurt this way - after boiling the milk, mixing in the culture they wrapped up the pot with a blanket and left it on the kitchen counter overnite! It was De-lish!
I agree the basic process is simple and versatile. That is the functional beauty. Making yoghurt can be adapted to ones resources and needs! My grandmothers cooking notes from over forty years ago mention cooking yoghurt:
'Scald milk (do not cover during cooking) and cool to almost lukewarm. stir the starter until smooth and mix in some of the warm milk and then stir the starter into the rest of the warm milk. Mix well and only stir in one direction. Cover bowl with a plate and wrap in a heavy wool cloth or blanket. Leave undisturbed in a warm (not hot) place-DO NOT DISTURB while it is working. Finished in three to four hours. refrigerate and serve cold.'
I make the cream cheese by mixing a little salt into the yoghurt. Pour the yogurt into a cheese cloth or cotton bag and let hang overnight to dry.
I love making our own yoghurt! I was officially converted last year when I happened on your blog and boy my family is glad I did.
I top ours with a spoon of homemade jam and sprinkle it with 1/4 cup of homemade granola. It's a cheap healthy breakfast!
LOL! I discovered your website a while back because I was looking for yogurt instructions. The new and enhanced pictures are very nice, although the concept is pretty much the same as before.
I use fresh starter from time to time especially if the yogurt starts having trouble setting up. I also keep powdered starter in the freezer that I bought at the health food store. It is not cheap, but it's more of a just in case the yogurt all gets eaten and I am unable to buy more starter (snowstorms, store out of stock, whatever). If kept frozen, it lasts quite a while. Of course since I started doing that, I have not needed it 🙂
Here's my favorite homemade granola for my yogurt. It's called Chocolate Crunch if the link does not work.
http://find.myrecipes.com/recipes/recipefinder.dyn?action=displayRecipe&recipe_id=1687651
Last questions, promise! Is the starter-to-milk ratio always 1 cup starter to 1 gallon milk? So if I was to make half a gallon I would use 4 oz of starter?
Also, with canning jars, is it true that the jars and rings are reusable but you need to use a new lid each time? I think I read that about making jams and jellys, but I'm not sure if this is the same type of thing.
Thanks!
Christie, that's awesome. Go you!
Dogear, yes, the content is the same. It just has nicer illustrations now. lol I'll check out your recipe...chocolate sounds delicious!
Erika, I've never made a small batch, but I'm guessing the ratio would be the same. Anyone else?
You can most definitely reuse the lids. You only need to buy new ones when you are preserving something so it will be shelf stable. Then you need the lid to seal properly. When you're making yogurt, old lids work just fine. I'm just re-using the lids that were on my canned tomatoes....I don't think I've ever made yogurt with new lids, actually!
Hello, I am eager to try this. I have one question tho. Could you use another type of jar, say perhaps old spaghetti jars?
Lin, you definitely can. The only downside is that sometimes commercial jars have smaller openings and it's a bit harder to get the spoon inside to dish out the yogurt. I use old glass peach jars sometimes, as they tend to have large mouths.
@
Kristen
Thanks so much, I can't wait to try it. Love the blog btw, I check it daily. Thanks and keep up the good work.
How long does the active part of the process usually take you? I've never considered making my own yogurt before, but this seems easy enough. Maybe some weekend when I'm looking for a project....
I first learned to make yogurt from your old post, and here are my tweaks:
1) I make a quart at a time. That's just right for my family.
2)I use a "permanent" coffee filter with a fine plastic mesh to strain the yogurt and thicken it up a bit.
3) I heat the milk in the microwave. I have a huge pyrex measuring cup (I think it holds 4 quarts) and it's perfect for this. It takes about 7 minutes to heat a quart of ice cold milk to 180 degrees in my microwave.
4) I let the heated milk come down to 120 degrees on the counter--it takes about 15- 20 minutes. No need for the ice bath.
5) I pour the cultured milk into a pre-heated wide mouth 1 qt thermos bottle and put the bottle in an insulated lunch bag to incubate over night. In the morning, I put the fresh yogurt in a quart jar to go in the fridge so we can see it (less likely to forget it), but it could be stored in the fridge in the thermos just as easily.
6) As soon as I'm ready to refrigerate a fresh batch of yogurt, I take 2 tablespoon's worth and put it in a small container in the freezer so I have some for the next batch. That way we don't forget to save some at the bottom of the jar.
I don't think it could get any easier than this. Thanks for the great idea to start making my own!
I use 1% milk. It comes out a bit thinner but it's okay. Sometimes it sort of strains itself and there's liquid on top, which I discard. I never thought about watering an outside plant. I will do that.
I use Polaner All Fruit jars, peanut butter jars, salsa jars. I never have a problem. I also pour it into a picture and fill the jars that way.
My only problem seems to getting the skin on the bottom of the pot from heating it up. I think I will try my husband's cast iron kettle. Maybe that will work.
I've used the liquid as a substitute for part of the milk in pancake or muffin recipes too!
Kristen,
(Congrats on cleaning up the "f"!)
Have you ever added fruit or other flavoring to your yogurt? I love plain and vanilla but we are always buying the little containers because my husband and son want the fruit versions.
i have made yogart for 25 years by addin 2 spoons of yogart in a wide mouth sterile glass jar with any kind of milk including powdered milk. i wrap a heating pad around it. go to bed and have yoart in the morning. so simple.
jean
Kristen,
We have been making yogurt with your previously posted recipe. I use 1% milk because we are supposed to be watching our cholesterol. It turns out fine if I use a store-bought starter yogurt and let it sit for 6 hours in the cooler. We like to add canned peaches or blueberries on top when we serve it. My daughter likes to mix in Kool-aid powder. We also enjoy your whole wheat bread recipe. Thanks so much!
excellent! doesn't seem difficult at all. very clear instructions, nice job! i am by myself, though and you can't freeze yogurt, but if it does last a month, i can always keep three and give one away ...??
other problem is i'm wondering if this can be done with soy yogurt and soy milk. what are your thoughts?
i think honey is delicious with some local honey stirred in for sweetener.
I've used this recipe successfully since I first found it on your blog. Here are a couple of other random thoughts: When grocery shopping, I always watch for jars that have taller lids. The canning lids and rings will fit these (think pasta sauce, some jams, etc.) and are great for yogurt. I am single, so I always share my yogurt with my neighbors and occasionally they buy the milk. Can't get more frugal than re-purposed jars and free milk! If I know I'm going to want fruit in my yogurt, I add a packet of unflavored gelatin (mixed with warm milk) after the starter. This makes the yogurt thicker to begin with, so it's not runny once the fruit is added.
Yogurt cheese rocks! Strain your yogurt (save the whey-I add it to oatmeal or grits for a nutritional boost) and use it in place of mayo. I make killer deviled eggs without mayo and no one knows the difference. Oh, so yummy and so much less guilt!
Make sure you have a good thermometer, it will make the job so much easier. Note: If, while you are getting the hang of this, you forget the milk and it comes to a boil, STOP! Your yogurt will not set up. Don't waste any more time or starter. Run to the internet for boiled milk recipes and better luck next time.
I disagree about boiled milk -- I have forgotten that I'm heating milk for yogurt and let mine accidentally boil for who knows how many minutes. I still cool it to 150 degrees (which is the temp that works for me every time even though temps listed here are cooler than that) and add a few spoons of live-culture-store-bought-yogurt per quart. Then I put the jars inside a cooler wrapped with a towel or sleeping bag and let it sit overnight/all day. It sets up fine even though it may not be the best consistency yogurt.
i've made yogurt twice and it was alot of work when the end product wasn't so thick and i had to strain out the whey. yours looks amazing. i will try again. something i've read about starters....there are a couple brands out there that have 8 different cultures in them. those are the ones to buy. the more cultures, the better! just read the labels. i think stoneybrook farms is one. good to know the unopened jars will keep for a month! i love to put honey or agave sweetener in mine...even better...bananas, honey and cinnamon.
Thanks for posting this very user-friendly post. I'd been a bit unsure about making yogurt and long wondered what went into it. But now I can see how easy it is and I'm much more likely to give it a shot.
Also, one frugal yogurt tip. We finished a jar of raspberry jam, but there was a little bit of juice at the bottom. Pour that into plain yogurt and--voila--raspberry yogurt (without crazy amounts of sugar, like the store-bought).
@Diane
I've never had a problem turning boiled milk into yogurt. Sometimes it takes longer to yog.
I second that William! Just last night I let my milk accidentally boil for who knows how many minutes. I still did my "yog thang", letting the jars yog up overnight/all day inside a cooler wrapped in a sleeping bag. It set up fine.
@WilliamB
I love that - "longer to yog"! I did it on one of my earliest attempts, so there may have been other contributing factors. I picked up a Yogurt Book from the library (after the fact, of course) and it reiterated the no-boiling thing, so I thought that was the cause. Happily, I seem to have gotten the hang of it.
Jonathan #23 - Your tip is straight outta the Tightwad Gazette. If you haven't read it yet, get the blue version (all three editions in one) from your library. You'll love it!
I love Tightwad Gazette, great money saving ideas!! I love this home made yogurt thing~haven't tried it yet, but it sounds like I'm going to!!
I started making homemade yogurt when a friend brought over farm fresh milk. Kristen just happened to post the original yogurt post around the same time.
I've made smaller batches and just tossed a whole container of starter in. It turned out fine.
This last time I used 2% and left the yogurt in the cooler overnight (I forgot about it) and it turned out great.
I've always had a question and I think you can answer it for me.
When you use farm fresh milk do you skim off the cream first, or just mix it up with the milk before you start heating it up?
Thanks! Cassie
You can just mix it right in!
Thanks for posting this!! I was just thinking about how expensive yogurt is to buy. I think I will try this.
Your yogurt does look delicious! Mine, made with 2%, isn't as thick. I just do the crockpot method-super easy. And because there are 7 of us we eat it all quickly!
i saw u make ur yogart from a crockpot. may i have the recipe? thanks
One other method instead of the stovetop heating method is just put the milk in 2 glass quart jars and microwave for about 10 minutes (per jar) to reach 180-190F.
Then cool it down to like 130 and add the yogurt culture. I use a hand blender to mix it up and spread the culture well.
I tended to do this at night, then I put the jars in a 50s styrofoam cooler and put the lid on and go to bed.
The yogurt was perfect in the morning.
I say "wa perfectgs" because now I'm a vegan and therefore don't make or eat yogurt. I may try making soy yogurt at some point though.
Even if you are a vegan you can make yogurt. if you are in the USA you can get vegan yogurt starter from Amazon or one of it's off-sites. I tried to access it here in Canada today and was successful until I got to the international shipping costs, way too expensive for me, so I cancelled it. But you should be able to get it easily. Hope this helps.
stonybrook makes an excellent yogurt for a starter.
frugal girl you rock. i always wanted to make yogurt. i used to alot but your idea for putting it in a cooler and pour a hot water never been smarter i went to your yoghurt blog yesterday and make your idea youghurt style and i found fantastic thank you and god bless
I've been reading your blog for a few months now and I'm thoroughly enjoying it! (I love the recipes and photography posts especially.)
Now my questions: My 7 yo loves "pink yogurt" from the store but doesn't like the chunky ones, so we're limited to trader Joes and Stonyfield. I'd like to try your yogurt recipe but thought I'd try mixing in some seedless preserves. Have you tried a berry variation?
My kids also love the "drinkable yogurts". Do you have a recipe for that?
Thanks!
Lovely blog!
I hate buying so many foods in non-recyclable containers. Plus, I am also a frugal person. So, I make yogurt regularly. A little different method:
2 quarts of milk. (I use skim, because my dh and I are watching calories and fat)
2 tbs dry milk powder
2-3 tbs dannon plain yogurt (or any quality brand. not non-fat)
Heat oven to its lowest setting. Mine goes as low as 170F. Once oven has reached that temp, turn it off, but keep the door closed.
While oven is heating, whisk powdered milk into milk in a microwave-safe bowl
Heat milk in microwave until just before boiling (about 200F)
Let milk cool to about 115-120F
Take out a cup of milk, mix in the yogurt. Stir the yogurt/milk mixture into the big bowl pf warm milk.
Place bowl in oven, cover with clean kitchen towel. Close the oven door
Turn on the oven light
Go to bed.
In the morning, divide the yogurt into portions and refrigerate for a few hours. It sets up even more then.
Save a little for starting the next batch.
I have little plastic freezer jam jars I got a long time ago that have tightly fitting lids, so I spoon the yogurt into these. My husband and I take these to work every day.
Higher fat milk sets up better. The powdered milk helps low/no fat milk set up a little more.
I put up a good bit of jam every year. We mix a spoonful of jam with a cup of yogurt.
I've made all size batches. The ingredients can be adjusted up or down proportionally.
THANK YOU for this post, Kristen. I am very pleased to tell you that I made a pint (a test run) of homemade vanilla yogurt on Thursday and even more pleased to tell you that I like yogurt for the first time in my life! I have never cared for commercial yogurt at all "” it sets my teeth on edge. This lovely homemade yogurt, however, has a mild delicious flavor which is very appealing. I do have true milk allergies, as well as lactose intolerance, and so I am eating only a little at a time, spreading it out in small, wonderful little bowls.
Just so you know, I varied slightly from your incubation procedure by filling jars with hot tap water and putting them into a soft-sided, insulated bag with my jarred milk mixture. And... it took much longer than 3 hours to make yogurt "” I think it was about 7 hours. (I did change out the warm water jars a time or two to keep temp steady in the insulated bag.)
Mine is very soft, pourable even, but so delicious I'm not concerned for this batch, although I would like to firm up a second batch. Does the sugar and vanilla affect how firm the yogurt gets?
Carla,
you said that you are lactose intolerant. Have you ever tried farm fresh raw milk? I ask because my husband is lactose intolerant and he read online that this is sometimes caused by the pasturizing of the milk. The process kills bacteria that is essential in the digestion of lactose. We bought raw milk from the farm and he was fine! He even had a milkshake with me last week with no belly trouble. I apologize for the long comment. I had to share.
This site is amazing I am going to make yogurt and sharemy results
If you can find it, goat milk can be used without any lactose problems.
We currently buy our yogurt from a local co-op but it's so expensive that I would love to make some ourselves. I've not made yogurt in the past because the recipes and advice I've seen all recommend using milk that has not been ultra-processed. I literally CANNOT find milk that has not been ultra-processed in the grocery store (organic or not). What milk do you use and is it ultra-processed? Should I just give it a try and see?
Kate, I use regular milk that's sold in plastic gallons at the grocery store. Usually milk that's sold in cardboard cartons is ultrapasteurized, but the kind in plastic gallons is not. I don't think that ultra-pasteurized milk would be a problem, though.
When I make yogurt with raw milk from a local farm, my yogurt is thicker, and I assume that this is because there is more live bacteria in it. But the pasteurized milk turns out yogurt that is just fine.
This recipe looks so easy to make, thank you for sharing!
Is it possible to do this without a cooking thermometer? Any tips to help you know when the milk is the right temperature?
Also, I don't suppose you've ever tried this with any non-dairy milks?
I have not tried this with anything but cow's milk, but I know people use goat's milk to make yogurt. I'm not positive about what might happen with soy milk or almond milk, but I'm sure you could google it and find someone who's tried!
I always use a cooking thermometer because while I could figure out what 120 degrees feels like, I don't want to figure out what 180 degrees feels like (hello, burns! lol). You don't need a fancy thermomete...a plain jane, non-digital $5 sort will work just fine, so I would totally recommend buying one.
That is a very valid point about the burns. Sometimes I get confused as to how hot things are in Farenheit (I am used to Celsius)... so thanks for that! (A quick google shows 120F is 49C, which is ok, but 180F is 82C... which is less than 20 degrees away from boiling point. Burns indeed!)
I have seen some recipes for non-dairy yoghurt before... they are achievable, but more complicated than yours, which seemed blissfully simple. I will return to my google-fu and see what I can find.
Thanks heaps for your advice!
The reason the jars need to be sterilised is incse of bolutism.
Botulism is rare, so you wouldnt notice unless is killed you. the lower teh ph the more the likelihood, so yoghurt is a bit iffy.
plus - screw the brand names, just go for something with good yoghurt cultres in it. yoplait is down teh bottom of my list. oxygen kills the cultures, so does saliva, so dont double dip.
I finally made the plunge into yogurt a few weeks ago. I wanted to give a suggestion to others. Instead of a cooler I use my crockpot. It is just the right size for the canning jars I have and means I don't have to pull out another piece of equipment to take up space in the kitchen. (Mine sits on the counter making dinner 2 to 4 nights a week anyway.)
Other than that I am just getting the hang of "the method" so I can use less pots and get the process down in time.
The family loves yogurt smoothies in the morning and I like knowing they are getting good things into their digestive tract.
I do a combo of methods I combine Ann's method of using powdered milk with Kristen's overall stovetop/cooler method. My bf and I only like skim milk & I know it sounds gross but I use the instant powdered milk (about 1/3 cup for 2 qts) & add it to the mix while cooling. It works wonders to thicken fat free yogurt! And let me tell you... I couldn't be happier with the overall result. And I use plastic caps for my Ball mason jars that I found at a local hardware store for only 1.79 for an 8 pk so my bands don't wear out.
is it possible that i could have ur yogart recipe. i also like skim milk. thanks
Love your blog. I do lots of cooking and baking but I have never made yogurt. I do eat a lot of greek yogurt. Can I use greek yogurt as a starter? Thanks so much.
Thanks so much. I read every word and took the plunge. Bought a gallon of milk, sanitized everything in scalding water and began. I used whole milk. an ordinary thermometer, followed heating and cooling instructions,filled four quart jars. Then used small container of Dannon regular yogurt in two of the quart jars and one of vanilla yogurt in the other two jars. I mixed thoroughly, put the tops and screw lids on. Had heated my oven and turned it off, leaving the light on. I put all four jars in the oven and went to bed. This morning everything was wonderful. The yogurt is firm like your pictures Kristen. Put it all in the frig and it is perfect. I love the oven method for it is so easy and I thank you Ann for that idea. I am delighted - I have four quarts of "lovely" $5.00 yogurt for $5.00 total. Wow!! Then I took one of the plain quarts and am currently draining it in the frig wrapped in cheesecloth over a strainer. Hopefully I will have cheese in the morning. I will experiment for I don't know what to do. I will add salt first and then proceed. Any ideas? Blessings, Sharon Lea
Thanks for all these tips! I'm really into physical fitness and make lots of protein shakes, which include organic fat free yogurt. I figure I use close to $1000/yr. I'm going to experiment with it!
Have you ever tried adding fruit to your yogurt recipe??
I just made this (it is in cooler now) and I had about a cup left over, is this normal? I made the vanilla one if that matters. Hope I didn't mix it up because it looks so yummy and was easy to do.
If you made it with a cup of yogurt as the starter and a gallon of milk, you should have 1 cup more than 4 quarts (a gallon). ;oP
I always plan for some leftovers, and yes the cup of yogurt does add to the amount of yogurt culture you are making. Usually the extra fits in a small jelly jar and I culture it along with the gallon. It can be used for the next batch of yogurt.
Bill
I just tried your yogurt recipe! I am so excited to see how it comes out!
Thanks for the recipe and wonderful pictures! I just successfully made homemade yogurt for the first time!
But now, I have been trying to add fruit so we can have strawberry banana yogurt, just like we like from the store. It is not working. After I add the fruit it is a liquid. I have frozen strawberries, which I take the extra frozen water off and i use a blender to chop them up. I tried adding corn starch (which was gross) and dry milk to thicken it, but nothing even seems to be helping. I guess I can try strawberry jam instead, any other suggestions?
I read that if you put it back in the fridge after stirring something in it it should firm up again. I'm not sure though trying it as I type this
Thank you so much for this recipe!!!! I was worried at first, it turned out I was just too impatient, but it did finally set up by the next morning. It is very good! Some think it needs more sugar, but I think when we get rid of the "store bought" taste, it will be just fine.
Love your blog. Finally tried your homemade yogurt recipe. I will probably never buy yogurt again unless I am buying starter. Thanks!
Ah, I was impatient. I took it out at the three hour mark, and it was not set up. It's a tad bit thicker now, but the consistency is still pretty much of milk. Tastes WONderful though, definitely worth it. I think I'll mix this batch with some granola to eat, so the thin-ness isn't quite as obvious.
Next time I'll try straining it, and I might even delve into the powdered milk arena if need be. This is too good to not make again (thin or not!)
On occasion I've had a batch that took a couple of hours in the fridge to set up. I have no idea why, as most of the time mine is thick when I take it out of the cooler.
Maybe yours will still thicken!
Mine came out watery twice (once with a crockpot-only method from crockpot 365 and once with Kristen's method). I am pretty sure I inadvertantly used ultra-pasteurized milk the first time, but the second time I know I didn't...well, I used the yogurt-milk over time for things like dressings, scrambled eggs, marinating fish, "cream" sauces...at least since it's cultured it lasts a long time in the fridge. I'm going to try again--I want yogurt! 🙂 I saw the tip with the powdered milk. I'm going to try that, b/c I really need to make mine with skim milk or 1%, not whole.
At the risk of sounding pedantic, I encourage you to always bring milk up to at least 190F, no matter what kind of milk you are using. There are many reasons for doing this, and this is what I know about it:
- the proteins in the milk break down and become more digestible and able to thicken the yogurt when the bacteria is added;
- when you heat milk this way, you are certain you will have no competition with any other bacteria - you start with sterile milk;
- having to cool it down makes sure that you have it at 110 - 115F range needed for incubation when you add the culture.
Now I always add some powdered dry milk. Recently, I even used a cup of powdered (non-fat) with whole milk and IMHO it turned out as thick as Greek yogurt. So here is what I do:
- The night before, I add 3 quarts of milk (usually non-fat) to my Crockpot and 3 cups of powdered dry milk to that and stir it in well. I could use more but this amount seems the most convenient at this time.
- Then I add a tablespoon of a 50-50 combination of sugar and Splenda for each quart of milk and then add a pinch of salt for the batch.
- I turn the Crockpot on low and cover it and let it go all night long.
So in the morning:
- I check the temperature to make sure it is at least 190F and pour the hot milk into the jars I am using to culture the yogurt. This helps sterilize the wide-mouth jars and ensures I have the right number of containers I need for the resulting yogurt.
- Next, the hot milk is poured from the containers into a huge soup pot which is in a dishpan with cold water surrounding the pot.
- I wait for the hot milk to cool to at least 120F.
- I put the culture - using between a couple of tablespoons and a cup - into the blender.
- Some of the cooled milk is added to the blender and blended for 10 seconds. Remember, the cultures contain billions of bacteria which need to be evenly dispersed throughout the milk or it will clump and become grainy.
- The cultured milk is returned to the rest of the cooled milk and I whisk it for another 10 seconds.
- Then I pour all the cultured milk through a fine strainer into a waiting pitcher or 2 - depending on the size of the pitchers and the amount of milk being used.
- Then the pitcher(s) are poured into the waiting warmed containers and they are placed in my yogurt machine.
- I turn it on and monitor the temperature - perhaps needlessly as mine is a Waring Pro yogurt maker which is thermostatically controlled.
- After 2 hours, I slightly jiggle one of the containers to see if it is firm - it usually is so I put them in the fridge and finish my cleanup. You can wait longer 5, 8 or even 24 hours - all that happens is the yogurt gets thicker and more tangy.
FYI, I put up to 4 quart jars in my yogurt maker and it will only hold pint jars so I have to put towels over the top to close the gap between the top and bottom of the yogurt maker.
By the end of the year I expect to have made over 100 gallons of yogurt - I am at over 25 gallons now since mid-May and without one failure.
So take what you want from my experience and instruction... I hope things work for you.
Bill
I've been making Kristen's method for a couple months now and it works great! I think that the longer I let it sit in the cooler, the thicker it gets. I know some methods let the yogurt sit for 12 hours, so I don't think you are going to hurt anything if you let it sit longer. Also, I make mine with 2% milk and add 2 packets of unflavored gelatin for 1 gallon of milk. I've read that powdered milk sometimes gives the yogurt a weird texture or adds starch (?)...I can't say if this is true though b/c i've never tried it. maybe i would like it if i did. I'd like to use 1% milk, but haven't had the nerve to try yet, and the whole milk and 2% is soooo yummy! when i mix it with pureed strawberries it tastes like strawberries and cream 🙂 hope that helps!
Why on your blog does it say to heat milk to 180 and on the recipe it says to heat the milk to 185-195? Will heating it above 180 have any effect on how it thickens and if you heat it higher than 180 will it not thicken?
Please rely,
Thanks
Whoops, that was a mistake on my part! I fixed it now. Really, though, I've let my milk heat to anywhere between 180-195 and my yogurt has been fine. I've even accidentally let it boil over, and the yogurt has still been fine. lol
Thanks Kristen, That makes me feel better. I made some yesterday and it set up very well. I let it heat up to 185. Everything I have made so far from your recipes have been outstanding! Thank you so much! The only downfall, I am out of flour and milk! LOL! The chicken tacos were great too!
I was inspired to make this and am I glad I did. It turned out wonderfully! I did make mine vanilla and sweetened it slightly. Just had it for breakfast with some leftover apples and blueberries that I had cooked slightly. Just wondering if you make your own laundry soap. I just started doing that a month ago and I am so thrilled with it. My son has skin issues and it has helped. Also the cost is pennies compared to dollars for other soaps you purchase..
Kristen, I've tried making yogurt twice now, and both times it just comes back as funny-smelling milk. The first time, I used the crockpot method from the A Year of Slow Cooking blog, which resulted in milk with lumps in it. When I later read that ultra-pasteurized milk will not work for making yogurt, I figured that was probably my problem b/c I had used organic milk, and almost all the organic milk at the store is ultra-pasteurized. Last night, I used milk that I *thought* was not ultra-pasteurized, from a local creamery, and tried your method. I was meticulous, I thought, but when I took the jars out of the cooler they were totally liquid. This morning, after 8 hours in the fridge, same situation.
In both attempts, I used 1% milk. I want to make my own yogurt to help reduce trash and get our diet as natural as possible; however, my DH and I are both those folks who have had a life-long struggle with weight, and I just cannot add the saturated fat into our diet that 2% or 4% milk would bring.
Any thoughts? Maybe I accidentally used ultra-pasteurized milk again?
Also, ideas for using this cultured milk?
Thanks--love your blog.
Hmmm, that is strange! If you're using lowfat milk, you could add some powdered milk into the mix to thicken it up a bit, or you could do some research on adding gelatin. I know some people do that with success.
What kind of starter did you use? The one time my yogurt failed was when I used an off-brand starter.
As far as the bum batch you have now, I'd use it in baking and in smoothies.
Thanks Kristen. I noted in another post today that I was able to use it. I'm going to try the powdered milk idea.
Thanks again! love your blog!
Try adding powdered milk to the mix. Make sure the starter Yogurt is well-mixed into the milk, so you don't get clumps. That should solve your problems. The first time I made yogurt was with a hotplate and some containers that came with it back in the seventies, and never had a single problem.
Do you use a new starter every so often? I was just curious as to when or if you should replace the starter with a store bought yougurt on occassion.
So far we have been enjoying this homemade yogurt for three weeks now and it justs gets better! Thanks!
I do use a new starter every now and then...it seems like after a month or two, my own starter runs out of steam as it were. lol
I'm curious about adding fruit as well. Any success or disasters that people can share? I don't want to ruin it!
I've not had success thus far, as the addition of fruit makes the yogurt too watery. So, we add fruit when we eat it, in the form of jam or sliced fresh fruit.
Here's the skinny on adding fruit. If you are using commercial yogurt for a starter, as you are, let the yogurt sit about 2-3 hours at 110-115F. THEN pour it on top of your fruit. Let it continue incubation 2-3 more hours, til the acidity of the yogurt increases to the point where the yogurt thickens properly. otherwise the fruit will ferment and yogurt will be runny.
Also, drinkable yogurt is kefir and you can find a culture for that also.
Hey namastemama, what happens when your yogurt sets up in only 2 hours?
I use Kristen's method in adding things to the yogurt after it sets up. That way I have a myriad of choices whether it be jam, fresh fruit, granola or what have you. In my case, my wife does not like the same flavors I like (strawberry, apricot, etc, etc, etc). So to keep it simple, I just stir the flavors she likes into the yogurt I am serving her (yes, some guys DO serve their wives) and stir the flavors I like into my own servings.
Another reason is that I make yogurt in bulk (at least 3-4 quarts at once) so making plain yogurt gives me the most options in serving the yogurt.
BTW, I do make a yogurt parfait using fruits and jams with a sprinkle of granola on top - delicious...
Just made this--thanks for the great post!!
I just discovered your blog last night, but already I am hooked. Just from a couple posts I read last night, my pizza crust crispness has improved and I have overnight cinnamon twists in the fridge.
I am really looking forward to trying your yogurt recipe. I tried making yogurt once before (last month, actually) and it was a flop. I used it up in smoothies, but no one wanted to just eat a bowl with fruit. In the recipes I found, no one said what kind of milk to use or even suggested a brand of yogurt to use as a starter. I found 1% milk marked down for .99 and bought 4 gallons. I only used 1 gallon to make the yogurt. We are a family of 8. Me, hubby, 5 always hungry kids and an invalid mother-in-law. We go through A LOT of milk. I followed the recipe instructions very precisely, using 1% milk and store brand yogurt, but I ended up having to strain the yogurt way too much. I had twice as much whey as I did yogurt and the yogurt was way too tart. Your detailed post and wonderful pictures make me want to try again - with better ingredients. Thanks SO MUCH for all you do for everyone who reads your blog. I love, love, love the recipes with pictures! Having simple step by step pictures is absolutely awesome.
Here are a couple of tips that can help result in a thick, tasty dairy yogurt - I have been making gallons of the stuff now over the past several months im my Waring Pro Yogurt Maker without a failure... but don't ask me about soy yogurt:
- add 1/2 powdered dry milk for each quart milk and a tablespoon of sugar or sweetener and a pinch of salt and stir in well.
- bring the milk almost to a boil.
- cool to around 110F.
- use your blender to blend in the culture (Siggis takes 3 hours to firm up and Activia can take almost 5 hours)
- keep the cultured milk at around 115F until firm.
You can see results on my website http://mryogurt.info/ for different yogurt cultures.
Good luck,
Bill
I posted previously when I made your yogurt. It was perfect. This time I had my computer on the counter following directions and it died so instead of going to my desktop to check I went ahead by memory. Big Mistake. I whisked in the started before it got to 120. I so hope it still turns out. I had added vanilla and sugar and made half the batch like that then added a tiny bit of pink coloring and some Lorann raspberry oil. The taste was wonderful. I so hope it sets up.
The good news is if you added the culture to the hot milk, it more than
likely brought the temperature down within range.
I know I constantly have my thermometer at the ready. And to use the old
adage, measure twice and cut once.
Let me know how it turned out. BTW, I have found you need to add at least
10 - 20 drops of the oil depending on how strong the flavor is. Like with
watermelon, I use 20 drops per pint. But coconut only needs 10 - 15.
Bill
I think jars of homemade yogurt are beautiful too...........
Well not only are jars of yogurt beautiful, but you can make it in all kinds of containers. I have made it in small stoneware crocks and in ceramic containers with ceramic bail-wire caps. And it is very beautiful. And if you are interested, my website is brimming with information about yogurt making. I just added a section on flavoring yogurt - just click on the tab at the top of the website to get to it.
http://mryogurt.info/
Bill
I made homemade yogurt the other night and it worked great! I actually used a half gallon of ultra-pasteurized organic milk (before reading that it might not work) and a small cup of Dannon starter. The ultra-pasteurized milk worked fine! Instead of putting my jars in a cooler, I put the oven on 170 (the lowest setting available on mine), then turned the oven off, turned the oven light on, and put the jars inside. In the morning: yogurt! It was really delicious...much sweeter and milder than storebought plain yogurt, which I don't like at all. I'm eager to try flavoring it differently, too.
Oh, and as a cost comparison...a quart of conventional storebought yogurt used to cost me $3. ($4 for organic). Making my own using organic milk and conventional starter, I got 2 quarts for less than $4 total. Not bad!
This is how I make yogurt, too. I love the photos. I don't bother sterilizing my bottles - I just wash them well and then shake some boiling water in there. I've used an open jar of yogurt as starter (I usually use one jar of yogurt for 2 batches a week or two apart, depending on the use-by date). It works out fine, although the resultant yogurt isn't as smooth. I thought was was because it wasn't as fresh. In any case, I always have fruit or granola in my yogurt, so I don't care if it's got a few tiny clumps in it. The taste is what matters!
You can cure your case of the "clumps" very easily by simply using a blender to blend in the starter culture with the milk instead of stirring it in. The reason you want to do this is that the culture literally contains billions of bacteria so just stirring it a bit doesn't distribute them throughout the milk. By blending the culture into the milk with a blender, you get the bacteria well dispersed throughout the milk. Then after it is all well mixed, I strain it through a very fine strainer. As I result, each and every time I get a smooth, custard-like yogurt that firms up in under 3 hours and most recently under 2 hours.
Try it, you'll find it works.
Bill
Hey, I have a quick question if it's not too much trouble. Do you stir your milk while it's on the stove? I used instructions from a yogurt maker that said to stir often, but I think I may have over-whisked my milk. My finished product has some liquid on top and a bit of a grainy appearance.
Thanks so much for your help!
Right now, I have a gallon of fat-free milk with 4 cups of dry, powdered milk with some sugar, Splenda and a pinch of salt in one of my slow cookers. I do this to keep from scorching it. If you do heat it on a stove, you must stir it constantly to prevent it from scorching. When it gets to 190F, I will turn off the crock pot and then pour it into a pan that sits in a dishpan full of cool water to cool it to 110F. This seems to work the best for me.... and of course then I culture it in my blender and strain it and put it in jars to go into my yogurt maker.
Works well every time.
why do you add sugar?
I think I have a yogurt FAIL 🙁 I was so excited to make it today, bought new thermometer and 1/2 gal of Stonyfield Farm whole milk yesterday. It's been about 3 hours and the yogurt is still liquid in the jars in the cooler. I followed the method and temps exactly, but I did use an open quart of SF plain whole milk yogurt as starter. Is there any way to save this? Maybe go get a brand new starter yogurt and gently reheat the milk to 120-130 and add new starter? I know I won't have an answer soon enough to matter, so I'm just rambling; I really hate wasting food. Maybe we'll have fish chowder tonight instead. Going out in a bit and I hope by the time I get back its thickened up a bit. Thanks. Will definitely try this again as it was pretty easy to make.
Lisa,
I'll bet it turned out ok after all - I hope???
If you have a life-long commitment to making yogurt, why not spring for a yogurt maker? I bought the Waring Pro yogurt maker - the only one thermostatically controlled - at a national store called Tuesday Morning for about 1/4th the retail price. It cost me less than $30 and I have yet to have had a failure. I made a gallon of a combo of Y1 (Bulgarian) and Activia several hours ago and it firmed up in less than 2 hours.
I look at a yogurt maker as an investment and it sure has been worth it. My website is: http://mryogurt.info
Let us know how it turned out!
Bill
Hi,
The yogurt didn't set...most likely the yogurt container I used was too old. The milk smells and tastes like yogurt, and there is 1/2" at the bottom that is set. I'm willing to try it one more time the same method, but get an unopened container at the store to start. Thanks for the info about the yogurt maker, I may consider that.
Lisa
To Lisa,
Before I got a yogurt maker I tried the cooler method and the crock-pot method with mixed results. Sometimes the yogurt would turn our right and sometimes not. And I don't think that had anything to do with the culture at all.
When I got my Waring Pro yogurt maker, except for soy yogurt which was a little thin, I have yet to have a batch of yogurt turn out less than perfect. And I know I have made at least 20 gallons of yogurt since I got the yogurt maker. When I pay less than $5 a gallon for the milk which becomes the yogurt and the same gallon of yogurt available in my local grocery store costs anywhere from 3 to 5 times that, I have paid for my yogurt maker many times over.
Believe me, it takes a leap of faith, as they say, to prepare and culture a gallon of milk, put it in the yogurt maker and wait to see if it comes out ok. So far, excellent, every time. So it is not so much faith now as trust. And I now have no faith in other methods...
I have no clue what is going wrong. It could be the culture, as you say. Or it could be something entirely different. If you mixed dry milk in with the whole milk and heated it to near boiling and added a little sugar for some of the bacteria and then cooled it to 110 or even 120, you should be ok. And if you used a blender to thoroughly blend the culture with the warm milk and then stir that back into the rest of the batch, it is hard to see what you did wrong, if anything. Then it is either the incubation temperature wasn't right or, as you say, the culture wasn't all that active.
If you start with a fresh container of active cultures yogurt and use that for your next batch, then all you have to do is save a bit of it for the next batch. That is, if it turns out ok. But you must check the temperature at each step of the process. In fact, I put a thermometer right into my yogurt maker just to see that the incubation temperature is ok. And thus far, after an initial adjustment from the starting temperature, it has always been right on 115F as close as I can tell.
Let us know how it goes?
Bill
I had the same problem. I just pulled my yogurt out the cooler and it' watery not thick. I used new Dannon starter and followed instructions I thought exactly. I have them in fridge now. Maybe they'll yog in there? I was so excited to try this too!
For those that make a yogurt FAIL -- KEEP TRYING!!! Don't give up, and if you are reading here about yogurt fails, know that yogurt making is actually super super easy. Don't be overwhelmed by the dozens of tips and troubleshooting given all over this page. (1) You heat milk (2) You cool milk (3) You add cultures (4) You keep it warmish overnight/several hours. Tada! I make yogurt with different brands of cows milk and different store-bought yogurt starters every week just about. Some turn out better than others but it's always healthy and good and saves $$$.
I had to jump on here and leave another comment. I have made this so many times now and it always turns out. Even when I added the yogurt too soon. I just put a batch in the cooler to "cure". Today I made Key Lime. I have some orange oil I bought and will be trying that tomorrow. I have found my favorite way to eat this is to put a coffee filter in a mesh strainer and then pour a good amount of yogurt in and let it sit overnight. In the morning I pour the liquid away and what is left is so creamy and rich. Like Greek Yogurt. Delicious!
I am a huge fan of home-made yogurt, I've been making it for years. I bought a yogurt maker a few years ago, and have been using that.
I have a question, if you can help me...
I was using Soy Milk for the last few years, and the results were fine. I also switched to using Greek yogurt as the starter, and the same results.
I recently swithced back to using Whole Milk, which I used in the past with excellent results, but the two batches I made were like tangy milk. Hardly thickened, after 8 hours or so. It has a tang, and the starter was fresh, so that can't be the problem.
I normally leave my milk out to come to room temperature and do not boil it. I've used this method for as long as I can remember and never had a problem. I can't recall if when I used Whole Milk in the past if I did it this way or heated it. Also, I used to use regular yogurt not Greek with the whole milk previously.
I'm just not sure why the switch to Whole Milk would cause this. I don't think it's ultra-pasteurized, I will check, I think just normal pasteurized.
Any help would be greatly apreciated!
Thanks
I started straining my yogurt because it didn't transport well in my husband's and son's lunch box. It is like Greek yogurt now! It is great! But does anyone know what to do with all the whey? I hate to throw it away.
Thanks.
Funny you bring that up because I just made black bean soup and used whey in it. My wife reported that it was the best I have ever made. Use it for bread making and so forth.
Bill
http://mryogurt.info/http://mryogurt.info/
Thanks for the info Bill. Maybe I'll try that black bean soup.
Just ate my first bit of my first batch (warm!!) Oh my sweet heaven! I had made yogurt before and loved it but your way is so much easier!!! Thank you so much for posting!!
Kristen, I had to tell you I finally posted about making yogurt 🙂 I've made it three times now and it's been great every time! Thanks so much! 🙂
http://bakeoff-flunkie.blogspot.com/2010/10/homemade-yogurt.html
I'm going to try this! My husband loves plain yogurt and I'd love to surprise him with homemade!
Arrgh. I just made mine last night and it didn't set at all.
It's barely slightly thicker than normal milk.
I didn't have a thermometer, but I heated it to close to boiling, but not super close, and then let it cool some on the counter, added the starter and then put it into the cooler with the hot water.... Maybe my water was too hot? It was probably pretty close to boiling temp.
Should I heat it back up and mix in more yogurt and keep a better eye on the temps?
Any thoughts? Thanks.
I don't think you can make it work without a thermometer. From what I've read the temperatures are really important, especially cooling it down enough to not kill the starter, and having the water in the cooler the right temp. If you want to try it again I'd get a thermometer. It's really worth it--Yum! 🙂
There is a lot of information on my website: http://mryogurt.info/
I agree with Tiffiny - get a thermometer. Amazon has them for a couple of bucks. I have 3 for yogurt and 3 additional I use to check temps of my fridge and room temperature in 2 rooms.
Don't worry about boiling milk... I have done it more than once and the yogurt turned out perfectly ok.
When you go to add the culture(s) - I use several together including Activia and a Greek yogurt plus a Bulgarian yogurt - check the milk temperature - it MUST be below 120 F. Using several cultures together eliminates the poor performance of one of the cultures. I usually wait until the milk cools to around 110 or below. Then I take some of the milk and put it in a blender with the cultures and blend for 10 seconds or so. Then I pour it back into the rest of the milk and whisk it for 10 seconds. Remember, you want to disperse literally millions of (good) bacteria throughout the milk and a blender will make sure that happens.
Finally, and this is why I use a Waring Pro Yogurt Maker, you need to maintain the jars of the cultured milk between 110F and 120F.
Don't let one failure get you down. Get back up on the horse and try riding it again. Once you master the art of yogurt making, you will be hooked for life! And if you use a yogurt maker, you will find it is more of a science than an art.
Best wishes and good luck and please let us know how your next batch turns out.
Bill
Ha! I tried again yesterday and it turned out great!!! Success at lost. And, even more importantly, I won my skeptical hubby over! 🙂 Happy yogurt-making me. Thanks for the advice to my first hilarious attempts. It sure is easier with a thermometer. Also, whoever had the idea of doing it in the microwave, genius.
Believe it or not, Mary, if you put the milk in a crock-pot overnight, it will normally reach near 200F by morning on low. For me that is even easier than using a microwave since you just set it and forget it.
Bill
Alas, everything I put in a crock pot burns. Every time. Maybe it's my crock pot? We'll go with that.
Mary - now that you have a thermometer, you can fill you crock pot with water and check it's temperature in the morning. Do it 3 times - one on warm, one on low and one on high if that is your settings. My guess is on high it would be 212F, on low around 190F - 200F and on warm around 150F to 160F. By checking it out this way, you can see if you have a bum crock pot or not. But really, if low gives you that temperature range overnight, then try a batch of milk out and see if it doesn't make things easier.
Bill
I just tried this recipe this week - thank you! If I hadn't spilled so much (forgot to put it into a pitcher first) I think I would've gotton almost 5 qts. Anyway, I'm blogging about my experience and posting a link to this post.
I too finally made yogurt using your method. Wow! So easy. I used already opened, bought yogurt as the starter, and all is well. Thank you.
I'll see what the kids think of it this morning!
YOU HAVE PUT THE WORDS MOTHER, WIFE, DAUGHTER, SISTER AND HOMEMAKER BACK INTO THE WORD WOMAN!!!!!!!! YOU ARE AMAZING!!!!!! THANK YOU FOR YOUR BLOG!!!!!!!!!!
The important here is that: You need to begin with starter yogurt. Starter yogurt is yogurt that has been made with active live cultures. And where I can't find such yogurt - from some village...
If that is a question - "where can I get active cultures..." if you can't get it from the yogurt you get in your food store, then you can order it online... it's powdered but works just as well: http://www.cheesemaking.com/cheeseculturesandmoldpowders.html
Page down to find the yogurt cultures.
I like the Y-1, 4 and 5.
Bill
My grandmother used to make homemade yogurt when we were kids. I will never forget that taste. Delicious!
I am so excited to let you know that I made my first batch of plain yogurt this afternoon. It turned out beautifully! I wanted to share what I will be using the majority of my yogurt for. I have a rescue farm of sorts and am a huge animal lover. I have found through my experience with my varied animal friends that yogurt is wonderful in balancing their digestive systems. I currently have a senior pony (Nicholas) who eats a cup a day with his feed so finding your very easy to follow recipe has added a much needed boost to my pocketbook. I find that it is very delicious for me too! I look forward to purchasing another gallon of whole milk and making the vanilla flavor. Thank you!!!
Stumbled across your site...thanks for the recipe and instruction! This is a fantastic recipe, and overall it looks so simple! Can't wait to try it sometime 🙂
Has anyone successfully made yogurt in a crock pot with ultra-pasteurized skim or 1% milk? The only organic milk I can get in my area is ultra-pasteurized. I really want to start making my own yogurt but cannot compromise by using non-organic milk. Any thoughts, suggestions, etc. would be much appreciated!
I have made yogurt with 1% milk - I use 2 quarts of it in my crockpot with 1 quart distilled water and 2 cups of powdered dried non-fat milk. I also use a cup of 50-50 Splenda-sugar for taste and to feed the yogurt bacteria. And oh yes, a pinch of salt. Then I go through the whole drill:
- leave in crockpot on low overnight until temp is 190F.
- cool in a huge soup pot placed in a dishpan of cool water. The temperature needs to be below 120F.
- add culture (I always remove a quart of the warm milk and blend with the culture in my blender. This is so important as you need to distribute the jillions of bacteria throughout the warm milk. And then, of course, whisk the blended culture back into the rest of the milk in the soup pot)
- strain into quart jars... usually have a bit of left over that I put in a small jar for the next batch. My wife objects to lumps in the yogurt and I have found that straining it eliminates the lumps. Just use a VERY fine strainer or strain through a dish towel.
- put jars in yogurt maker (Waring Pro) and let it go for around 2 hours which is how long it usually takes me to get a firm yogurt for the cultures I use.
- put jars in fridge.
- enjoy.
I have developed this method over the 8 or so months since I bought the yogurt maker. It usually takes me a few minutes to get out the crockpot and put in the milk to heat overnight. And then around 15 minutes to prepare the milk culture, bottle and place in the yogurt maker. And then refrigerate. Perfect yogurt every time with no hassle and only 20 - 30 minutes of my time at the most.
Bill
This was my 3rd attempt at yogurt and it finally turned out perfect! Thanks so much for the recipe! I did add more than a gallon of water to my cooler because my cooler was a different size than yours. I also used aqave to sweeten my yogurt insted of sugar and it worked great.
I would love to know if this works with almond milk (since that's all we drink). I hope you'll try it out one day and let us know because if I tried it and it didn't work I wouldn't know if it was something I'd done wrong or the almond milk's fault! lol...
thanks for those article! I'm sure going to try making my own yogurt! I myself try to put my two cents by upcycling materials. Here is my website in case you'd like to check it out: eatgreen.etsy.com
Winderful article!
Monica
http://www.blogher.com/rescuing-plastic-bagseven-greener
Hello, I just found your blog the other day, somehow through a long bunny trail.... I was very happy to see a "How To" on making yogurt, cause I'd been thinking of trying it, but though it sounded like a lot of work. Your recipe sounded very easy so I attempted it... my yogurt turned out runny. Any ideas of what went wrong? I tried to be exact with the temperatures that the milk and water were heated to and I used Homo milk from the grocery store which is 3.25% milk fat. The yogurt was quite 'sloshy' as you described when I took it out of the cooler and it never got more solid in the fridge 🙁 Any ideas?
Also, does it work to 'up' the milk fat of the milk by simply adding some cream?
Thanks! I'm loving your blog by the way!
What kind of starter did you use? I recommend a name brand starter.
How runny was your yogurt? Sometimes my batches are thinner than others, but they should definitely be thicker than milk.
And yes, you could definitely add some cream for a richer end product.
Bum batches of yogurt are good for smoothies, at least!
I think it was Astro Vanilla yogurt that I used, and it said it contained "active bacterial cultures". Maybe I'll have to try the Yoplait or Dannon like you recommend.
The yogurt was definitely thicker than milk, but still very liquidy. When I ran my spoon through it, it had clumps kind of like eggwhite consistency. That would be my best description of it.
Also, can homemade yogurt not turn out, as in that it is not safe to eat? I tasted it and it definitely tasted like yogurt, just more tangy and less sweet (which is a good thing!) I think I might have to try your Vanilla Yogurt recipe too! I want this to work!
Thanks!
It should be totally safe to eat, yes. I'd use it in smoothies, if I were you.
And yes, try Yoplait or Dannon next time. That should work for you.
Okay... so I was a little scared to taste the yogurt, since it looked slimy and like eggwhite slime in thick milk, but I did more than just lick the spoon last night! Yes, I was brave! I tasted it plain and was surprised at how good it tasted! It had a mild vanilla flavor since my starter was flavored and it was surprisingly sweet! I am a total sugar addict, so for something like that to taste sweet is very surprising. I made myself a smoothie with the liquidy yogurt and some mango, YUM! I'm definitely going to try making the yogurt again, and will try a different starter next time! Thanks for all your advice Kristen!
When I made my yogurt years ago, I had a recipe that used skim milk powder and a touch of vanilla. It was very thick and creamy. I have lost the recipe. Has anyone tried this or have a similar recipe?
Tannis,
If it is not too terribly thin, you could also strain it through a paper coffee filter. It becomes very much like greek yogurt. Nice and thick and delicious!
I think this is the third or fourth post talking about using a paper coffee filter to strain, making Greek yogurt. None of the post explain at what phase of the process it would be done. Do you filter it right after the culture is added or after the refrigeration process? My family really prefers the thicker Greek yogurt and I think making the regular yogurt would be a waste for us.
You strain it after the refrigeration process, yep!
Oh...thank you. I'll give it a try and let you know my results.
Hi Katherine,
You don't have to use paper filter papers - you can use the reusable plastic ones. Mine fit in the top of a quart plastic container - the kind we get for Chinese soup like Wonton for carry-out. I just dump about a pint of yogurt from the fridge into the plastic filter while it is in the top of the plastic container and then put a loosely fitting top on top of that and into the fridge she goes. Depending on the type yogurt, it may take as little as 8 hours to drain and as long as 24 hours if it is especially thick to start with. I then dump the now strained Greek style yogurt into another quart plastic container (my stash) for use when I need it. The leftover whey goes into a quart bottle where I mix it later with orange juice, soup or what have you. And I find an ice cream scoop helpful to make a serving of the yogurt from my stash.
Cheers!
Bill
I'll bet that very few if any of us know that there is an International Scientific Association for Probiotics and Prebiotics and that it is doing great things in the field of probiotics including yogurt probiotics.
You can find them here: http://www.isapp.net/
And better yet, there are international guidelines for choosing probiotics: http://www.isapp.net/docs/Consumer_Guidelines-probiotic.pdf
Why do I mention these things? Well if you are as interested as I am in yogurt making, you would find everything available about yogurt making, including things being done to set standards and so forth.
For example, in my frustration to find what probiotics are available for yogurt making, along with a search of the Web, I also bought containers of every yogurt available in our local (Giant Food Store) supermakret. Eventually I went to many more stores such as Trader Joe's and Whole Foods, etc, etc, etc. You see, on each carton, you (are supposed to) will find a mention of all contents in the yogurt. But lo and behold, not true. One such container only had one culture mentioned although in order to be called yogurt, it must contain at least 2.
"Under the standard of identity established by the U.S. Food and Drug Administration (FDA), in order for a refrigerated product to be called "yogurt," it must be produced by culturing permitted dairy ingredients with a bacterial culture, which contains Lactobacillus bulgaricus and Streptococcus thermophilus."
Anything else is optional.
So I finally came up with a list of 20 bacteria strains which were either mentioned on the Web or on the actual containers of yogurts being sold commercially. And what is interesting is that as a general guideling "more is better" when it comes to probiotics. Several yogurts being sold commercially, like Stonyfield yogurt and some of the Greek yogurts contain as many as 6 different strains of bacteria.
What I am leading up to is that I have a culture bank of yogurts in my freezer and when I make yogurt, as I did this morning, I always include several different yogurt cultures in my batch - this morning I used Stonyfield, Activia and two cultures from prior batches. In this way I am sure to get a multitude of probiotics in the resulting yogurt. In the past, my culture time has been until the yogurt gets firm - usually from 2 - 4 hours but this time I will let it culture for an entire 8 hours on my yogurt maker. My thought is that it will increase the quantity of bacteria if I let it go the entire time.
Now if I could only get a culture strain or yogurt with 20 strains in it....
Bill
Success!!! I attempted making yogurt again yesterday and it turned out very nicely. I used a Yoplait starter this time, and my yogurt is nice and thick, and I'm starting to get used to the taste.
Something I was thinking of after reading Bill's comment about different strains of probiotics, has anyone every tried adding digestive enzyme/probiotic pills to their yogurt? I'm talking about the capsules that you can buy in the store with acidophilus and lactobacilus (or something like that), that you could open up and pour the powder into the yogurt? It's just something I thought of and am wondering if anyone has tried it!
Tannis, congratulations on your making yogurt again. And I am wondering why you commented about the taste. You might try a Bulgarian starter if you want a change in taste.
Good thinking on those probiotic capsules. I might try doing what you suggested some time. Here are the bacteria in one such product: L. rhamnosus A, L. rhamnosus B, L. acidophilus, L. casei, L. delbrueckii subsp. Bulgaricus, Bifidobacterieum, B. longum, B. breve. When I try doing that, I think I would start with a successful culture I am already using and add the capsule to it. In that way, even if not all the bacteria "take" in the yogurt, at least the attempt will not be wasted and I will have yogurt to consume.
One reason they put probiotics in capsules is that the gastric acids in the stomach tend to kill many cultures before they reach the intestines. In fact they have studied the yogurts to see what comes all the way "through" your system and found that one of the 2 main bacteria components of yogurt doesn't get all the way through.
But that is no reason not to try the capsules in yogurt as an experiment.
Thank you again for your suggestion - I'll get back on it when I finish the test.
Hi Bill, I'd commented on the taste because the yogurt I made tasted a lot more tangy and tart than store bought yogurt. I assume it's because there isn't all the added sugars and flavors!
I had the idea about the probiotic capsules because the yogurt I used as a starter only had 2 probiotics/active bacteria (whatever you want to call them) listed, and I thought most capsules have a lot more varieties in them and that might be a way to add a little more 'variety' to your yogurt. I'd love to hear how your "test" goes!
Hi Tannis, I understand about the flavors and sugars. I add some sugar for the bacteria and some Splenda for taste - plus a pinch of salt and it turns out great...
The last batch I made was from mostly dry, powdered milk as I was running low on whole milk. It did come out a bit thin even though I added extra dry.
I ordered Primadophilus® Optima with L. casei-108; B. longum-135; L. acidophilus-122; L. plantarum-119; L. rhamnosus-111; L. rhamnosus-114; B. breve-129; B. bifidum-132; L. lactis-136; S. thermophilus-110; B. infantis-116; L. bulgaricus-137; L. salivarius-118; L. helveticus-128
Got it from Amazon with free shipping as I ordered some other things I needed also. So it should be here in a week or so - let you know how it turns out. BTW, read reviews of it on Amazon and one reviewer said he used it for yogurt and it turns out great.
Bill
Hi Tannis, I have tried both 8 probiotic strain yogurt and one that has 17 strains. The 8 strain one worked out well but the 17 strain was not as thick but tasted ok. Not being a microbiologist - I have to take on faith that some if not all of the strains ended up in the yogurt...
BWDIK?
Bill
They asked me to write a wikihow on making yogurt by machine: http://www.wikihow.com/Make-Yogurt-By-Machine
Any feedback would be greatly appreciated.
Hello from Scotland and thanks for the recipe.
I'm going to give this a try in the morning. I have some bio yogurt in the fridge that needs to be used up so what better way than to make more yogurt.
I'll come back and let you know how I got on, you make it sound so easy so I'm sure it will all go smoothly (literally)
Yesterday, I needed to make yogurt and was running low on whole milk. So I made up a mixture of 1 qt whole milk and 2+ qts homemade rice milk (had some vanilla, sweetener and cinnamon like horchata) and added 2 cups powdered dry milk plus 1/2 half cup sugar/Splenda mix and a bit of salt. I brought it to a boil and then cooled it, cultured it and put in jars into my yogurt maker... it turned our fantastic - great taste, fairly thick (like Activia) and I am amazed how easy it was.
I am probably going to have to buy a small chest freezer to store all the cultures - they are taking over my family freezer!
Bill
Thank you SO MUCH for this great recipe/method! This was my second time making yogurt and it came out perfect! (My first was the crockpot method & the results were liquidy and over-tangy for my tastes.) I halved the recipe and used 6oz canning jars sterilized in the oven, so it's already set-up like serving sizes for the week -- I just add mashed raspberries and a squirt of honey and enjoy!! My toddler loves it, too! Thank you again!! <3
Well, my first attempt was a bit of a failure....... no I take that back, it was a total failure.......... It was either the old yogurt I used or too much heat (I was incubating it in the oven by turning the oven on once per hour for 1 min and forgot to turn it off for about 10 mins at one point)
Second attempt was perfect, not as thick as yours but lovely and creamy..... made some naan bread with it too :).
I tried the crock pot method with skim milk and powdered milk. It came out so thin. I tried to run it through the coffee filter-let it sit ALL DAY and a little whey came out but not much still too thin. SO I did it this way with whole milk. Gosh that was thick yogurt this morning!
Thanks so much for this method! Much faster than crock pot, though now I have to deal with the burnt milk on the bottom of my pot, but that comes off with my fingernails.
I also ran it through a strainer into the jars. That most definitely needed to be done.
Valerie, the way I avoid the burnt milk at the bottom of the pot is to dump the heated milk into another pot before whisking in the other ingredients. Before doing that my yogurt would be graining like in texture.
Yesterday, I wrote on an old granola post you had regarding getting into making my own yogurt and granola for my favorite breakfast of fruit, yogurt and granola. Another good reason (and it probably has been mentioned in the past) occurred to me about doing my own yogurt is the reduction in trash. Once the individual yogurt containers are opened they are no good because they don't have replaceable tops like some I have had in the past.
I LOVE this recipe. I am having a little problem. It seems when I heat my milk I'm losing a descent amount of volume (almost 1/4 of my total milk volume). It looks like the lactose is crystallizing (or burning) at the bottom of the pot. Am I doing something wrong or is this nomal?
If you have a thin-bottomed pan, or you don't stir the milk regularly while heating it, a little bit will indeed stick to the bottom of the pan. This is normal, but it shouldn't reduce your milk volume significantly.
I have found if you use a slow cooker for the milk and turn it on warm overnight, it will bring it up to around 160F by morning. I turn it on high and stir once in a while and within an hour it is up over 180F.
In my new Wolfgang Puck multi-cooker, I turn it on Warm overnight and then use Steam once or twice to get the temperature over 180F. Be sure to stir several times while on steam or it will burn.
BTW, this past week I tried using Half and Half and then used a combo culture of Siggis, Chobani and Stoneyfield yogurts. OUT OF SIGHT!!! The Half and Half was on sale at Walmart for $1 which was the same price as milk... so it was worth the experiment.
Good luck!
Does anyone know if I can use goat milk with this recipe? I have a daughter who is allergic to cow milk but she loves yogurt.....our grocery store carries whole goat milk so I'm wondering if anyone has tried it? Thanks in advance, might give it a shot anyway.
Yes! I haven't done it myself, but I know that the original source of this recipe used goat's milk.
Hi Kristen. I have been making all of our yogurt ever since I first saw your recipe on your Awesome Blog. I use whole milk, but, I have been using 130 degrees as the temp to cool the hot milk to and add the yogurt. Instead of the 120 that I see here now. Could this be the reason that my yogurt seems a bit thin compared to commercial yogurt - I eat commercial yogurt when at hotels or on vacation. I have tended to leave my yogurt in the cooler for 4 hours instead of 3 hours, it does seem to make it firmer. But when we start to use it I see a lot of whey in it, or on it. Any tips to reduce the amount of whey, or firm up the finished product? How do the commercial guys do it?
Maybe I should write to them and ask them!!
how long should it be in the fridge to firm up before eating
So after two years the stars aligned and I finally made my homemade yoghurt. I have two questions for you though. First, the yogurt has a VERY mild flavor, non of the tang or depth that I associate with store bought yoghurts. Also, my yogurt seems to have a good consistency (although not quite as firm as yours perhaps) but there are "tendrils" that run from the spoon back to the jar or bowl. Not a big deal, just makes for slightly messier toddler eating! I used organic, whole milk and Stonyfield nonfat French Vanilla organic yoghurt as my starter. Were these issues due to my ingredients, process or are they to be expected when making basic homemade yoghurt?
Thanks for thoughts Kristen!
Leigh,
I use regular whole milk and extra dry milk and have used Stonyfield French Vanilla as a culture. I always use a blender to add the culture to the cooled milk and then strain it through a very fine strainer. It eliminates any grainy texture and I would imagine any tendrils.
Oh, and I use a yogurt maker - the shorter the incubation time, the less tang there is. When I let it go 24 hours, it is about as sour as it gets.
Good luck!
Bill
Bill,
Thanks for your thoughts. I didn't use dry milk or a blender and had no issues with grainy texture thankfully. I questioned Kristen for her thoughts as I am a big fan of her processes in the kitchen and I followed her technique which doesn't involve a yogurt maker. Your process may indeed create different results but another gadget isn't in the plans for my little kitchen!
Following the posted directions I'm curious if anyone has had similar results to mine?
Leigh,
My apologies if my suggestions rubbed you the wrong way. I like to read what others are doing to make yogurt even though they may not have yogurt machines. And actually, when my yogurt thickens in as little as 2 hours as it often does, I doubt if a machine is all that necessary.
And before you dismiss my other ideas out of hand, perhaps you have either a hand mixer or even an egg beater which could be used instead of a blender. And if you don't have a fine strainer, then strain the cultured milk through a towel or cheesecloth.
You don't have to try any of my suggestions - but I suspect if you do you will appreciate them and what they can do to improve your yogurt making, machine or no.
I have a gallon of milk incubating on the barbe.... er, in the yogurt maker right now and I hope it will turn out again like it has each time before.
And I would like to thank all the folks on this blog who have contributed all the ideas - I know I have benefited from many of them.
Bill
If you heat the milk too fast it will be slimy, and snotty like. The milk must be heated to 180 degrees SLOWLY. Once the temperature reaches 180 degrees, try to hold it there for 10 minutes. I don't recommend ever bringing the milk to boiling. Too high a temperature will also result in a slimy (tendrils) yogurt. I hope my suggestions help you. Good luck!
If you want it to be tangier, let it incubate longer...the longer it incubates, the more sour it will be.
The tendrils in my yogurt seem to be most noticeable when I'm using a fresh store starter. The longer I use starter from my own batches, the less gelatinous it seems to be. Trader Joe's yogurts always were that way too when I bought them.
Of course, if the tendrils drive you crazy, you could just use homemade yogurt for smoothies and store-bought for eating with a spoon.
Thanks for the great instruction! We drink smoothies every day for breakfast. I always like the idea of doing things myself and knowing what goes into my food. I incubated for 3 hours and then refridgerated. It's a softer texture than the starter I used (Narragansett creamery whole plain) but it's great for my purposes. I get my milk delivered and it has served me well for cheese making. Next time I'll incubate a bit longer and hope it comes out more like yours. I also made it during the hurricane....maybe the weather could have had some effect on it?
I've solved the problem of milk burning to the bottom of the pot by using a double boiler. If you don't have one, you can fake it with a metal bowl set over a pot of boiling water (the bowl has to be big enough to sit on the rim and not fall in!). Though the crockpot overnight sounds appealing.
I don't see why ultra-pasteurized milk should be a problem -- the whole point of heating the milk to 180 in the first place is to kill any bacteria (basically, you're re-pasteurizing) so they won't compete with the cultures you add.
I use pureed fruit to flavour yogurt, with a little drizzle of honey if the fruit is tart. Stir the honey into the fruit, then fold it GENTLY into the yogurt. I find this thins the yogurt a bit but not enough to be unappetizing. Certainly my toddler loves it.
We find adding flavors, granola, pureed fruit and so on after we make the yogurt to be more practical than to the dairy product to be cultured into yogurt. The reason is that we make about a gallon of yogurt each week and if we flavored it before culturing it with, say strawberry, the flavor would get mighty boring about the 3rd day.
By adding flavors etc just before eating the yogurt you have the maximum of flexibility in taste.
And sometimes even using a crockpot to heat the milk to pasteurize it can cause mild coagulation of some of the milk on the bottom and on any hot spots in the crockpot. But since I always strain the cultured yogurt into the quart jars, it isn't a problem and it doesn't affect the taste at all.
Good luck,
Bill
I have got 3 gallons of whole milk sitting in my fridge. And since my daughter (for whom the milk is alotted) doesn't drink the stuff I make yogurt with it. I would like to try this method, but don't have any wide mouth mason jars on hand. Would this work if I used plastic containers, ie old yogurt, sour cream, cottage cheese tubs? Or if I left it in the stainless steel pot used for heating the milk?
Currently I set my pitched milk on a heating pad, covered in a towel. But I have to stick around and turn the pad on every 15 minutes. I'd like something that I can "set and forget." Any help is appriciated! Thanks!
Yes, I've used plastic containers before...the only trouble with small ones is that they float in my cooler! But if you're using all small containers, you could just make the water level in your cooler lower.
Thank you so much for posting this great recipe for making yogurt. With 4 kids we go through a lot of milk products and this is a wonderful way for us to cut down on the container waste of buying yogurt. I love knowing exactly what we are eating as well, thanks again so much!
After that whole "wrap your crock pot in beach towels overnight" disaster, I had given up on making my own yogurt. I came across your site on Pinterest and am so happy. The kids and I just enjoyed a cup of our homemade yogurt and the cooler will now reside much closer to the kitchen. We are thrilled, grateful, wanted you to know that today, as well as being frugal, you were also an official science experiment. Many thanks.
Oh, that's marvelous to hear!! I'm delighted your yogurt worked out this time. Isn't it delicious??
Kristen, just wanted to say thanks. I've been making yogurt your way for about a year now and I'm so grateful for your post. I just made a fun little video of myself making yogurt. I hope you and your readers will enjoy it! http://vimeo.com/bobbiesue/yogurt
Wow, that is a neat video. Thank you.
Hi There Kristen,
I was very nervouos about making the yogurt. Thought it would be time consuming and not sure if it would turn out ok.
Well..........................I love it! It was so easy and tastes great. Some store bought yogurt is tangy and that is a taste I do not like. This is nice and smooth and clean tasting. I made the Vanilla yogurt. I brought a quart to work today and have made anyone I can taste it. I have handed out at least 5 of your recipes.
Thank you so very much for your blog, I have made 5 of your recipes and love every one of them. I have passed along the Tortilla Soup and Potato Bread recipes.
Kudos to you!
I just wanted to thank you for this recipe! I have always totally hated yogurt, wouldn't touch the stuff. But, I tried this with a vanilla starter and I actually ate a whole cup. (With grape jam added in, of course) I had to use the oven method, no cooler that small, just heated it to 170 then turned it off and put the oven light on when I put in the jars. Left it in there a little over 4 hours. Worked great, even with my husband coming home and turning off the light. I'm going to make some plain now and hope it can replace my beloved sour cream!
To Jeni:
Thank you so much for the "oven" idea! I just gave it a try and love it! No more dragging out the huge roaster oven and filling it with water, yeah! The oven method worked so well and thickness of my yogurt was even better this way. I was a little afraid at first because it was a little runny when I pulled it out, but it thickened the rest of the way so nicely in the frig.
Thank you:)
Kristen – I tried this recipe using whole milk and it seemed like it worked because when I took the jars out of the cooler and tipped them on their sides, the yogurt didn't move. I put them in the fridge all excited about the $$ we were going to save but when I later spooned it into a bowl it was pretty loose/runny and it tasted terrible. It certainly didn't look like the firm and creamy goodness from the picture in your post. Any idea what I did wrong or something I could try differently? Thanks!
Hmm. Did you use a name-brand starter? (I use Yoplait vanilla when I need a starter) Was your incubating water high enough to cover about 3/4 of the jars? Is your thermometer accurate?
Those are the most common problems....I hope your next batch turns out better! Homemade whole milk yogurt should be smooth and creamy and mild.
Thanks for the reply. I will definitely try these suggestions on my next batch.
SO incredibly excited!!! I just made this yogurt today and it turned out beautifully the very first time! It was VERY user friendly and my whole family loved it! I will DEFINITELY make this again (and again and.....).
That's just lovely to hear. Yay!
Okay, if I thought I loved this recipe after the first time, I am now convinced that I'm completely infatuated with making my own yogurt. I've made it 4 times now and it has been perfect every time! I made our most recent batch a few days ago and I thought I'd try something slightly different....I strained some of the whey out, as I saw had been suggested. Then I took our thick, delicious, vanilla yogurt (along with some fresh berries to top it) to a family gathering today. It sat amongst a small sea of chocolate mousse, cupcakes and pie on the dessert table. Wouldn't you know.....not only did it hold it's own, but everyone LOVED it! My mom even wanted to keep the leftovers and handed me a gallon of milk from her fridge to make more for her. LOVE this....Thank you SO much for sharing!!!!
I have great success making thick, creamy yogurt from cows milk, and horrible luck with thin, slimy goat milk yogurt. So I tried an experiment:
After heating my whole cows milk to 180 degrees for 10 minutes, pouring into 3 sterilized jars, and cooling to 112 degrees, I then added 1 tsp Fage greek yogurt to each jar as a starter.
Then I closed jar 1 (control), added 1 tps powdered cows milk to jar 2, and added 1 tsp powdered goat milk to jar 3.
After 10 hrs at 110 degrees, the results were:
jar 1 - thick and creamy
jar 2 - extra thick and creamy
jar 3 - slimy and thin (note this was COWs milk yogurt and just fortified with powdered goats milk. I would have expected the extra protein to make it thicker like jar number 2, but it was like there wasn't any cows milk present).
I would love to know why "essence of goat" ruins the yogurt texture, even if the yogurt base is cows milk... Obviously it is not a lack of protein, or fat, or anything like that. It really is too bad because I like the goaty taste!
I've been reading your post for awhile now but this is my first time commenting. I finally attempted your yogurt recipe and to my surprise it turned out perfectly! I really couldn't believe it!! For my first attempt I only a quart but next time I will make more for sure. I have a few questions.
I used Stonyfield as my starter because that was the only plain yogurt I could find with live cultures. I didn't really like the taste of the stonyfield and I found that my yogurt was a little tangy like the starter. Does the starter change the taste the yogurt will have?
You said that it is recommended that you shouldn't open the starter until you plan to use it. What if I want to use my homemade yogurt as a starter? I made it in a big jar and I opened it to serve some to my family. If I want to start using my own yogurt as a starter how does that work? do I have to make another batch as soon as I open it?
You know, I'd just use a container of vanilla Yoplait. The bit of sugar won't affect your yogurt a whole lot, and the Yoplait cultures seem to be a bit milder.
I set one jar aside to use for a starter...if I'm really on top of things, I make a small pint jar to use for a starter the next time.
Sometimes I forget to save some, though, and I just buy a container of yoplait (the single-serve kind) and use it as a starter.
I thought the starter had to be plain favor?Also could you let me know what size container or how much to use .I just got my yogurt maker.It makes 2 mqt's. it has a jar thank you. can use help be first time making it yself
I've often used vanilla flavor yogurt as a starter and it's fine. I wouldn't use a flavor like Key Lime Pie or chocolate, of course! But vanilla is fine.
Hi Tiff,
Experiment, experiment, experiment! For example, I make a gallon of yogurt each week for my wife and I and strain much of it to make Greek style yogurt. Here are some things I have learned:
You can mix several cultures together like some leftover yogurt from a previous batch either unopened or opened, Chobani, Stonyfield and Activia. This all goes into my blender and I blend it all together for at least 10 seconds. Then I pour it into several small containers, mark them with the cultures in them and the date and freeze them for another day. Then I use what is leftover in the blender container by simple adding the cooled milk and blending for at least 10 seconds and pour that back into my large container of cooled milk... around 120F. Whisk well and pour into continers you use to make the yogurt and make your yogurt - I use a machine.
A couple of hints I have learned
- do not add too much culture to the cooled milk or it tends to clump and become grainy or even turn into something like cottage cheese.
- I add a cup or so of a mixture of sugar and Splenda before heating the milk to 180F. It helps the bacteria grow and sweetens the yogurt a bit.
- I strain the cultured milk into the jars with a very fine mesh strainer.
- Don't be afraid to extend the length of time you use to make the yogurt... I have made it in as long as 16 hours or more and it turns out perfectly fine.
- Make BIG batches once you get the hang of it. Once you start using yogurt as part of your daily diet, as we do, it goes very quickly.
- If you strain your yogurt, the leftover liquid whey is good for soups and even in orange juice. I use half orange juice and half whey and sweeten it a bit with Splenda.
Experiment, experiment, experiment! You will learn so much by doing that!
And feel free to visit our website for more ideas and tips: http://mryogurt.info/
Take care,
Bill
Oooooohhh I'm so excited to try this recipe. Look like something I could do. I love making cottage cheese too!
How do you me cottage cheese? Would you post that?
make;)
Hi Barbe... several points on my post and Veronica's and your request for cottage cheese making instructions... and for any other Littly Miss Muffets out there... no slight intended:
Whenever you add acidic materials to warm milk (it can also do it all by itself under the right conditions) it will turn into the curds and whey that LMM ate. So when you add too much yogurt starter to the warm milk you are trying to culture - say a pint from a previous batch to a quart of your warm milk - the acidity of the starter can make the milk turn into curds and whey. I have had that happen several times - I just strain off the whey and eat the curd-like material. But even though it looks like cottage cheese, it really isn't - and if you are interested in making cottage cheese, here is a recipe: http://www.cheesemaking.com/CottageCheese.html - the process is a little more complicated compared to yogurt making.
And as far yogurt thickness.... we just strain whatever kind of yogurt we have made to thicken it to Greek style yogurt. But the thickness of the yogurt right out of the jar depends on so many things... the culture has a lot to do with that as does the length of time you have it at yogurt-making temperatures. Then, of course, there are additives you can add like gelatin to artificially make it thicker.
Experiment, experiment, experiment!!!
Good luck,
Bill
Thanks for the recipe Bill!
hi, i have a few questions on making yogart. Does this work with skim or 2% milk? Does dannon fit and light vanilla yogart work? if i use greek yogart will it make the final yogart thick. i can't stand to eat greek yogart it is tooo think for my liking. so i am looking to make it like the consisting of pudding. how and what would i use thanks
Nope, greek yogurt starter will not make your yogurt thick...you have to strain your yogurt to make it that thick.
Skim and 1% milk will typically not produce a thick yogurt unless you add some thickeners such as gelatin. You could try adding some powdered milk to make it a bit thicker.
My yogurt seems to be a bit thicker since I started using a greek starter and putting it in a 170 degree oven for four hours.
At 170F you kill all the cultures after they have done their thing... there go all the benefits from live cultures. And you probably cannot use the result as a starter...
Yogurt growth is best between about 80F and 130F max. My machine runs a little over 120F - I have seen it as high as 125F.
Now if you have your jars in a large water bath in the oven, it could well be that the temperature of the yogurt never gets as high as 170F.
Bill
A while back, one of Kristen's readers said that she turns on her oven to 170, then turns the light on and the oven off, and puts her yogurt in for four hours. This method has worked great for me. I have even used it for a starter with wonderful results, nice thick yogurt. I no longer have the hassle of a water bath and cooler. It just feels so much easier to make now.
thanks what would be the ratio of milk to powder milk?
When I make a gallon of yogurt, I add an extra 1/2 - 1 cup of dry milk. There are several powdered milks on the market and, depending on the strength of the powder, I adjust the amount accordingly. My recipe:
2 quarts of milk made from dry, powdered milk
2 quarts of milk - no-fat - from the supermarket
1 cup combo sugar and Splenda
1/2 tsp salt
1/2 to 1 extra cup of dry, powdered milk.
I add everything together except the cultures, heat it to 180F, cool to 120F, blend cultures with blender for at least 10 seconds with part of the warm milk and mix that back in to the rest of the warm milk, stir for a minute and strain into quart jars. It goes into my yogurt maker machine for at least 4 hours and up to 20 or more hours - time not critical... just gets more tart with time.
And using a mixture of cultures in a small amount (tablespoon to a cup) for 4 - 8 hours or more at 120F results in a yogurt which is usually almost as thick as Greek yogurt. But we strain it anyway for thicker Greek yogurt.
Bill
Today I attempted to make my second batch of yogurt using your method, since my first batch of yogurt did not turn out. I figured I'd start by making a small amount so I wouldn't waste a whole gallon of milk (I use Straus Whole Milk) if I didn't come out again. I used only 3 cups of milk to start. It took almost an hour with stirring to reach 185 degrees on medium heat. When I would turn the heat up the milk at the bottom would seem to stick but when I would turn the heat down the milk wouldn't heat fast enough. So finally after about an hour of stirring the milk to reach to 185 degrees, I was left with 1 cup of thick milk instead of the 3 I started with. I did proceed to add the yogurt started as directed and I am now waiting for the 3 hours to be up to place my jar in the refrigerator. I'm not sure what will come of out of this especially since it was as if I made yogurt with heavy cream instead of milk. I am a little 🙁 I want to be successful at making homemade yogurt. Can you think of anything I did wrong? Thanks.
On the flip side, I discovered how to make Alfredo sauce without using any flour for thickener.
Okay, so my yogurt looked thick and set up before I placed it in the refrigerator. And now after been in there for a while I finally opened it up to see what I made. Well, it looks just like the finished product in your photo BUT when I scooped out some to take a bite, it was thick and "curdly" almost like ricotta. This is the same thing that happened the first time trying it except it was runny and curdly. And suggestions on what I did wrong? Thanks!
Hmm. I know some people heat their milk by putting it in a crock pot overnight...you could try that! I always have some residue on the bottom of my pot when I heat my milk, but I just soak it and scrub it off each time.
What about microwaving your milk a bit before heating it? Then it wouldn't have to be on the stove for long.
Yogurt should definitely be smooth and creamy, not curdled. What starter are you using? I always use Yoplait or Dannon.
I use Straus yogurt as my starter. It works best for our family to have an Organic full fat yogurt with all five live active cultures. I was happy to see it nice and thick vs my first attemp. But it still curdly like small curds of cottage cheese or ricotta. I checked the temperature before mixing in my starter. And the temperature before pouring in my water bath. And I let my starter sit out on the counter way before I got started. The only other thing I can think of is that I gently stir in my starter (not whisk), or that my temperature is off and too hot for the starter before mixing in with the milk. I so want to get this right. I don't know what I'm doing wrong.
Hi Taylor,
Here are some suggestions which may work:
- don't use too much starter because it is acidic and can curdle milk. For a gallon of yogurt, I use less than a cup - more like 1/2 cup and it is a mixture of several cultures including Chobani, Stonyfield, Activia and others....
- put the starter in a blender and add some of the warm milk - about a quart from the gallon and blend it for 10 seconds or more. It is really important to distribute the starter well throughout the milk - so I pour the blended mixture into the rest of the milk and stir it well. If you are only making a quart at a time, I wouldn't use more than a tablespoon or two of the starter.
And I use a Wolfgang Puck slow cooker/rice cooker to heat the milk overnight. If I am in a hurry, I set it on steam for 10 minutes and stir frequently. Anything that sticks to the bottom get strained out of the heated milk after it has cooled, been blended with the starter and strained into quart bottles.
Good luck,
Bill
Taylor,
The same thing happened to me when I used creamline milk. I let it sit in the frige after TRYING to strain it (hoping that would help) and all that happened is the whey went to the BOTTOM...It was really weird.
I have been making yogurt the way Kristen does for close to a year (after failed crock pot attempts) and the ONE time (a few weeks ago) I used the creamline milk, what you are describing happened to me, but has nevere happened when I use conventional or organic store bought milk. I really tried to fix it since I spent $7 on a gallon of creamline milk but nothing worked. I had to toss it in the trash.
It looked like cottage cheese almost but without defined curds, kinda like a cross between ricotta and cottage cheese. I also tried to push it through a strainer and it just reclumped. I don't know what kind of milk Strauss is, but I wonder if it is the creamline (not homogenized) like when it happened to me.
I want to make honey yogurt, would I just add the honey in place of the sugar and vanilla?
Kristen - a few questions after 3 'so-so' batches of yogurt. The yogurt never seems to firm up as well as in your picture. It looks firm in the jar (I can tip it on it's side and it doesn't move) but when I spoon it out, it has always been kind of runny. I use whole milk, Dannon as the starter and have a digital thermometer. So, my questions:
1) Should the starter be warmed before putting it in the milk? I have been using it straight out of the fridge, but have recently wondered if adding the cold starter to the 120degree milk makes a difference?
2) When I add 1 gallon of water to the cooler, it doesn't come up very high on the jars. In a previous comment you mentioned that the water should come up 3/4 of the jar. So would you say that depending on the size of your cooler, just heat enough milk to cover 3/4 of the jar or should a gallon really be enough? My cooler isn't huge, but it's definitely larger than 4 quart jars.
3) Do you think it matters how much time passes while the jars sit in the cooler, before you add the warmed incubating water (the time between step #5 and #6 in your instructions)? Because regarding Q#2 above, last time I tried heating more milk after the gallon didn't come up 3/4 of the jar and more time elapsed before I could get correct amount of water in the cooler.
Sorry for all the quesitons, but I really want to get this right! I'm so appreciative of your blog and have learned a ton from you arleady. 🙂
Some thoughts based on my own experience with your questions:
Pre-question: If you stir in a packet or cup of powdered dry milk to the gallon of milk as you heat it you will get a much thicker yogurt - almost like Greek yogurt. Also, the culture you use has a lot to do with thickness. Try Chobani or Stonyfield or a combo of both... just make sure you use no more than 1/2 cup or so. Keep any leftover for your next batches. And I even add ground up probiotic tablets to the culture so I get plenty of the good stuff in my yogurt.
My answer to Question 1: It doesn't matter, really, whether the starter is warm or cold. In fact, I have seen studies of the culturing of yogurt and it will do so at almost any temperature from 40 F to 125 F. Naturally, it would take a really, really long time to culture at low temeratures. And sometimes I will let my yogurt maker turn itself off at 8 hours and then let it sit in a room temperature environment for as long as 12 more hours.
My answer to Question 2: Kristen needs to respond to this one. But I regularly culture 4 quarts of milk in my Waring Pro Yogurt maker and the water only comes up a couple of inches on the jars - but remember it is constantly heated water and I cover the yogurt maker with towels to make sure the heat is even throughout the jars.
My answer to Question 3: Kristen needs to respond to this one. I imagine if you add more hot water, things would work ok if it came up to at least 3/4 the way on the jar. And again, yogurt is made from sturdy microbes so the higher the heat - up to a max of about 125F - the faster the microbes work. They just slow down a bit when the temperatures drops and speed back up when you add the hot water.
So now you have had Microbiology 101. (Just kidding!)
I actually tried Stonyfield vanilla on my 3rd batch (the worst batch so far!) after trying Dannon vanilla on the first 2 batches. The 3rd batch was also not as firm as Kristen's just like the first 2 batches, but was also clumpy like cottage cheese. I use the whole container of yogurt which I think is 6 or 8oz. Do you use Chobani greek yogurt as a starter?
I have considered using powdered milk like some of the previous comments have mentioned but I can be a pretty stubborn person (LOL! maybe determined is a better word) and I keep thinking that I should be able to make this work since Kristen (and many others!) does it routinely with just milk and a starter! I would really like to master the process without 'doctoring' it up or needing to add 'extras'. I'm trying to keep it as simple as possible I guess, although if I drive myself crazy in the process I guess I won't have accomplished much....
Hi Kristen - I was just wondering if you had any thoughts on questions #2 and #3 above before I try another batch? Have you ever added powdered milk to your yogurt or does it always come out thick and creamy with just whole milk and a starter? Do you always leave the yogurt in the cooler for exactly 3 hours or do you ever let it go longer for any reason? Thank you! 🙂
I just use whole milk and a Yoplait starter, cold from the fridge.
I do have the water coming up about 3/4 of the way up my jars. In my cooler, that's a gallon, but maybe yours is roomier. Heat up enough water to go 3/4 of the way up for sure.
I've accidentally left mine longer than 3 hours, but not generally on purpose. Longer incubation will make it a bit more sour, but it's not a huge deal.
I have a question.. well 2 really... 1st if I use greek yogert for a starter will my finished product be like greek yogert? And 2nd... at the cool down step... insted of adding suger and vanilla could I use a flavored jello mix... or sugar free jello mix to make flavored yogert? I'm thinking orange jello mix would make 'creamsical' flavor and strawberry for the kids who like there yogert fun colors too... we do lots of fresh chopped fruit on our yogert....thanks!
Nope, Greek yogurt is made by draining regular yogurt so that the whey drains out. You can totally do that with your homemade yogurt, though.
I have no idea about the jello mix, but you could give it a try and see! Do report back.
Ok I made my first batch and when it came time to cool in the sink, I took out 4 cups into a smaller pan to try out the jello flavoring. I used 1/2 a package to the 4 cups... we didn't like it.. the kids found it to bland and I found it to jello-ish... it will be used for smoothies. The rest of the batch I made into the vanilla flavor we all loved this batch.. can't wait to make more, but plain... so I can make 'creamcheese' with it. Thanks for a great recipe I will use over and over and over!
Good to know! Thanks for reporting back to us.
Success!
First time making yogurt and it turned out swell. I was worried when the hubby brought home Stonyfield Organic Low-fat Greek yogurt for the starter, which seemed to be the trifecta of yogurt death based on reviews, but I went ahead with hopes high.
I didn't let the milk get quite to 185 degrees as I got impatient, and used one whole container (6-8oz) of starter to about 5 cups of milk. I used a large (1/2 gallon capacity) mason jar -- don't do that...lots of yogurt calling out to you at the bottom of the jar, unable to come out...cleanly, anyway -- and cultured in a medium-sized cooler with hot water (highest "hot" tap water) filled about a quarter-way up the jar (or about half the milk line). Oh...and I added about a teaspoon of vanilla in the cooling stage.
Kiddos loved it. Hubby, too. We mixed with strawberry pulp (left-over from the juicer) and agave syrup. Definitely a "make-again"...like today. It's already gone.
Thanks!
Beth,
Congratulations on your success.
Here are some thoughts I had when reading your posting:
- a cup of starter to 5 cups of milk is way too much starter to use, based on my own experience. That amount of starter can curdle the milk (the acid in the yogurt can do it) and cause it to separate. For the gallon of yogurt I make each week, I use a heaping tablespoon of starter and it works extremely well. And you might think about making up a starter combo like the Stonyfield, Activia and Chobani.... blend all together and keep in fridge/freezer (as yogurt cubes) for when you want to use it. And do use a blender to add the starter to at least part of the cooled milk.
- as you can see, you can go through a lot of yogurt very quickly. That is why we make a gallon - 4 quarts - at a time.
- try straining some of it through one of those plastic coffee strainers - I put the strainer in the top of a quart plastic container and fill the strainer to the top. Then I put the plastic lid from the container loosely on top and keep in the fridge for a day. Then I dump the yogurt contents into another quart plastic container (my Greek-style yogurt container) for use when we want it - which is a lot. The whey that is strained off can be used in soups and, suprisingly enough, in with orange and other juices. Healthy stuff, whey.
- and a delicious and quick way to use the Greek-style yogurt is to buy some of the syrup available online like peach or strawberry - I buy several bottles at once of the Torani brand through Amazon and get free shipping. Then take an ice cream scoop and scoop some of the Greek-style yogurt into a bowl and pour a tablespoon or so of the syrup over the top and stir. Yum! Quick, easy and tasty.
Good luck,
Bill
I really want to try this. Can you add in blended fruit when you add in the starter? I don't like just plain yogurt and if the fruit would work I would not ever have to buy yogurt again!
this blog post is so helpful! honestly I am just starting to eat yogurt, and now that I am obsessed with it I realized I spend a lot of money every two weeks stocking up. I had no idea that you could make it at home, your directions are simple and it will definitely be saving me money in the long run
my only concern is similar to ones below. Any chance you know the nutrition of the homemade yogurt? I enjoy a healthy breakfast so any nutritional facts would be great!
Kristen, I have to tell you, I have made your yogurt in the past and it is, hands down, the very best yogurt I have ever had in my life!
Thanks so much for posting how to do it.
You rock
Thanks for the yogurt recipe! The first time I made yogurt was total failure (different recipe) 🙁 This time it worked fantastically! We get headaches from aspartame, so this is perfect! I have a 4 month old, and I can't wait until he starts to eat yogurt, I'll know exactly what's in it! The only thing I did differently was put towels in my cooler instead of hot water, I was worried about my dog bumping into the cooler and knocking the jars over! Thanks again, I will be making my own yogurt from now on!
Oh, and I use stevia instead of sugar 🙂
I did'nt see in the comments if this was asked: Will this same recipe work for non dairy milk like soy, hemp or coconut?
Thanks for this recipe. I been making it from milk kefir grains but dont like the taste. I just use it for my home made farmers cheese. http://leascooking.blogspot.com/2012/04/homemade-farmers-cheese-for-breakfast.html
I will defiantly try this recipe.
We've had great success using low-fat milk to make yogurt!
Read about it over on our site!
There are several points to consider:
- the microbes involved in yogurt-making are fairly robust. The only damage you can do to them is to overheat the culture which can kill the yogurt microbes. A chart I have shows that the microbes can multiply at a temperature as high as 55 degrees Centigrade which is about 125 degrees Fahrenheit. While reducing the temperature slows down their rate of multiplication - they still can be kept going strong - even under 100 degrees F. So when you cool them down and put them in the refridgerator, they are still sluggishly active and if you leave the jars in the fridge for very long, the contents will get more sour as time goes by. I have let my yogurt culture, after the initial 8 hour or so, sit as long as 24 hours or more with no harm at room temperature.
And another tip is to super-max the culture by adding more stains of microbes to it. How do you know what to do? You can find probiotic tablets and capsules on the web... I use one that has 18 different microbes in it. I add the ground up tablets or I break open the capsules and sprinkle the powder over the culture and stir it in. In my method, I will take some of the cooled milk and add that to the culture - and blend that all together before stirring it back into the rest of the cooled milk. So when the cultured milk goes into the quart jars and into my yogurt maker - it has an entire cocktail of probiotics to work with and ultimately becomes the yogurt you eat after making the yogurt.
So you can think of it as a horsepower race of sorts - and hopefully, the more probiotics the better. From what I have read elsewhere, some of the microbes have shown no value to our bodily processes. But others seem to show that many digestive aliments like colitis can be helped by the right bacteria. And there is, of course, ulcers which may respond well to treating them with certain microbes in the yogurt.
But then I have only researched what is out there on the Web and am not a microbiologist.
Take care,
Bill
I made yogurt this weekend and have a quick question. I pieced together different recipes, so I could use the materials I have on hand as a way to save money. I used by cast-iron dutch oven to boil the milk and let the milk sit at 110 degrees in the dutch oven in my oven until the yogurt was complete. The consistency turned out wonderfully with descent favor, maybe a little bit too soar and a funny after taste. Do you think the dutch oven, which is cast-iron with no enamel covering, could have imparted some flavor into the yogurt?
That's possible, I suppose..I've never used plain cast iron to heat my milk (my dutch oven has an enamel inside). Do you have another pot you could try?
How long did you incubate your yogurt? My recipe calls for a slightly higher temperature and quite a short incubation time, which results in a less tart yogurt.
I LOVE this blog! Excellent directions, thank you do much.
A couple of things . . .one, aluminum reacts with yogurt. I use the plastic lids Ball makes specifically for their regular mouth jars and sold in a box of eight.
I make a LOT of homemade jam . . .and it's perfect with this yogurt. For extra special occasions, I reheat the jam, pour in the bottom of my special Weck jars, and when the jam re-gels, very slowly (so not to disturb the jam) fill the Weck jar the remaining way with yogurt before placing the jars in my Igloo to set up.
First few times I made this, I used my candy thermometer. Worked fine, but I did have to keep an eye on it. Finally, it dawned on me, I could just use my Poulder digital timer/thermometer. I lay a wooden spoon across the top of the milk pot . . .then with a clothes pin, clip the wire holding the probe until its in the center of the milk, not touching the pan. Set my timer to alert me when the temp is 190 F . . . .and again, when in the cold water bath, when the temp reaches 125F (leaving the remaining 5 minute drop for me to measure the starter and prepare for pouring 🙂
Very thorough directions! You can simplify the process (and create a lot less dirty dishes) by essentially creating a double boiler with the canning jars. Pour the cold milk directly into the quart jars then put those in the pot with water. After I get it to temp, I scoop out about 1/4 cup from each jar to mix with my starter then mix well and divide that between the jars. Walla!
I have had this pinned for a while and I really want to try it this summer! I will be sharing a link on my "favorite find" today. Thanks so much for the inspiration! I read you cost comparison and that was a huge motivator. I rarely buy the little cups of yogurt, but my kids get so excited when I do. I would love to have a healthy treat available to them all of the time. I also am cooking more with plain yogurt, but I use nonfat. I was hoping to make nonfat yogurt using skim milk, but I see many warnings in your post about the success of that.
Hi Heather, I typical use a mix of whole and nonfat for my yogurt. Since I make 4 quarts at a time, the nonfat milk made from dry, powdered milk contains extra powder. Today, for example, I have in my 1 gallon crockpot a mixture of 2 quarts of the nonfat milk reinforced with 2 extra cups of the powder. So instead of making it up with 4 cups of powder and 2 quarts of water, I made it with 6 cups of powder and 2 quarts of water. Then I topped it off with 2 quarts of whole milk, more or less.
I also added a cup of 50-50 sugar and splenda plus a half teaspoon of iodized salt. This is warming on the warm setting and soon I will be heating it to 180F for the heat treatment. Then it will be cooled to 120, combined with a culture made of many different starters strained into the quart jars and placed in my yogurt making machine for an overnight fermentation.
Usually it comes out quite well this way. If you were to make it with non-fat milk then I definitely recommend you add extra dry, powdered nonfat milk to it so it comes out thick.
Remember, you can always strain it for a thick Greek style yogurt.
Good luck,
Bill
Years ago I tried making my own yogurt and flopped. Then my daughter fell in love with yogurt and fruit, so I thought I'd give it another try. OH MY GOODNESS! This is way better than store bought. I thank you for the simple instructions and my family thanks you too. I'm sure this will become a regular menu item in our house!
I just made my first batch of yogurt last night & it turned out well. So excited. I had asked my Indian friends about their way of making it-they use a lot of yogurt in their dishes like curries). I heated up 1/2 gal of 2% milk up to near boiling(they told me to boil, though). Cooled the milk to lukewarm. Added about 1/2 C of warm milk to 2 tablespoons of plain Fage yogurt & whisked to smooth consistency. Added the mixture to warm milk & stirred. Poured mixture into two 32-oz size & previously sanitized yogurt containers (used diluted bleach to sanitize them & rinsed very well). Covered. Being in the Las Vegas is in a way a blessing in the summer. I left my containers in the garage overnight & the result is an amazingly smooth yogurt that is currently in the fridge draining in coffee filter to remove most of the whey to make it thicker.
I was just wandering if you could add fresh fruit to this process to make fruit yogurt?
I haven't used fresh fruit during the process since I just started making yogurt last week. I'm sure the fruit will spoil if you add it to the warm milk with the starter. You may add fresh fruit just before eating your portion.
Is your homemade yogurt like the Greek yogurt the stores sell? I would like to make Greek yogurt.
Even better. I am able to control the amount of sugar. I have also cooked down a piece of over ripe banana & some strawberries along with about 2 tbsp sugar. I use this to top the yogurt & added some home made granola for extra fiber. I have also made frozen yogurt with the Greek style yogurt. Simply add enough milk to make the consistency lighter. Add sugar or honey, if needed-remember, when this freezes, you won't taste the sugar as much. Add anything from chocolate chips, berries, mangoes, peaches, or anything you fancy. Place in ice cream maker according to manufacturer's directions. Alternately, place in pie pan, freeze. Good luck.
I'm pumped that I found this! I had used a crock pot version for a while but it was a more involved process....I'm making it now with 1% milk and instead of a cooler, I've put the jars in my bigger crock, wrapped in 2 blankets and sitting in the sun! We shall see!!!
Wow! Great yogurt! Fast, easy and tasty! This is my first time and I cut the recipe in half. I added the sugar and vanilla , and I used recycled jars. It turned out great. The cooler thing is much better and faster than other blogs I have read that suggested using a heating pad. Thank you for sharing!
WOW!!! I just made this yogurt yesterday and it is delicious!!! I am so impressed with myself! 🙂 I tried it with a half gallon first to see how it turned out and it was so easy. I used Trader Joe's whole milk and used 6 oz. of their low-fat organic vanilla yogurt as a starter. I am going to try a lower fat version and see how it turns out for me and the hubs! Thanks so much for this recipe. It cost me about $2.50 for about 2 1/2 quarts of yogurt!
Hi,
We use our yogurt so quickly that I am thinking of going to 2 or even 3 gallons at a time. The last gallon a couple of days ago was made with 1% milk and 2 cups of non-fat powdered dry milk. And of course just a bit (a tablespoon) of sugar - had to dial back on the sugar as my diabetes is acting up.
We make just plain yogurt and make part into Greek style by straining a quart or so. We add any flavors when we serve it. At least a quart or more goes into our morning smoothies. Yum.
I am looking at warming trays with adjustable temperatures to expand our yogurt making. That way we could use 6 or more 1/2 gallon wide mouth jars in a water bath on the warming tray.
Any ideas?
Bill
Hi Kristen,
I made this yogurt last week and I loved it! I made the vanilla version.
Thanks for sharing another delicious, cheap and easy recipe!
Have you tried using honey or agave nectar instead of sugar?
For anyone interested, I successfully made soy yogurt last weekend, with Kristen's picnic cooler method. I used Trader Joes blue box soymilk, and part Yoplait/part homemade dairy yogurt as starter. It turned out well. Soy yogurt comes out thinner than dairy. There are many things you can add to your yogurt to thicken it during processing (one being agar), but some of these may inhibit future batches of yogurt, if you use your old batch to make a new one. So I chose to strain my yogurt, next day, through a coffee filter, for 2 hours. The result -- a rich, creamy, thick Greek-style yogurt. If you use soymilk, make sure it has some sugar in it (or add sugar), has a high fat content (compare labels on packages at the store), and high protein. The bacterial cultures need these to do their thing, and make a thicker yogurt.
Lili,
I have had the same results as you have... in fact, you can make your own soymilk easily enough for a much lower cost than store-bought. And I found that adding a bit of lemon extract improves the taste.
Actually, you can make yogurt from many different "milks" like rice and almond milk.
We just use dairy milk since we are not lactose intolerant... and we make a gallon of yogurt at a time. I am looking for a larger yogurt maker so I could make 2 or 3 gallons or more at a time.
Good luck and God bless,
Bill
Thanks for the info, Bill.
I was quite impressed with the quality of the Greek-style soy yogurt.
I do make my own rice milk from time to time (when in a pinch --think horchata), and used to make my own almond milk. I may try yogurt-ing my rice milk. I watched a woman make her own soy milk once, but never tried it myself.
Hi. I just wanted to tell you what a great post this is. Very informative whilst being easy to read and digest. Unlike my yoghurt unfortunately. Recently purchased a yoghurt maker with the intention, (still have!) Of making my own yoghurt. With the machine, came a small recipe book with four or five recipes in it. I chose Blueberry Vanilla and set to, boiled the milk to 85 degrees Celsius as instructed and then cooled in a cold sink using added ice cubes to 43 c. Then mixed with dried skimmed milk, vanilla essence, sugar as I had no honey, vanilla essence and organic yoghurt starter before adding a heaped tablespoon of blueberry preserve to each jar followed by the mixture. I placed the jars uncovered in the machine and placed the plastic lid over the top. Recipe said to leave for ten hours which I did and then remove, stir together with the preserve at the bottom til smooth, place lids on and then into the fridge. Recipe states these will stay fresh for a week. I couldn't wait to taste one but when I did, was absolutely foul. Far too sweet, sickly in fact and the combination of blueberry preserve and vanilla essence on top of the three tablespoons of sugar didn't work at all. The only change I made to the recipe was to use whole milk when it called for low fat. I didn't realize at the time however the addition of dried milk was to compensate for the low fat so I didn't really need to add it. Yoghurt was sufficiently thick enough, it's just the way it tastes. Even my dog (Canine trash can) won't touch it. This means that being a waste not want not person, I've now got six remaining jars to punish myself with. I really like your method and the sound of your recipe, just wondered if you could give me an idea as to where I went wrong and any tips for future success. Also wondered if you may have a simple recipe for a mild strawberry yoghurt using fresh fruit. Thank you. Regards, Peter.
Peter, Do yourself a favor and make plain yogurt! You can always stir into it whatever you want. I make a gallon of yogurt a week and half of it goes to Greek-style yogurt and half I use as-is with flavorings, preserves, fresh fruit, and in smoothies, etc. The same goes for the Greek yogurt.
We have a yogurt maker and it takes very little time to make a gallon of yogurt. That way you have plenty on hand for whatever you want it for.
Good luck and keep trying!
Bill
Thanks Bill, your recommendations are a great help and I'll be putting them into action. Regarding the above recipe, it's supposed to have been written by a well known and top Irish Chef. I don't think it was very well thought out to tell you the truth and can't possibly have been tested unless by some other lifeform as it's absolutely minging and I followed recipe quite well I thought, (With said variation). Good news though, my dog Jack has taken a liking to it so is having a pot a day. 3 to go! The other thing with above recipe was the fact that after using the listed ingredients, had about half a pint of liquid ingredients left after filling jars which due to the ten hour culturing period, would have been dead before I could have re-used machine so a real waste. Certainly wasn't drinkable by me though cat and dog both thought it was great having the additional treat. Anyway, thanks again. Regards, Peter.
Just made my homemade yogurt for the first time and it was AMAZING. I used only a half gallon of whole milk (glass jar. pasteurized.) with 8oz of vanilla whole store bought yogurt, 1/2 cup sugar and 2T vanilla. So creamy and delicious! The texture was perfect! Tasted as good as store-bought! (If not better!) Thanks so much for this post!
Hi Kristen! Thank you for posting this recipe for the homemade yogurt! I think I will give it a try, but only my daughter and I will be eating yogurt, so I need to make just the two quarts. This may be a silly question but, would you also reduce the starter from 1 cup to 1/2 cup? It makes sense to me that you would, but I wanted to double-check before starting. Also, I wonder if this would work with using the lactose-free variety of whole milk?
Thank you again for blogging so faithfully. I find your posts to be so encouraging and inspiring!
God Bless!
Jenn, I make just a half gallon at a time. I reduce the starter to 1/2 cup. The proportion does matter. I haven't tried with lactose free milk, and would be interested as well, if this would work.
I make soy yogurt regularly now, and it always turns out fine.
I am also lactose-intolerant, but I love yogurt. So guess what I do? I make my own yogurt with “lactose-free milk”! It tastes no different than yogurt made from regular milk, and I can eat as much as I want with no gastric discomfort at all. I’m disappointed that there is little, or no mention at all about using lactose-free milk for making yogurt. Hopefully by mentioning it to you there will be a “grape vine” effect and lactose intolerant people can get in on the joy of making and eating yogurt, too. Good luck!
Quick note to let you know that I have tried other yogurt recipes that haven't worked----this one absolutely did! I was so glad that it thickened up in the fridge 🙂
Thanks so much for posting this recipe.
Awesome! I'm so pleased to hear that.
Just made the yogurt recipe last night (with 2% milk) and I am so excited! It worked!!!!!! Yummy. I put it off for a long time because I was afraid it was going to be hard, but it was really easy. Slightly time consuming because it was the first time and I stirred the milk the entire time it was heating and cooling. I am at high altitude, so I only heated the milk to 185 and it was almost boiling. I didn't sterilize anything, just washed all the equipment in very hot, slightly soapy water first. (I figured since you don't sterilize all the equipment, like the pots, stirring spoons, thermometer, why bother with the jars). I also left it overnight in the cooler for nine hours by accident, because I was too tired to stay up and set my alarm but the volume was off so I slept all night. It still worked!!! I used this recipe compared to the others I looked at because you put it in jars to set, and you use a cooler to keep it at the right temp. Genius...
Hi, I made yogurt this weekend and forgot about it in the cooler overnight! It should have been ready around 8:30 pm and I didn't remember it until around 12:30 pm the next day! I hate to throw it all out. Is there a way to tell if it is bad? It is a bit more sour than normal but it doesn't really taste bad. I just don't want my family to get sick! Any thoughts?
I think it should be fine to eat...a lot of people do culture their yogurt overnight. It just makes for a more sour yogurt.
Hi I made yogurt for the first time using your method and it came out great. I put the milk in a double boiler so I did not have to worry about the milk burning. I also added two tablespoons of powdered milk. I wanted to add sugar but I decided against it since this was my first time. I will try it when next I make yogurt. I do not like commercial yogurt because most are too sweet and overpowering in flavour.
I just had a taste of my attempt it is smooth and creamy and not tart at all which is great for me. Now the sky's the limit for what I can do with it yum.
I forgot to mention I used the cooler and I left the mixture there for four hours. The yogurt set perfectly. I live in the Caribbean so maybe that helped.
I made this yogurt today after doing a little research online to find the best tasting and care-free recipe that didn't take a lot of monitoring. I also needed a recipe that wouldn't cost much money to make and without expensive sit-in-my-cupboard appliances. I did add some sugar and vanilla as per your suggestion and although I am a perfectionist, I find no reason to change a thing. Very simple to make and really awesome texture and flavor. THANK YOU!!!
Wish I'd thought of buying jars at a thrift store! I ended up buying a whole case at Walmart, and they didn't have quarts so I did pints - but I think in the long run pints will work out better, since my son is the biggest consumer of yogurt but couldn't go through a quart in a week. It's in the cooler right now so I'm very excited to see how it turns out!
Molly, whatever works for you. I make a gallon a week but that is because my wife and I eat a lot of yogurt and half of it gets turned into Greek style yogurt by straining it.
Much of the yogurt goes into the breakfast smoothies we make with instant breakfast, milk, yogurt flavoring and sweetener - usually Splenda.
Put the pot of hot milk in a large basin of water. As the milk cools the water in the basin gets very warm. It is just the right temperature to pour into the cooler. There is no need to waste energy to heat water for the cooler as you already have it.
I'm so excited to try this, but I'm always a little hesitant about spoilage ... is the bacterial culture in the starter what keeps the "bad bacteria" out of the yogurt as it's cooling? Thanks!
Yep, it's totally safe. Commercial yogurt is incubated just like homemade yogurt (well, not JUST like it...obviously it's done on a much larger scale!) I've been making homemade yogurt for years now and have never had an issue with it spoiling.
I am so going to try this one. I have always to make my own yogurt, since my son eat 1 -2 of the single serves daily. But I have never seen any recipies that don't require a special "something"!!! Thank you for the post!!
This is the best yogurt recipe I have found (and I have tried plenty) - the recipe itself is very forgiving and really easy to execute.
It also works with greek yogurt or any other yogurt (as long as the yogurt you are using as a starter has active cultures)....
I am going to try it with soy milk next; I want to impress my lactose intolerant friends...
I have had great success making soy yogurt using soy milk and a soy yogurt starter. Rice milk didn't work for me though, for some reason.
Hi Kristen, I just wanted to say that I made this yogurt today and it is wonderful! I haven't tested it with the kids yet, but I am very optimistic. It has such a mild yogurt flavor, not tangy like most commercial plain yogurt. I used whole milk, which I normally don't buy to drink (we use 1%) but wanted my first experience with yogurt making to go as smoothly as possible. It was easy and required very limited hands-on time. Milk was on sale for $2.99, and with a .65 cup of starter yogurt, this was a very economical, coming to .91 per quart. Will do this again! Thanks for a great recipe!
I noticed that too when I started making yogurt...that the flavor is so nice and mild. I really don't like store-bought yogurt very much now!
I make my yogurt at night then put it in the oven with my electric blanket on low for the night...the oven door closed, the cord hanging out and into the electrical socket. Works like a charm.
Thanks for the instructions! I made yogurt regularly for a while, then we kind of tired of it. Now we're back on again, only organic, and I lost my directions! I use a "yogurt maker" (glorified heating pad/container) my mom got for me because she was grossed out by the low-tech method, LOL! I like the little re-usable glass containers it has though! I figured out yesterday that for little over the price of ONE quart of organic plain yogurt ($4 each), I can buy a gallon of organic milk ($5.50) and make FOUR quarts of organic yogurt myself! IF my teenager doesn't drink all the organic milk up first...
Isn't it crazy how much money you can save? I love it.
Loved your recipe! Best yogurt ever! I will never buy it from a store ever again. Easy and delicious. Thank you! 🙂
Hey Kristen! Once again, GREAT recipe! It totally worked on my very first try. Which is a relief after two failed crock pot yogurt attempts. I used Dannon Plain for my starter, 1% milk, mason jars and a soft sided cooler that we use for sporting events. I was worried that this wouldn't keep the temperature warm enough, but again it worked out GREAT! Thanks again for your repeated inspiration and help with frugal and healthy homemaking. Making my second batch today and writing a post soon and of course I'll link back. Have a great day!
I have tried using Greek and name brand yogurt as a starter with whole milk and both times my yogurt has come out runnier than I prefer. Do you have any suggestions to make it thicker next time?
You can try incubating it longer to see if that helps. If that doesn't, you could experiment with adding some powdered milk to your mixture.
Fresh yogurt will not be as thick as Greek yogurt, since Greek yogurt has had some whey drained out. If you want your yogurt to be that thick, you can easily drain it through a thin towel until it's the texture you like.
How much powdered dry milk do you suggest adding to a gallon of yogurt, and when should it be added? My yogurt has also turned out a bit runny, like honey consistency, after 3 hours incubation.
It's been a lot of years since I made my own yogurt and cream cheese. It was always better than the store bought, and couldn't be easier. I noted that the critical needs, as for preparing any foods, are for spotless jars, spoons, pots, etc. Beyond that, for making my yogurt, a good pot hanging thermometer. I raise my milk temp to between 106 and 109 degrees, and if I use Dannon for the starter, I don't need to measure how much I use. Simply scoop whatever the one teaspoon holds, mix it into the milk well, and that is all that is needed. I learned quickly not to use my home made yogurt from one batch for the starter more than 4 times. Using it more than 4 times just doesn't turn out a good tasting yogurt.
Thanks for doing such a great job with your recipe presentation. It will help a lot of people to eat better and live healthier.
I can't believe there are people who would choose to make such a chore out of making a batch of yoghurt. Invest in a yoghurt maker and give yourself a break. They work perfectly every time, aren't expensive and take up very little storage space and the little individual jars hold just the right quantity for one large or two small servings. The resulting yoghurt lasts about 2 weeks stored in the fridge and the last jar can be used to start the next batch. I'm a great believer in 'scratch' in the kitchen and have been making my own breads by hand for nearly forty years but I think making work for yourself unnecessarily (like the above method of producing yoghurt) is not sensible. The end product is no different than the one coming out of a yoghurt maker. Spend your time learning to make your own bread instead; now that really does produce something totally unlike anything you can buy.
I think that's great that you enjoy your yogurt maker. A yogurt maker doesn't make enough yogurt at one time for my family of six, though, so the method I outlined in this post is much more practical for me.
I do make my own bread too. 🙂
My yogurt maker, a Waring Pro model, accepts 4-5 pint wide mouth jars or 4 wide mouth quart jars. The trick to using the quart jars is to throw a towel over the top of the unit which does not reach the bottom with the larger jars. Then set it and forget it, as they say and perfect yogurt every time.
I agree wholeheartedly that many yogurt makers do not make a lot of yogurt at a time which is counter (no pun intended) productive as well as inefficient. Remember, making Greek style yogurt requires you strain off much of the whey which reduces the amount of yogurt you have by half. So making a gallon of yogurt in our yogurt-maker at a time is perfect for us.
And another trick we use is we always make plain yogurt and then add any flavorings aftwards. In that way you aren't stuck with a gallon of, say, lemon yogurt which can get tiresome eating after a week or so.
For more ideas, visit our site mryogurt.info - and like this blog - no charge and a huge amount of information.
I believe that each of us is entitled to our own interests - you may be drawn to making your own bread, others their own yogurt, others grow their own vegetables and so on. I personally don't like to have too many "gadgets" - but that does not mean that I am knocking it for you !
This sort of forum that we are on works best when people interested in the subject matter voice their opinions in a nice, polite but more importantly respectful way...
I just wanted to thank you again... my family of six goes through at LEAST a gallon of yogurt a week. We're enjoying strained yogurt, using it in recipes, smoothies, just as-is and so much more. I've never had a failed attempt and it is just fabulous... not to mention cheap!! I never had to buy a single thing! I can't thank you enough for how simple and awesome this recipe is!!
Thank you so much!!!! The more I make the better it gets! We LOVE your recipe. 🙂 God Bless you and your family and keep sharing!
Thank you for your directions on making yourger.. I have a yogut maker but it's a pain since the containers are only 1 cup.. I will have to try your method in the cooler next time..Also, I never sterilzed the jars.. I will have to do that next time too. Also, my son is lactose intolerant and we make butter with whole cream . first we make the yogurt than we chill the cream than we whip it with the mixer...some of the water/milk comes off so we usally make pancakes with that. Thanks again, I will be visting your site again.
Help!
I was in the process of making yogurt this morning for the 3rd or 4th time (we love it!), when company arrived at the door ... needless to say, my time line got re-arranged, and now I only have 2 hours before needing to leave for the afternoon. Am I better to leave it in the cooler for just 2 hours, or until I get home, which would be 6 hours ... Thanks for your help!
Leave it in for six, for sure! 2 hours isn't really enough time to let it incubate, and incubating it for six hours won't be a problem at all. Your yogurt might be slightly more tart this way than it was the last few times, but it shouldn't be a huge difference.
So I finally made this last night and it was very easy 🙂 . I left it out last evening in the warm water and they thickened up somewhat. It went into the fridge this morning. I just tried a bit and it tastes good, but it's more soupy than thick. Do you know how to make it thicker, like the Greek-style yogurts? Thank you! April
I use my mesh coffee filter to strain regular yogurt to make Greek-style yogurt. I place coffee filter over a funnel & place them over a used quart size yogurt tub to collect the whey. The fit is perfect. Place yogurt tub top over the yogurt or cover with plastic wrap. Leave in fridge overnight, even longer if you want really thick yogurt.
Good luck.
when making the yogurt, do you add any sweetener or vanilla and when would you add that?
I do indeed! At the bottom of the post is a vanilla version, which explains how I do that.
I add a little sweetener & vanilla while I am heating the milk. Go easy on the sweetener. You can always add some honey or fruit preserves when you eat your portion.
I stumbled upon your blog a few days ago and have been reading a little bit of it slowly ever since! It's very inspiring. As for this post specifically, I would love to try making your yogurt recipe, eventually. I eat a ton of yogurt and the expense certainly adds up. I am a bit worried though, for two reasons: (1) I am not much of a cook, and (2) I've been eating Greek yogurts for the past year or so now and am very used to the taste and texture. Do you have any suggestions of things I should practice cooking first, or could you tell me how difficult it was for you to adjust from standard, consistent brand yogurts to hommade?
I actually prefer the homemade yogurt to the stuff from the store-it has a much milder taste, in my opinion.
To make Greek yogurt, you can just strain this yogurt through a fine-mesh sieve (leave it in the sieve over a bowl in the fridge for an hour or two). The whey will drip out and you'll have Greek yogurt. That's how they make the commercial stuff...by straining regular yogurt.
That's actually really good to know and makes me much more determined to learn making yogurt, thank you!
Side question - is there anything you can do with the whey once you've strained it out?
I use a small amount of whey in soups and I mix half whey and half orange juice... great drink.
Oooops - should read Bill and not BKK
A bit in soup and you can also use half whey and half orange juice for a great drink..
Awesome, thank you!
I bake with the whey in 50/50 proportions with milk. I use it in scones, biscuits, pancakes, muffins and waffles. If I'm not going to be able to use the whey within a few days, I freeze it in 1/2 cup portions, to thaw and use later.
I made this a couple of times last year and liked it. Over the last few weeks i've been making it regularly and like anything, the more you do it the easier it gets. The last few batches have been amazing, really thick and creamy and my family and I can't get enough of it.
Thanks for the recipe
I've been making yogurt for about a year and this is the best recipe I've tried. The yogurt turns out perfect every time. Only change I made was instead of putting it in a cooler with hot water, I just put the jars of yogurt in a stock pot with the hot water and sit it in a slightly preheated oven!
Oh my goodness. This is the easiest recipe I have ever seen. My time at work has been significantly cut, until probably March, so I have plenty of time to do things like this.
I can't wait. When and if we're blessed with a child (I'm 35 and it will be only one) I hope to only work 24 or so hours a week and I'll need to be as frugal as possible.
Thank you! I read several articles on how to make home made yogurt, but yours seemed to be the most user friendly! I am now eating my yogurt!
I made yogurt for the first time a few days ago, and I followed your recipe exactly, with the exception of using Stonyfield Light vanilla yogurt as the starter. I used 1/2 cup sugar and 1 Tbs vanilla. Oh my, it is so good! At first I didn't think it was enough sugar to suit me, but by the time I opened the 3 quart, I was completely hooked on the flavor. It was almost as thick as yours, but not quite. I will try it with your recommended starter next time and see how that goes.
Thank you so much for the concise tutorial! We have some serious yogurt eaters in my house, and I usually buy around $20 worth EVERY week (4 quarts of StonyField and 1 quart of Chobani). By following this recipe, I will be able to cut the cost down to around $5 per week.
Thank you, thank you, thank you!
thank you for your recipes, is it possible for future reference that you could maybe translate weights and measures into metric also
I'd love to be able to do that, but I'm a one-person operation here and I'm probably not going to be able to find the time to do that. I bet there are some converter tools online that you could use to convert them yourself, though.
Hope your yogurt comes out great!
Hi Jane,
I know you posted this awhile ago, but I was just reading through comments, and noticed your question about metric measurements. I use a 4 L bag of milk, and about 250 ml. of starter. The temperatures above translate to: heat to 85 - 90 degrees (celcius), and cool to 48-49 degrees (celcius). It gives a little more than 4 one litre sized mason jars - I use four of those, plus one 500 ml. sized jar.
Hi Kristen, I really love your ideas and am looking forward to trying out this homemade yogurt recipe. I am just wondering though, I know that you mentioned that the yogurt will keep in the fridge for up to a month. Is this time frame for the unopened/unused yogurt only or for both unopened as well as used?
Thanks
The up to a month is for unopened jars. I'm not entirely sure how long an opened jar would last (ours are usually gone within a day or two of opening them), but it wouldn't be a month. Maybe 3-5 days?
If that's a concern, you could always pour your yogurt into smaller jars and then incubate them. That way you could open just a pint or so at a time.
I was just wondering if anyone has tried using any flavoured yogurt as a starter. By flavoured i mean the store bought vanilla flavour. I can only have sugar free yogurt and silhouette brand is the only one that doesnt have regular sugar in it in my area and i just bought a new container but its vanilla flavoured. Do you think it would work ok with the vanilla flavouring in it already?
Yup, I use vanilla starter on a regular basis.
Why did my yoghurt come out of the cooler runny? I am worried it won't turn out
The most likely cause is a faulty thermometer, which may have meant that your milk was too hot when you added the starter, and that would kill the starter bacteria.
Another likely cause is an off-brand starter yogurt-I've had failures with those before.
The good news is, if the milk turned sour but is just runny, you can still use it to make ricotta and whey. Just bring it to a boil and it will curdle, then strain it through cheese cloth.
Can you add flavoring to the yogurt? Like coconut or vanilla maybe flavoring that you like? If so when would you add it. Thanks so much for posting this I am excited to try his my family loves yogurt!
Yup, I add vanilla and sugar right before I add the starter.
Gosh! I feel so domestic.
My first ever batch of yogurt is incubating in my cooler as I type. I had few of the supplies on hand so picked up jars at Value Village, lids at another store, and a candy thermometer at the grocery store. I do have a meat thermometer but I think it is past its prime as just sitting on my counter at room temperature it reads 140F.
I hope I did everything correctly and that I don't end up with something resembling milk.
Coming back to repor that there is a lot of liquid in my jars and from your finished product picture about it looks like you had no liquid in your jars after the finished setting in the fridge.
I know it can be strained but I'm wondering what I did wrong in order to have so much liquid. I used whole milk and was hopeful it would be as thick as yours above.
Oh, bummer! I was nervous yours wouldn't turn out when I read that your thermometer wasn't accurate. Careful measuring of the temperatures is really important for this recipe to work, and I would DEFINITELY recommend getting a properly working thermometer and trying again. If your temps are too hot, you'll kill the yogurt cultures and if your temps are too cold, it will take much longer to incubate than what this recipe says.
I think it turned out as it is supposed to after all. I do have an accurate thermometer as I bought a new candy thermometer when I noticed that my meat thermometer clearly was out of whack.
There was not nearly as much liquid as I had thought once I opened a jar. I have one jar draining in the fridge right now but when I poured it into the strainer, there was a not a lot of liquid immediately running out.
Your final picture looks like you have no liquid once yours is ready. Is that true?
Thanks so much for the recipe and all the helpful replies to our questiojns.
Oh, I'm sorry-I misread your first post! =P
Mine generally does not have any liquid in it until the jar is opened and partially used. Then some of the whey tends to separate as the jar sits in the fridge.
A question: what do you mean by "cooler"? Is that an ice chest, like you'd take on a picnic? What size would you use? I don't have one, but summer is coming so they shouldn't be hard to find.
Another question: can lactose-free milk be used? I buy lactose-free yogurt for my husband but it's (a.) expensive and (b.) hard to find.
Yep, like an ice chest...an insulated box. Mine is a fairly medium size...just a little bigger than it needs to be to hold 4 quart jars, as you can see in the photo.
Wendy, I can't have lactose myself. I make soy milk yogurt. I use Trader Joe's blue box soy milk. It comes out slightly thinner than the dairy yogurt I make for the rest of the family. I strain it on the second day to thicken it up a bit.
If by lactose-free milk you mean something like Lact-Aid milk, the Lact-Aid milk in our area is ultra-pasteurized. On several sites I have found that ultra-pasteurized milk has not been successful for making yogurt. I didn't want to waste the $3.50 on the Lact-Aid to find out for myself. I'd be interested in hearing any first hand experience on using the ultra-pasteurized milk.
I don't if your husband would be interested in soy milk yogurt, but I've been very satisfied with the results.
Thank's for the instructions. I found an error in your instruction. To sterilize equipment, you need to heat it to 250F, something you can't do by boiling water at normal pressure. You can do this with a pressure cooker, but given your success with your method, sterlization is probably overkill.
What your doing may be considered pasteurization, as you are heating the equipment to temperatures above 160F, which kills most pathogens. You could also use Starsan or Iodophor, which are used in brewing to achieve the same ends.
Another tip from the brewing world is regarding boil-overs. We often use a chemical that goes by the brand name Fermcap-S. It is a detergent. Just add a drop or two when the foaming begins and the foam will break up. The bacteria might eat the chemical later, if they are anything like yeast.
Hi there!
I am dying to try this but I don't have a cooler and I actually don't have a crock pot either... is there anything else I could do to achieve the same results??
Maybe give one of these methods a try? http://www.salad-in-a-jar.com/recipes-with-yogurt/more-than-six-ways-to-incubate-yogurt-without-a-yogurt-maker
I put mine in a stock pot with 120 degree water and put it in a slightly warm oven with the light on. Works great!
I made this recipe over the weekend and my family loves it. I was extremely surprised that it work just like the directions said. We are enjoying it so much that we are now throwing new items into it - such as - strawberry jam and I am now making homemade granola to put in it. We plan on freezing it too. Thanks again for sharing this recipe. I love it!
why did my yogurt didn't thicken up, is it because I forgot to put the warm water in the cooler when I cooled them
Oh yes, you definitely need to have warm water in the cooler. Otherwise, it will get too cold for the yogurt cultures to grow.
can I fix it???
Well, that can be a little bit disastrous, as I've discovered...you'd probably end up with separated milk during the heating phase. I'd use this batch for smoothies, and then try again with incubating water next time!
will fat free milk work?
Yes, but your yogurt will be thinner and not as creamy.
So happy to have found your post about yogurt and excited to read more of your blog! 🙂 Thanks!
THANK YOU for the easy recipe with great directions! I've looked all over the internet at a lot of homemade yogurt recipes, and yours was by far the easiest. I tried it this morning, and OH MY GOODNESS, it was so delicious! Thick, creamy. I just can't say enough. I had some heavy cream on hand (yeah, terrible for me, I know), and I substituted that for part of the milk. It worked great!
Also, if someone doesn't have a cooler or slow cooker, I turned my oven to "warm" (under 200 F) while the milk was cooking, then turned it off. Then I put the jars in a towel-covered baking pan, and put that in the oven with the light on for the amount of time you have in your recipe. Worked great!
Question: All of the other recipes I've seen say to leave it in the "incubator" for 8-10 hours. Why does your recipe work in half the time?
That's because I'm incubating at a pretty high temperature. Most other incubation methods are lower than 120 degrees F and/or are indirect heat, whereas in this recipe, the jars are directly touched by the hot water.
So glad your yogurt turned out well!
I have followed this recipe multiple times and my yogurt has always turned out. This time I noticed I had accidentally bought fat free yogurt. I used it anyways as it was very thick, but a day later and my yogurt is still runny. Can I reheat it and add more yogurt to it?
That might turn out weird...I tried it once and ended up with some pretty disgusting curds and whey. I'd use this batch for smoothies and start fresh next time!
I tried your recipe and added a few tsp vanilla, it turned out very watery... Not sure how to avoid that next time. Could it have been from the vanilla or the type of milk I used... Used homogenized milkfish organic. It still seems good but seems to leak out water. Thanks for sharing! Love your blog! 🙂
If your milk was ultra-pasteurized, that could be the problem. Generally organic milk in the paper cartons is ultra-pasteurized.
Thanks, I'm going to try non organic milk this time... Thought I really wanted my own organic yogurt. Ill keep searching for ways to make that work. I'm hoping to find an organic non pasteurized milk source. 🙂
Ive tried this twice, and after three hours in the cooler it is as runny as when it went in, i used whole milk and fresh starter. but it never worked
Hmm. Are you positive that your thermometer is working correctly? Is the water in your cooler reaching almost all the way up the jars?
I've found that mine can take as long as six hours to set up. Also, I've had 2failed batched and discovered my thermometer was off by about 8 degrees, so i was adding my starter when the milk was still too warm. New thermometer=perfect yogurt.
I've found that mine can take as long as six hours to set up. Also, I've had 2 failed batched and discovered my thermometer was off by about 8 degrees, so i was adding my starter when the milk was still too warm. New thermometer=perfect yogurt.
Hi, Thanks for the great tutorial. Can't wait to make this! Just a quick question though... have you ever used honey or maple syrup instead of the sugar for the vanilla recipe? Wondering how that would turn out and what amouts to use... Thanks for a reply:)
I haven't, but you could certainly experiment with it. I think it would make the yogurt a little less thick, since maple syrup and honey are both liquids.
I have heard that honey will kill the cultures in yogurt if you put it in at the beginning. We things like honey and flavorings in after the yogurt has set.
Bill
That should read "... we add things like honey..."
Thanks:) I decided to do it plain and we have just been adding a little maple syrup to our yogurt when we eat it. So yummy! I'm so excited how great it turned out! I made a gallon a couple days ago and its almost gone already! My kids are crazy over it 🙂 I also made some of it into greek and it is fabulous! Thanks so much for the recipe.
I have made your yogurt several times and we all love it! I have a couple of questions?
1. Has anyone followed your method for raw milk? I have switched to raw for our drinking milk but am nervous about wasting it in an attempt to make yogurt.
2. I ade some yogurt about a month ago and it still tastes great. My understanding is that it doesn't go bad, just gets stronger. True?
3. My starter is about a month old as well. Will it still be viable for making a new batch? I am almost out and ready to make more.
I hate wasting food and wanted to check on these items before I started cooking.
Thanks so much for the help!
Raw milk works just fine for making yogurt...better, actually! The yogurt tends to be thicker.
The only time I've ever had yogurt go bad was when an opened container sat in my fridge too long. The unopened jars stay good for quite a long time. I suppose eventually they'd go bad, but I haven't tested it out because we eat it too fast!
The starter that's a month old should be fine, although in full disclosure, I've never used one that's a month old, so I'm just guessing here.
I used raw milk and it turned out great:) We, for the most part, drink only raw milk so I was happy that it worked!
Joy. Thanks for the success story on raw milk. We only drink it as well but read about some issues when using it to make yogurt. Question. Do you follow Kristin's method? Heat, cool, starter, incubate, chill? Same amount of starter? Does it thicken well?
Thanks
Laura, I followed her method except I left the yogurt incubated in the cooler closer to 6 hours. It was surprisingly thinker than I thought it would be. Also, I then made half the yogurt into greek by straining it through a dishtowl in a collinder over an ice cream pail in the fridge overnight. It turned out wonderful! Good luck:)
new at this going to try it got fingers crossed
So I tried it again using regular milk not organic, it's much less watery and thicker but it seems slimy. When I scoop the yogurt strings seem to be attached to the contents still, it reminds me of egg yolk. It tastes fine I think. Any ideas abot the "stringy slime"?
Ok, I searched the internet for yogurt makers for 2 weeks and then decided not to buy any of them. For one, there were such mixed reviews and two they all seemed to be made in China and I'm a USA buyer! So last night, I made this using a quart jar and a tall Coleman thermos/cooler that is made for holding water/liquids. The jar fits perfectly in it. The yogurt came out beautiful. It sat for about 8 hours, and the consistency is thick. Can't wait to eat it after it has cooled!
Do the jars have to be sealed (new lids) when you put the warm milk in?
Nope-these aren't sealed like canned tomatoes would be (you have to store the finished yogurt in the fridge.) So you can use old lids or the plastic reusable lids that Ball sells.
Are you careful about not disturbing it before it's cooled in the fridge? I used whole milk and good yogurt, and it's a little runny. How long does it need to refridgerate before it's solid? I used greek yogurt, will that affect the consistency? Can I put it back into a crock pot after it's been cooled to let it warm for a few more hours to get it thicker?
This is my second attempt, and it's just not working out for me :(. Maybe my third time will be the charm.
Some batches I make are more runny than others, but I'm not sure why. Did you incubate it in the crock pot or in a cooler?
Ok, that's good to know. Well, I hadn't found your recipe until this morning, so my attempts have been with other methods. This last time I tried incubating with them wrapped up in a towel. Next time I'm going to try your cooler method. Do you use raw milk, or store bought whole milk? I just used my daughters Vit D whole milk and have never bought raw milk before. Have you tried using a greek yogurt to start?
Ohhh, ok! Well, yes, definitely give this method a try. I think it'll work out for ya. Just make sure to be precise about your temps, and make sure your incubating water comes at least 3/4 of the way up the jars.
Store-bought whole milk works fine, but don't buy the ultra-pasteurized sort (the kind in a waxed carton). The type in plastic milk gallons is typically not ultra-pasteurized. Raw milk also works really well but it's not necessary.
I have not used Greek yogurt, but I've heard of other people doing it with success. I've had great success with Yoplait and also have used Dannon. I had a failed batch with a store-brand starter once, though.
Just so you know, you can use your runny yogurt to make smoothies...no one will ever know it wasn't firm. 😉
This may have already been asked but I don't have time to read through the 300+ comments 🙂
Can you directly add fruit to the jars such as blueberries or blackberries? Or should this be done using fresh berries when you decide to eat it?
It works better to add them right before you eat the yogurt, because adding it to the yogurt itself tends to make the texture a bit watery.
Savannah, You can add lots of things just before you serve the yogurt. After putting it in a bowl, we add granola and a fav jam like sugar free strawberry. It doesn't take much to flavor it. And there is a world of extracts and flavors out there... Take care and good luck. Bill
We have been making yogurt for years and we use a commercial powdered starter that we get in the health food section of our grocery store. Lots of commercial yogurt manufacturers, like Stonyfield, have proprietary cultures that just won't work making yogurt at home. I have had much more consistent results at home and I think it might be cheaper than buying a cup of yogurt. I always forget to save some for the next batch. Also, don't sweeten with honey before you incubate, it won't set up. I have learned this the hard way twice...once initially and then again about a year later after I forgot my first mistake.
I am trying this recipe for the 1st time. It is super easy. My only questions is if you make a half batch do you need to reduce the amount of the yogurt starter? I ended up with more than I could fit in my 4 pint jars for a half batch.
Thanks!
That makes sense to me, but I've never made a half batch, so don't take my word as gospel. Report back if you try it that way!
Thanks, I got nervous and used the whole culture. Lol. My husband and I loved the yogurt so much we polished off the half batch in a week! I used my yogurt from the previous run as the started for my new run and it turned out great!
I was wondering though, is the yogurt usually thinner in the middle? The top, bottom and sides are sturdy and thick but the center seems to be more soft. Is that common?
Hi there,
I stumbled upon your recipe today and am keen to give it a shot.
I don't know if you are still posting on this site but I wanted to talk about your post and your recipe in my blog. I have added the link to it in the "website" field. I hope it is ok if I link to your site and use one of the photos in mine, please contact me asap if you would like me to take it down!
Thanks, Sophie
Yep, that's just fine!
Hi,
My friend and I both enjoyed this recipe for many months, thank you. For some reasons neither of us can make it firm up anymore. We both have double checked starters, milk, thermometers etc. One thing we can think of is the seasonal change from winter to spring. I know that seems like we are reaching for an answer but we are really trying to figure out the problem. We have used several gallons of milk without getting yoghurt and getting a little swayed from doing it anymore. Can you share has this ever happened to you before? Have you gone through a period where it would not just set? Any suggestions? We would really appreciate your feedback as we too are frugal and hate to lose a good thing.
Thanks.
Oh man, that stinks! I wish I knew what to suggest. You're positive your thermometers haven't gone wonky, right? Have you tried a different brand of starter?
I followed the directions to a "T", but after 3 hours my yogurt was pure liquid? I have some in the fridge and kept some in the cooler waiting to see if time will thicken either way. I did add the vanilla & 1/2 cup of sugar and I used 6oz of chobani Greek yogurt, instead of the others. Any advice or is this batch a total flop?
I know people have used Greek yogurt as a starter with success, but I almost always use Yoplait and have great results.
If this batch doesn't thicken up in the fridge, I'd use it for smoothies, and try again with a Yoplait (or Dannon) starter.
I used your recipe to make my first batch of yogurt. After refrigerating overnight the yogurt did not thicken. What did I do wrong? Can this same batch be reheated for another try? Thx
I had a dud batch once that I tried to save and the results were terrible! I recommend using this batch for smoothies.
Common issues are a faulty thermometer, an off-brand starter (I use Yoplait.), or ultra-pasteurized milk.
Oh bummer. 🙁 Ditto to what Kristen said - and keep trying, it really will be worth it!
Good morning all :),
I just wanted to pop in and say last night I made my 4th batch of homemade yogurt from this recipe, and up until last night it turned out beautifully! Alas, last night I followed the recipe exactly, except I forgot the part about using generic yogurt. And yes - it was a major fail. I now have 4 mason jars of milk! So strange that the generic brand makes a difference? I wonder if they don't use live cultures? Anywho, just a warning to others reading and learning this - use the good starters just like FG's recipe says. I'm not too bummed, still going to use the milk for granola, etc. You know what they say - no use crying over ruined yogurt!
I read other yogurt recipes that say to allow the jarred yogurt to rest in a warm bath for 7-10 hours, rather than just 3hours. So the batch that I thought was a dud ended up working! I let it set for an additional 5 hours and it thickened.
WOW I have to try this !! We eat A LOT Of yogurt. Its pretty pricey for as much as we consume weekly. How would you add fruit to this ?? Such as peaches, blueberry or strawberry. As those are the family's favs. Can't wait to try this ! Thanks for sharing !!
We stir in fruit after the yogurt is made...when we serve it. Adding fruit during the yogurt-making process has always made mine too watery.
Help... I made yogurt (tried). I found recipes that used almond milk so I did a half gallon (in case it didn't turn out). I precisely followed directions of heating to 180, cooling to 110, adding 1/2C yogurt to some of the warm milk then adding that to the whole batch, poured into jars, incubating 8-12 hours. Then into the refrigerator. They have been in the frig about 8 hours now and it looks like curdled milk!! I haven't opened it yet, hoping that a longer time in the frig will make it thicken up. I have heard of adding gelatin but I don't know if it is too late for that and am not a fan of gelatin powder (knowing where it comes from). Any thoughts? Thank you so much.
I used the recipe from creatingnaturally.com which seems pretty much the same as any I have come across.
Hi Kelle. I have tried a whole range of non-dairy "milks" but I have the best luck with plain old whole milk with a bit of sugar and a pinch of salt added. For extra thickness, I add powdered dry milk. I just made a gallon of it last week and it turned out perfectly.
And I tried to find your recipe on creatingnaturally.com but all I found was a crockpot recipe for plain whole milk.
For me, making yogurt is a robust process - especially when using regular milk. We have probably made 200 gallons of it since starting several years ago with no failures. And the savings are incredible - in excess of $1,000 per year. And the thing is, the culturing process is supposed to reduce lactose intolerance - especially if you wait as much as 20 hours or longer before refridgerating it.
Why not try a plain batch using regular whole milk and once you get the hang of it, try experimenting from there?
Just some ideas for you to think about - hope you have better luck the next time.
I bought wide-mouth jars and tried your recipe. It came out very good. It tasted very smooth and natural. Thanks for sharing !
Kristen,
I applaud your recipe,..and I will try it tonite, (07-05-13), however, I lived in Tehran, Iran during turbulent times,..the ousting of the SHAH,..etc., and I made my yogurt there in a more barbaric way, if you will,..i.e. no sterilization, not as many steps as you've provided. All was done room temp., added 2 tblspoons of "Yogurt" in a pan of milk and covered it with cheesecloth,..put it in the oven (NOT ON) for 48 hrs.,..and presto,..there was my yogurt,..delicious and wonderful.
BTW, spoke to a woman from India yesterday, who told me if I wanted to make buttermilk (I love Buttermilk), instead of milk use water and the starter of yogurt. I'm going to try it. Thanks for your listing.
Happy Yogurting!
Regards,
Steve
Yes! I want to make buttermilk...I really should get around to that.
Hi, I tried to make vanilla yogurt, I used my candy thermometer for everything, trying to follow the recipe exactly. My yogurt didn't set up very well. I'd say it's honey consistency. I used about 8oz activia yogurt as my starter. Any suggestions?
Hmm. I've never used Activia before, but it does seem like it would work.
Did your water come about 3/4 of the way up the jars?
I did have it 3/4 up the jars, and I made sure it was 120. Maybe it should incubate another hour next time? I've had two batches of flops, but I don't want to give up yet! My 2.5 year old absolutely loves yogurt, and me and my husband eat it too, so I'd like to save some money!
My cousin had a problem with yogurt setting. I never did so we worked a batch together. My cooler is a tight fit lid and the water temp is still about the same after 3 hours. Hers was a loose fit cooler and the temp got down around 100 at the end. I use water only at the bottom 1/4 of jars and she filled to 3/4 up jars. So she has my spare cooler and no more trouble. Make sure your lid keeps that heat in! And if it does, lower the temp a few degrees. Mine goes in at 115-117 degrees so it wont go too hot. And its pretty constant.
Hi Stephanie, since the yogurt culture you use must be alive and well when you use it, I like to take hold-over yogurt from my previous batch and add 3 different kinds of yogurt like Chobani, Activia and Stonyfield and blend them all together. Then use about 1/4 to 1/2 cup of the blended yogurts for culturing my next batch of yogurt, keeping some of the left-over tri-culture in the fridge and freeze the rest in small batches. In this way, I am assured of having a great start for my next batch of yogurt as well as future batches.
And when you do mix the culture mixture into the cooled milk - must be no more than 120F - blend it in a blender. You must get that culture evenly distributed throughout the cooled milk.
Using this method makes sure your batch of yogurt-in-making is properly cultured and the same holds true for subsequent batches for which you have stored the "triple yogurt" culture.
Good luck and let us know how your next batch turns out... I will need to make another gallon this week - probably tomorrow if I get by the store for some more milk.
I could get a few different kinds. I used a whisk with each of my two batches. I could use a hand mixer next time. I want to try at least one more time! I think I'm going to put some of my soupy yogurt into my ice cream maker tomorrow and see what happens. I hate to throw it out!
I would keep it in the warm bath for another 3-4 hours. Same thing happened to mine, but it got thicker after several hours.
I loved making the first batch, but I will say that it wasn't quite as thick as I'd like it. It wasn't as thick as yours appeared. And upon stirring, it basically turned very liquid, like melted ice cream. I used whole organic milk (at $5/gal, definitely not cheap), and an entire small container of yogurt, so am not sure what went awry. Any thoughts since you've made many times?
Hmm. Was your milk ultra-pasteurized? U-P milk doesn't make very thick yogurt, usually.
I'd like to add powdered milk to help thicken my yogurt. Any suggestions on how much I should add?
Hi all! This heat and humidity was wreaking havoc on my yogurt. It was runny and seeping a lot of whey. I played a bit and found a winning solution. I use 1% milk so if you don't then try different measurements. I added 1.5cup powdered milk + 2 packets plain gelatin (if you find and can afford grassfed, its the best) but I used store brand for my experiments. You simply add these to the milk while testing and make sure to whisk it extra to get the gelatin dissolved well. The result was impressive. Nice and thick and creamy much like a greek texture. Whey did not seep out after 5min on counter in bowl and about 2 hours later I did not have any to drain off when I went back for my daughters snack.
Oops! Add to milk while HEATING not testing.
Hi Kristen,
When using the white plastic lids, do you sterilize them along with the jars? My first batch didn't thicken - urgh! I didn't add enough water to reach 3/4 height on the jars - and it might have been too hot. Also, I added 6oz of Tillamok brand yogurt to 1/ gal of milk.
I'm about to give it another try, though - looks amazing - and there is no question what's in it!
Thanks!
Mary
I don't, and so far, it's been just fine without the sterilization.
Definitely be careful with the temps-it's important to be precise in this recipe.
How much fruit is reasonable to add to a quart of the finished yogurt? Thanks.
I just add it to individual bowls as we eat it, so I'm not too sure. I think the texture of fruit is nicer when you add it right before you eat it.
Thank you. I ask because I was hoping to bring yogurt to a party, but I guess I could have fruit on the side for people to add themselves.
My recipe called for dry milk to be added to the other milk. I forgot to do this until *after* heating. I hope it wasn't too late...?
If the milk was warm, it probably helped the dry milk dissolve, IMHO. I don't think it matters when you add it - I have added it before heating and it worked fine and I have added it to the hot milk and it has worked fine. I wouldn't wait until the milk has cooled from heating as you don't get the benefit from the pasteurization process which would kill any bad organisms in the powered milk.
Thank you so much for taking the time. I added the powdered milk while the other milk was still hot, luckily.
Ok...I came across this on pinterest. I am a pretty handy person, if I do say so myself...but I really didn't think this would turn out. IT DID though!!! and has been an amazing addition to all of the dishes I make. I use it often in place of sour cream, and of course I have started making whole rolled oats refriderator oatmeal. this has been wonderful. Thank you for sharing. Oh, and the hubby thanks you too!!
Can you please convert your gallons and quarts to the metric system. Very confusing for someone in South Africa! The US and UK conversions also differ and I'm not sure whether I sould use 3.8l ir 4.5l???
I'm very exited to start, just waiting for your reply...
Oh, gosh, I'd only be able to help by using the online conversion tools too, since I don't use the metric system. Is there no good tool out there on the web?
Yes, there are a few, but I need to know whether you use the US or the UK measurements? They differ as the one says 1 gallon is 3.8l and the other 4.5l. ??
Yes, there are a few, but I need to know whether you use the US or the UK measurements? They differ as the one says 1 gallon is 3.8l and the other 4.5l. ??
I think my yogurt failed this morning. 🙁 Can the result be used some other way, so I don't have to waste it? That would also keep me from being discouraged from trying in the future.
I would love to know the same thing as Jeanie. Mine failed yesterday too and I hate to waste all of that organic milk, not to mention the time and effort that went into it 😉
Mine failed because I took the risk of using Greek yogurt as my starter. It was the only "plain" yogurt I could find at the store at the time (I had to buy because my previous batch was used up). ugh. I learned that lesson the hard way. So, take it from me, never use Greek Yogurt to try and start your batch!
You can use your failed yogurt in smoothies or in place of buttermilk when you make pancakes or waffles.
I've heard from several people that Greek yogurt hasn't worked. I wonder if some of the cultures drain out when they drain the whey or something.
Thank you. What about pudding? That was my mom's suggestion.
I've read that one needs to use just-opened yogurt for a starter. I used the same yogurt I did on my first batch, so maybe that's why mine failed.
If it's instant pudding, requiring no heat, then that would probably work. But in my experience, heating a failed batch of yogurt results in separation because even if it's super liquidy, there are still some cultures in there and when you heat it, you'll probably end up with curds and whey.
I ONLY use Greek yogurt in mine (but always the same brand) and mine has always worked beautifully....
I use FAGE yogurt (available at WalMart & Harris Teeter & military commissaries for sure)
In our years and years of yogurt making, we find using our yogurt maker machine takes out the guess-work and we have never had a failed batch. And that is for hundreds of gallons of yogurt.
Today I was notified that the article we posted on http://www.wikihow.com/Make-Yogurt-By-Machine has now been read 10,000 times - so you may want to review it to see if using a machine is for you.
As long as you use a thermometer to check temperatures when you temper and cool the milk and use a culture with live bacteria in it and blend it in well and use your yogurt maker to heat and time the culturing yogurt, you will always turn out quality yogurt.
Good luck!
Thanks. As a matter of fact, that's how I've been making yogurt (with a machine). I haven't been using a thermometer though. I made pancakes with the failed yogurt, and YUM!
A Russian lady who cuts my hair at the barber shop said her family makes yogurt all the time. You can heat the milk to boiling and then cool it down - if you can hold your hand against the side of the pan for 14 seconds then it is cool enough to culture... so you do not really need a thermometer. I use a thermometer to make sure the temperature gets to 180 - 190F for 10 minutes. Then I cool it.
There are a couple of things that can prevent the yogurt from culturing properly - overheating, inactive cultures, and use of inappropriate milk. So the best bet is to use a thermometer, make sure the yogurt has active cultures and an expiration at least a month in the future. And use plain, pasteurized whole milk to be sure... add some sugar, a pinch of salt and some dry powdered milk.
Good luck!
Frugal Girl, delighted to see that your yogut lasts up to a month. All other recipes with raw milk suggested 3 - 4 days but they also included straining whey out. Yours had no straining included. So does leaving whey in the yogurt make the yogurt last longer and of course it would be much healtheir with the whey left in it. I would really appreciate knowing why yours lasts longer. I will certainly stop straining. Its really a headache for me. I was very excited to come across your website. It was colorful, interesting and easy to understand. Job well done. Thanks. Sandra Byrd
Mayonnaise jar lids also fit on regular mouth canning jars.
Have you tried using honey instead of sugar for your vanilla? I know honey can be more acidic. Would it ruin the process? I am hoping to give homemade yogurt a try.
I haven't personally tried honey, but I did a little googling and it looks like other people do this with success.
FWIW - honey has antiseptic qualities so if you want honey in your yogurt, add it to the bowl when you eat it. Also, honey should never be fed to infants - slight chance of botulism which adults tolerate in small amounts but can kill infants.
Hi!
I just wanted to comment about how awesome your recipe is! I can't believe I can make yogurt - it's soooo exciting!
Thank you so much for taking the time for sharing. Please know that your efforts have been very appreciated by no only me, but my family and my friends! 🙂
Sue
Chobani has a recall out so you may want to be careful before using it as a culture, at least for now.
I just tried your recipe yesterday...Yummy and easy!! I'm not a big yogurt fan as sometimes it seems to tart, or even too sweet. This was perfect. Everyone loved it, the hubby, 3 teens and myself.
Next time I'll definitely use whole milk. I used 2% and halved the recipe this first time and think it could be a tad thicker, and we want more. I went with your recipe mainly for the ease and quickness. I was too anxious to see how it would come out to wait 8-12 hours plus fridge time!
I'll definitely make this again; probably tomorrow as I don't see what's left making it past today. I'm adding a link to your site on our blog and I'm anxious to try some more of your recipes!
Thanks for the recipe!
Oh, that's awesome to hear. Yay for yogurt!
Good post-thank-you. What about making non-dairy yogurt with soy milk? Can I try using store bought coconut milk yogurt as a starter?
You will probably need a different set of instructions for that. I'd google to find other bloggers who have actually made non-dairy yogurt, since I haven't!
First time I made yogurt... very smooth warm as it went into the refer (the extra 8 oz of starter) can't wait until tomorrow...I noticed you had no lower limit on the temp for the bacteria in the yogurt. I make beer, which is yeast, and temps matter on the lower end depending on which yeast you pitch into the Wort for alcohol conversion. I like this, it was easy and fun and something I'll be doing again soon as much as I cook with yogurt.
Thanks for the great recipe/tutorial! I used a half gallon of milk and a half cup of Stonyfield Organic Plain Greek yogurt that I had opened the day before and it worked great. Instead of the cooler, I heated some water in my 7 qt crock pot then turned it off before putting my jars of milk in. I wrapped the crock in 3 towels. About half way through, I was concerned it might have cooled off too much so I placed a heated rice bag on top. At 3 hours I removed the jars and I had yogurt! They were almost completely firm at that point. They've been in the fridge overnight and are now completely firm. Tonight I am going to use some to make frozen yogurt! 😀
I would like to try this! Do you think if I use Greek Gods plain Yogurt it would do just the same? Not a fan of Dannon or Yopait.
I'm not sure if you'll have success with the Greek yogurt...my readers have had mixed results, but you can certainly give it a try.
Thanks so much for this post!!! I just bought a yogurt machine (only because it was on clearance for $10, regularly $40, couldn't pass that up!). I have been looking for info all over the internet and was about to purchase a starter culture online, but some were quite pricey! So glad you posted how you used store bought regular yogurt to start... I am going to try this before buying cultures online!
Amanda, when I am not using my bought cultures from http://www.cheesemaking.com/yogurtmakingsupplies.html I use a blend of store-bought yogurts including Chobani, Stoneyfield and the store brand unflavored (or vanilla if you cannot get an unflavored retail yogurt). I put the 3 yogurts in a blender and blend for a couple of seconds and then pour it into several jars to use as I need it.
I can highly recommend the Y4 and Y5 from the link above... sometimes you can get them on sale. I stock up and toss them in a freezer bag into my freezer.... will keep for years that way. Good luck.
First, Happy New Year Kristen!!
Rats to my first failed yogurt attempt! I have made yogurt following your recipe a couple times before and it turned out just fine. The batch I made today, however, is as liquid as it was when I poured it into the jars. Not sure what went wrong but my guess is that it was either the starter or perhaps it was still a bit too warm when I added the starter. I was watching the temp quite closely though so I'm leaning toward it being the starter itself.
Oh well. Here's hoping my next batch will turn out.
Weighing in here, and having made beer for many years, I have found a few things about the process of converting the milk to yogurt. Once I started making yogurt, some of my friends who have made it in the past gave me some valuable advice. The temperature is important in as much above 120 and you'll kill off most of the activity. I have had the temp go as low as 90 and the little buggers appear to be quite happy making yogurt. The amount of time in the "set" is between 3.5 and 4 hours. But the one thing I have found is the amount of "starter " is critical. In this instance more is not better. Somewhere between 5-8 ounces and no more, anymore and it seems to stymie the process (this happens when making beer as well) and I wind up with a higher amount of whey (water type liquid) content. Greek yogurt is the same stuff with one more step, draining the whey from the cooled and set product. There are several types of bacteria that will convert milk to yogurt, we have found they all pretty much react the same with only a few minor and very subtle taste differences. It keeps in a refer that gets to 39 degrees for up to 6 weeks sealed (accidentally forgot to rotate a jar into the mix).
Question about the homemade yogurt. Can I strain the whey from the yogurt to make greek yogurt or do I need to buy yogurt cultures? My family likes greek yogurt and I was going to try and make yogurt this weekend for the first time and thought if I could make it greek style they might like it even better. Thanks for the recipe. I am new to your site and have really learned a lot.
Thank you, Katie Altine
Yep, that's exactly how Greek yogurt is made! Just make it as directed, strain it, and you'll be in business.
Would this recipe work with raw goat milk?
Thank you!
As far as I know, it would. I did a quick google search and it looks like you can use it like you would cow's milk.
I make this every Sunday. I use pint jars and fill them 2/3 full so I can easily add granola or fruit when I pack for lunch. I use an organic Greek yogurt for my initial starter. I have found that the more starter used the thicker the yogurt. Every few weeks I start a new batch with new starter otherwise I just keep using my own yogurt as starter. Also I have found that the perfect warm place is inside my over the stove microwave with the stove light on low until set.
I would like to try this and have a question. I really like the flavor of Noosa Honey yogurt. Can I use that as my starter? Also if I wanted a vanilla flavored could I use honey to sweeten it instead of sugar? I have a friend that makes her yogurt using your recipe and loves it. This will be so much cheaper than buying it.
I'm not familiar with that yogurt, so I'm not sure if it will work well as a starter. You could always try it and see.
I haven't personally used honey, but it appears that other people on the internet have done that, so I think it'll work. Do let us know!
I started making yogurt because we often run out before shopping day. We like organic, so it gets expensive. I also like to create less garbage. so According to my numbers, we save about 78 containers a year, and $260.00!
I like to make it in a thermos!
Thank you for this post.
Most other homemade yogurt recipes call for cultures, etc. I love that yours allows you to just use milk and store bought yogurt. So simple.
The first time I made it, it turned out a little runny despite using fresh, full fat, raw milk. My second attempt (last night). I let it sit longer (over 12 hours) and it was the perfect solution for this drafty old house. I love your cooler method, because I don't have to plan around what is or isn't going in the oven. My seven year old really enjoyed helping out with this. It was a great learning experience.
I tried this recipe with a clay pot that I got from MEC pure clay cookware and the also the yogurt recipe in their website (http://miriamsearthencookware.com/categoryclay-pot-recipeshow-to-make-homemade-yogurt-in-claypots/) it was much easier and the taste was fantastic. The taste was deffinitly  different, i guess because of the lack of metals in my yogurt.
In India people make yogurt on a daily basis. No complicated jars, sterilization, water bath. Just boil the milk, put it into any steel, ceramic, glass bowl, once lukewarm add the yogurt starter and mix it and close it and keep it in a warm place overnight.
In the USA Bulgarian yogurt is a good starter. The other ones I have tried makes the yogurt sticky/slimy consistancy.
Whole fat and 2% works good.
1% and fat free not recommended.
It lasts very long in the fridge but after 4-5 few days it gets more sour day by day. In India we have recipes that we make with sour yogurt. SO sometimes I intentionally let them sit in the fridge and sour.
Hi, could I do it with greek yogurt?
You can, although my readers have reported mixed results with it, and I haven't personally tried it. A Greek yogurt starter will not make Greek yogurt, though. You'll have to drain the whey off to get Greek yogurt.
I was wondering if you have ever tried the Vanilla Almond Coconut milk that is unsweetened and only 30 calories for the homemade yogurt. If so, do I do it the same way or something different. I would like to give this a try so any information would be appreciated.
Thank you,
Tiffany
I'm so sorry, but I can't be any help! I've never tried making yogurt with coconut milk, since none of us here are sensitive to dairy. Maybe do some googling to find the answer?
I am going to make it easy for all of you :
1. Heat up the milk to the boiling point on the stove or microwave in a ceramic cooking pot ( or some other pots which is thick and keep the heat for longer time ).
2. Put aside the pot enough time , for milk to cool down ( you should be able to keep your , clean , finger in the milk for 10 seconds or more . in other words the milk should be warm NOT hot at all .
3. for a gallon of milk add 4 or 5 FULL table spoon of plain yogurt and mix.
4. put the lid on the pot and cover the pot with a blanket or couple of towels ( trying to keep it warm for a few hours for yeasts of yogurt to do their job). at this stage keep the pot still and do not move it for few hours ( all night).
5 . Take the pot and keep it in refrigerator for weeks and enjoy your yogurt.
Wow...this looks way easier than I ever imagined! I'm going to try it...maybe even today! We have our own milk, and I've been looking for healthy ideas. Our kids love smoothies, so what better way to give them some fresh ingredients.
I am so thrilled to get these instructions for making Yogurt in qt. jars. I can't wait to try this. Definitely going out tomorrow to get a new thermometer. My husband and I are always looking for ways to be frugal, and are not afraid to give things a try. Thank you so much!
It Worked!!! Great website. Thank you for all the information. I haven't made yogurt since the 70's. I loved it. Even my husband got into it. He eats 2 qts a week. He was surprised how mild it is. I let it stay in the oven (preheated to 275 and turned off when I put the yogurt in, with light on) for 3 hours. I think I will let it stay in for 4 hours next time because I like a little sour taste to it. I don't have a cooler, but I will get one for next time. Would be great to have an alternate method. Years ago I put the yogurt into a gallon thermos bottle, put it in a box, and stuffed newspapers around it. Then put the box in a draft free place overnight. Came out rather thin, and very tart, but I loved it anyway. This is better.
I make mine near the same way but once I stir in the starter I place the stainless steel or heavy stockpot on a small heating pad that I have, leave it four about 12-24 hours than refrigerate. works very well.
I have been culturing my yogurt in a lunch cooler, heated with a large rice bag (this is just a cotton bag which is stuffed with rice* and heated in the microwave - the same kind that you would take to bed to warm your feet or put on a sore muscle or use to soothe an ear ache). I warm the milk, add the culture, seal it in the jar and put it into the cooler with the very warm rice bag wrapped around it. I fill any vacant area inside the cooler with kitchen towels for added insulation, close the cooler and walk away for half a day or over night. Works like a charm and is easier for me than filling the cooler with water and monitoring the temp.
* my rice bag is about 8" x 10" with 2 cups of rice in it, sewn shut and heated about 3 minutes in the microwave. If you have no sewing skills take a large, clean, heavy sock, put in the rice and tie shut with a string - same thing.
Brilliant! This works so much better than the little stinking yogurt cup maker I had from the 90's .. I am giving it away to save space and time. Your way is so easy and it turns out thicker too. Also, my son is lactose intolerant and can't eat real butter so I have to turn the cream into yogurt than chill it ant make butter. your method will help so much when I make butter for him next time. toodles, Janet p.s the left over liquid from the butter can be used in cooking or drinking. win win
Yes! The little maker from my childhood made such a small amount and it was super sour.
I just made this over the weekend and it turned out great! For the started I couldn't find a small cup of plain yogurt so I bought Greek plain yogurt. I didn't realize however that one of the small containers that I bought of the Greek wasn't enough so I added some vanilla whole milk yogurt from a large container (that was already opened) that I had on hand. So using an already opened container of yogurt doesn't seem to effect the end product. I also used lids and bands and three of my jars actually sealed themselves after I put them in the refrigerator. I really like this recipe as it makes eating organic cheaper. Thanks
I've been making my own yogurt for about six months and have never had any that is as thick as you show. Mine is like thickened milk. It still tastes like yogurt and I either mix it with cereal or drink it. What do you suggest for thickening my yogurt.
Hmm...are you maybe using skim or 1% milk? That can make yogurt really runny.
No, I usually use 2% or whole milk.
Are you using ultra pasturized milk or organic milk (which is usually ultra pasturized unless you are getting it locally)? The higher heat of ultra pasturized sometime affects the proteins in the milk making it difficult to achieve coagulation consistent with thicker yogurt.
Also, we live in a draft old house and I have to let it sit longer and by a heat vent so the water in the cooler does not cool too fast. I think Frugal Girl lives somewhere warm.
I've heard some people strain some of the whey out, so that it is thicker like Greek yogurt. (I make ricotta and this is how I get the whey out.) You could do this by doubling up some cheese cloth and lining a strainer with it. Rubber band it to prevent the cheese cloth from falling and making a mess. You put your strainer over a non- reactive pot. Put your yogurt over the cheese cloth. Whey will drop out. You can set it in the fridge while it drips. The longer you strain it, the thicker it will get. Leave it too long and you'll end up with something more like cheese. I've never done this to yogurt, but when I strain ricotta I do it for about 3+ hours. I would think yogurt would be less.
I use plain old grocery store milk. It doesn't seem to matter if I heat the milk or not, it still doesn't get very thick. Keeping it warm isn't a problem since I use a yogurt maker. I typically use part of a previous batch as the starter or I'll use Fage from the grocery. I've also tried specific yogurt starter but there doesn't seem to be any advantage, besides, it costs more than using yogurt.
Like I said, it still tastes like yogurt and I'm getting the benefits. I just wondered if there was a trick to getting it thicker.
Just a quick update. I tried a different commercial yogurt, Chobani, for my starter and my yogurt is much thicker but with a lot more whey separated out. When I use Fage for my starter there isn't nearly as much whey, if any.
I have tried using multiple cultures like Fage, Chobani and store brand with good success. Just keep the extra in the fridge for the next batches.
Have you tried using a "greek" culture or one that claims as many as five different cultures?
Greek yogurt isn't made with special cultures, but is rather made by straining regular yogurt so that they whey drains out. So, using a Greek starter won't make your yogurt Greek. You've got to do that after you make your yogurt.
Yoplait or Dannon work great for me!
Is there some way for you to let it incubate longer in your yogurt maker? I am only saying this because the first time I made it, my yogurt was really runny. I have since experimented and now let it sit for around 12 hours..
I typically start it in the evening and let it go all night, usually eight to 12 hours.
I just came across your blog last night, looking for a recipe to make my own yogurt. I've been wanting to try this for awhile, knew it would be less expensive than buying, but never figured out how much less! I do have a question - when you boil the jars in an inch of water, are you just setting them in the water? So there's no water in the jars, they're just steaming? And then do you take the jars out of the pot (you say you use the pot you boiled the jars in to put in the cold water) and set them upside down to keep them sterile? (All right, that's 2 questions!) Thanks so much!
Yep, it's just steaming the jars. Honestly, though, I have skipped the step for the last few years and my yogurt has been just fine (the jars do go through the dishwasher, though.)
Thanks for sharing! This is truly the easiest way to make yogurt. Have you made fruit yogurt, say blueberry? I'd like to know how to do that too??
We just stir in jam to the yogurt when we dish it up. I've not had great success adding fruit to the yogurt before incubation.
Hi Kristen. I sure hope you are still taking questions! I made my first batch of yogurt using whole milk from a local dairy that is not homogenized. I also used a plain yogurt starter from the same dairy that had pure ingredients, and honestly, it was a bit runny. I added some sugar and vanilla as suggested in your recipe. It tastes really good, but is not as thick as your picture shows. Now, this doesn't bother me so much, because my brand of choice has always been Stoneyfield Organic, and it was always less thick than other non-organic, not pure brands. However, if I could get it a bit thicker, I would be happy. I am confident in how I monitored temps along the way. Looking online, I'm seeing suggested incubation periods at 8-12 hours, compared to your 3 hours, but doesn't a longer incubation only result in a more sour flavor, and not a thicker yogurt? I incubated for 4 hours. Any suggestions would be appreciated!
Yeah, from what I understand, longer incubation just means that your yogurt will be more sour.
My suggestion would be to maybe try another batch using Dannon or Yoplait as a starter. It's such a small amount, the less-pure ingredients shouldn't bother you a lot, and perhaps the cultures in those yogurts will work a bit better.
No doubt longer incubation makes the yogurt sour but the term "longer" depends upon lot of external and internal factors, external- the temp around and the weather for sure, internal- the type of yogurt starter, the milk and its temp. I make the yogurt the natural way meaning no canning supplies or temp regulator. I have lived in 3 different apartments over the last 12 years and in each one the time and method came out to be different to get the same consistency and taste in yogurt. I everytime I moved to a new one it took time with trial and error because the previous method did not work so well. so "longer" is very varient. and everytime it goes beyond the thick and correct point it definitely becomes sour.
the dannon and yoplait always gave me a sticky yogurt which only becomes more and more sticky as you use it. White mountain bulgarian yogurt has never disappointed me.
Happy to report that a couple more days in the fridge, the yogurt thickened up more. I've made a second batch, using my first as a starter, and it turned out beautifully. Thanks, Kristen! I'm in. Never going back!
Yay! SO glad to hear it.
Hi Kristen! I tried making this tonight and I didn't use a food thermometer when I heated my milk since I haven''t bought one. I made it a point not to bring my milk to a boil, though. Will my yogurt come out the same as yours? :S
I think it should be fine! The main thing that you want to do is cool it down sufficiently before you add the starter. If it's too hot, you'll kill the cultures.
It was a success! I even used the first batch as the starter for the second batch! 🙂
Yay! Always so glad to hear of yogurt success stories.
Kristen,
Can I use plain Greek yogurt as a starter?
I hear mixed things from people about that. Some had had success and others haven't. I've always used regular yogurt.
Just to be clear, Greek yogurt starter will not make Greek yogurt. To make Greek yogurt, you have to strain regular yogurt.
I noticed the last time I bought yogurt to use as a starter that ALL of the commercial brands have "Greek" on the label. It's a marketing thing.
I've had the best results from Dannon Oikos plain yogurt. Fage is also good but results in a thinner homemade yogurt than the Dannon.
I used whole milk and my yogurt still came out very thin. Any thought suggestions. I followed the directions exactly. Verified that my starter had active cultures. It tastes like yogurt, its just thin. 🙁
Gosh, I'm so sorry to hear that! Are you positive your thermometer is properly calibrated? What brand of starter did you use?
Yes I have a very good thermometer. I used Fage greek yogurt. Like I said, it tastes great... but its like soup.
Maybe try using regular yogurt, not Greek yogurt, if you try this again. I've heard mixed reviews about Greek yogurt as a starter. It's got a bunch of whey drained out, and I imagine that some of the cultures disappear with the whey.
I get great, very thick yogurt results using a fresh container of Fage strained yogurt (whole milk or 2%) as my culture starter added to scalded at 180°F then cooled to 110-115°F Trader Joe's organic pasteurized whole milk. I'd say this combination gives me the thickest yogurt I've ever been able to make (without straining). I incubate at least 6-88 hours, but usually longer, like 10 or so. I thought the thickness might be because the Fage yogurt has an additional culture strain that most other yogurts don't seem to include.
With the same Fage yogurt as starter, but a different milk source (such as fresh raw milk that is only gently warmed to 110°F), the resulting yogurt is quite creamy but not thick (the raw milk has a higher milkfat % than standardized whole milk, and the raw milk's natural cultures compete with the yogurt cultures - plus the enzymes and milk proteins haven't been denatured in raw milk). It's good for smoothies, though, and the lactase enzyme that lactose-intolerant people lack hasn't been destroyed so it might be more tolerable for the lactose-intolerant than pasteurized milk that lacks lactase.
I'm a homemade yogurt enthusiast, too. I've been making plain whole milk yogurt on and off for many years, using essentially the same technique you use. However, the "off" periods were usually because of my annoyance with the milk scalding step (I do think scalded milk yields the best thick yogurt results). Invariably, I'd become impatient or get distracted while the milk was heating. I'd stop stirring and leave the stove, the milk would overheat, and I'd have a thick, sticky mess to clean off the bottom of my pan, and sometimes even on the stove if the milk boiled over. Even when everything went smoothly with the milk scalding, it seemed like there was a lot of prep & clean-up.
But for the past 7 months I've been making yogurt regularly, like clockwork, because my new Instant Pot DUO electric pressure multi cooker has a yogurt program that not only incubates the yogurt after the culture is added, but it also streamlines the initial step - it scalds the milk and can sanitize the canning jar storage containers, too. I no longer have to stand at the stove and stir the milk while it heats. I just set the Instant Pot and come back when the timer beep goes off.
I often make the yogurt directly in the wide mouth half pint canning jars instead of one large quantity - the small jar sanitizing and scalding can be completed in one step with just 1 min of pressure-steam program, plus a few min for the pressure to naturally release and the milk to cool enough for the culture to be added. Laura Pazzaglia of Hip Pressure Cooking blog has posted a great yogurt video on her blog and YouTube using the Instant Pot yogurt program.
Here is a shortcut I take that has always worked. Once you get the milk to scalding temperatures, carefully pour it into the containers you will be usine and it will sterilize them. Then pour the milk back into the container for culturing, bring the temperature down and add the culture - I use a mix of several retail yogurts which I blend (use a blender), add part to the culture container and save the rest for the next batch. Works every time!
When I make yogurt, I make a gallon at a time and use quart jars as containers - really works well. Unfortunately, I haven't been able to make much yogurt because of health issues in the family - nothing to do with the yogurt, of course.
Try it, it works!
The instructions for my yogurt maker say that scalding isn't necessary if you're using pasteurized milk. Sometimes I do, sometimes I don't. Doesn't seem to make any difference. You can heat the milk in the microwave, also.
As far as sterilizing goes I just run the jars and lids through the dishwasher.
http://en.wikipedia.org/wiki/Scalded_milk
Scalding "fresh" milk isn't strictly necessary, but it does make better (thicker) and more consistent yogurt because scalding reaches a higher temperature, around 180°F and for longer than flash-pasteurization does (typically 161°F in the for a few seconds, at least in the US).
That's because the higher temperature reached during a gentle scalding unfolds the protein strands. Also regular pasteurization doesn't actually sterilize milk - there are viable bacteria & yeast present even in a new container of milk that will compete with the yogurt bacteria, though obviously an older milk container that has become a little warm or has been open for a few days will be even more compromised than a just purchased, always very cold, freshly opened container.
Because I always found the scalding process to be a pain, I've tried making yogurt skipping the scalding step many times, but I don't think the resulting yogurt is nearly as good or consistent, unless one doesn't mind runny and variable yogurt.
Our family also drinks truly fresh milk, that is raw milk, which is legal for retail sale in California. I've made lots of raw milk yogurt, only gently heating the milk to 110°F, but it always makes a runny yogurt. The raw milk still has viable enzymes and it's own lactobacillus culture's which is great, but they inhibit the yogurt culture. Raw milk yogurt is great as a beverage or in smoothies, but I prefer thicker yogurt from scalded milk for eating from a dish.
Since trying the scalding step in the electric Instant Pot DUO pressure cooker and finding it to be a quicker, much easier step without any of the annoyances of stove-top scalding in a pot with a whisk, I never skip the scalding step anymore, and my homemade whole milk yogurt is thicker than ever. Being able to steam-sanitize the jars and scald the milk in one quick step in individual serving size wide mouth half pint canning jars is an additional convenience, as the family members help themselves to more yogurt in the smaller jars vs serving out of a quart jar.
Laura Pazzaglia of Hip Pressure Cooking blog (the maker of a yogurt instructional video for Instant Pot) reports that she see better results when she steam sterilizes the Instant Pot liner pot first, right before she adds the milk to scald it, especially if she has hand washed the liner pot instead of using it straight from the automatic dishwasher. Bacteria and years competition in one's containers shouldn't be underestimated - it might not be pathogenic or enough to prevent yogurt coagulation, but it still can be a factor in yogurt quality and texture characteristics.
Ultra-pasteurized and UHT milk, on the other hand, has been heated to extremely high temperatures to allow an unnaturally long shelf life (while sealed), and it doesn't culture well at all. The proteins strands in highly processed cooked milk products become very damaged and fully denatured during the ultra-pasteurization process, which alters the taste, consistency, and the yogurt culture's ability to properly coagulate the milk proteins. UP and UHT milk is nasty stuff, IMO, and I won't buy it for any purpose.
Have you ever tried making yogurt with something like Activa? I am having a
lactose problem and wondered if this would help. I process my yogurt in yogurt maker for 16 - 18 hrs. I was told this amt of time would reduce the lactose problem. Doesn't work for me. Any suggestions?
Making yogurt with Activia(TM) is a challenge. What I do is include in with one or more others like Chobani and Siggis. I usually dump several different brands in my blender, give it a whirl and the use part for the batch I am making and save the rest in the fridge for future batches. Works for me.
Another thing you might try is to use leftovers from the first batch of Activia for the next batch. Sometimes that second batch, for some reason, firms up better than the first one. Just a thought.
Good luck.
I love this recipe! I've looked fro years for this and I finally got it!
I made my first 2 jars of yogurt and they came up very well and delicious.
Thank you very much for sharing!
Mylene
This comment is for Susan with a lactose problem
Try using goats milk to make your yogurt. Also, goats milk is more heat tolerant than cows milk and can be used to make sour cream and cream cheese. If you are interested I will give the recipe.
Thank you for this recipe. I have been looking for an easy way to make my toddler healthier yogurt, she loves gogurts, which gets expensive. She is also lactose intolerant so I made mine with lactaid. While not as thick as yours, it is still extremely creamy! My husband likes it too so I am glad to make it again.
In my experience, you don't have to be religious about temperatures. I heat my milk to 170-180ish and cool it to *150* before adding the yogurt-with-live-cultures-starter. This saves some time since I don't have to wait as long for it to cool and it has resulted in great yogurt. But after reading your recipe I will experiment with letting it cool to an even lower temp to see if the consistency is different. After all, it's all an experiment that ends in something tasty!
I just tried the crockpot yogurt method that seems to be the latest craze. I'm left with a half gallon of tangy milk. Can I try again with the same milk-perhaps using the thermos method I see here (next time I'll definitely make a quart or pint at a time!) , or should I just freeze it for baking and use the rest in overnight oats?
Trying again will probably give you a disgusting mixture of separated curds and whey (ask me how I know!!! Ha.). So I would use it for smoothies and such and try again with new milk.
I've never tried the crockpot method, but the method I use here works really well for me.
Help!! I've been following your directions for awhile now, and loving the results ... my head was in the clouds today, and I dumped in the starter while the milk was hot, which I know will kill the starter. Can I cool it, then add more starter?? Thanks for your help!
Yeah, I'd probably give that a try!
After years of following your blog, I finally decided to go for it and make our own yogurt. My daughter just turned 1 and I want her to have yogurt for the probiotics, but all yogurt in the store except the plain ones (which she doesn't like) had so much sugar!! I made the vanilla version with very little sugar and we all love it! So glad to know that we have a great option for yogurt. Thank you!!
I just bought a yogurt maker; which will heat for 8 - 10 hrs when I put the yogurt starter in. I don't have a thermometer yet. How long will it take me to heat milk to 185* F ? I have electric stove. 5 or 10 minutes?
Am a senior & use to make yogurt in 1977 -78 in a 5 individual cups in a Sultan? heater to heat for about 8 - 10 hrs.
That depends a lot on the stove and the pot and how much milk you're heating. A thermometer is the best way to know what temperature your milk is, rather than a set time on the stove.
A thermometer is always the best for checking temperature. But you can always carefully bring the milk to the boiling point - make sure it doesn't burn on the bottom of the pot. I have done it that way with no harm. The next point is the 120 F level before mixing in the culture - be sure to stir well to mix it in properly. That culture temperature is 120F - 125F. A Russian barber taught me how to tell when it was cool enough. If you can hold your your wrist against the pot for 15 seconds then it is time to put the culture in.
This sounds so easy! My boyfriend will only eat whole milk natural yogurt, so this will be great for me to make for him! Thank you for the step-by-step photos and instructions!
I go through a ton of plain yogurt in my house, so have been wanting to experiment with making my own. Reading this makes it seem less daunting 🙂 Thanks for all the photos at each step!
I've made yogurt using your recipe about a dozen times now. Is it normal to have 5 quart jars full of yogurt instead of 4? It happens EVERY time I make it but the yogurt comes out delicious with no problems at all. I haven't read through all the comments but I haven't seen this mentioned at all. Thanks for a delicious and simple recipe my boys enjoy
Yeah, I feel like my quart jars actually must hold a little less than a quart, because I generally have about 4.5 jars worth of yogurt.
I get 5 quarts every time, but I don't quite fill the jars all the way. I fill them almost up to the neck.
I buy the store brand milk and Fage yogurt. I use whole milk and have not needed to add dry milk or gelatin since I started using Fage. My Way: Make a double boiler out of a large stock pot. If your Dutch oven will sit inside the pot suspended by its handles, you can fill the pot almost up to the bottom of the Dutch oven. Fill the Dutch oven with a gallon of milk. Heat the water in the pot (I set the heat on HI) and put a candy thermometer in the Dutch oven. Heat milk to 190 degrees. Take the Dutch oven out of the pot and place it in a sink of cold water and ice and let the milk cool to between 110 and 120. Preheat your oven to the lowest temperature, I set mine on LOW and the temperature is 170. Put a cookie sheet in the oven. Also turn the light on. When the temperature is right, put the room temperature yogurt (I use Fage from Kroger) into a quart bowl. Pour in a little milk and whisk it. Add a little more milk and whisk it. I fill the bowl and whisk it. Pour the yogurt and milk mixture into the Dutch oven and whisk it really well. You want to have the yogurt mixed in thoroughly. Pour the yogurt and milk mixture into quart jars. Put lids and rings or the plastic freezer lids on. Set them in the oven on the cookie sheet. Turn the oven off!! Leave the light on. Set a timer for 4 hours. Then leave it be. No Peeking! When the timer goes off, take the jars out of the oven an put them in the refrigerator. The yogurt will be thickened when it is cool – 3 hours or more. I have not tried sweetening it. I want to use a cup of the yogurt to start the next batch, so I save a cup of yogurt at the end. Saves money buying yogurt. You can use the homemade yogurt as a starter 4 or 5 times, then it seems to get thinner and thinner each time I make it. The yogurt tastes wonderful and my husband loves it and thinks I am wonderful. I make yogurt this way every week because my husband eats it all up!
I am so happy to have found this recipe. I have been looking for a good and easy recipe to make my own Yogurt and this one looks like it should be the one I want to try.
Thanks for posting this and for all the comments here that I can read and learn from too.
I love yogurt, and I have been making my own Matsoni yogurt for a while now.
I am looking forward to making this kind because it is more solid and easier to serve.
Thanks for this recipe and I hope to be back really soon, to tell you how well we like it.
I just tried this recipe for the first time last night; yum! It took awhile, but like you said it's really not hard at all, and I just did other things around the house while the yogurt set. And since I can make a large batch, I only have to do it once a month or so. This is going to save me a lot of money on my grocery bill. Thank you for sharing!
I love that it makes a gallon at a time! The yogurt maker from my childhood only made a few cups of yogurt at a time, and it still required heating milk up on the stove. This is so much more efficient.
I was wondering if the size of the jars HAD to be quart size? I just want to make sure that I can use little 8 oz jars. Thanks! I can't wait to try this!!
You can use little jars if you'd like...shouldn't affect things. Just make sure the incubating water comes about 3/4 of the way up the jars when you put 'em in your cooler.
I made once but it did not firm or thick. I tried with Dutch Milk Brand. Is this possible?
If it's Dutch Lady milk, that's probably the problem. From what I can tell online, that's an ultra-pasteurized milk product, and that typically does not work well for yogurt-making. You want to buy milk that is not ultra-pasteurized. In America, ultra-pasteurized milk usually comes in waxed paper packaging whereas the stuff that's good for yogurt comes in a plastic gallon jug.
I'm so glad that I ran across your blog!
We get a gallon of fresh milk weekly from a farm nearby. My husband only drinks milk with cereal, while I can't seem to get my son to drink any. I usually will separate the cream and take it to work for my coffee or make butter, but sometimes (like this week) I leave it alone and have whole milk. I have been starting to make biscuits & gravy for my guys for breakfast and I use milk in the gravy, and I have quite a few gallons of milk in the freezer (easy to do in gallon freezer bags)....but most of the time the milk ends up going to the chickens (which is still not wasteful since we benefit with the wonderful eggs)....but both hubby & son LOVE yogurt and I've planned on making some for awhile (even bought fillable tubes to replace my son's store-bought yogurt on the go!)....your directions seem so easy to do that I think I'm finally going to try to make some with the gallon of milk we'll pick up tonight! Thanks!!! k
Yay! I hope this works out great for you. It always seems a little complicated the first time you make it, but after a few batches, it starts to feel simple.
Thanks for the recipe!! I made 1/2 gallon batch. Instead of a cooler, I put my 2 jars in a pot of warm water, and stuck it inside an insulated grocery store bag. In case somebody doesn't have a handy cooler.
I tried this recipe today using half of the amounts. My yogurt still looks like milk. I used Fage non fat yogurt as my starter. What did I do wrong? I was very careful to keep the milk mixture a 120 degrees and not over.
Oh, what a bummer! That's so frustrating to work hard at something and have it not turn out. I've heard of people getting mixed results with Greek yogurt as a starter (which makes sense, I guess, because Greek yogurt has whey drained out, and I'm sure the whey contains some of the necessary bacteria.)
That's why I recommend using regular Dannon or Yoplait yogurt as a starter. If you want to make your yogurt Greek, use a regular starter and then drain the yogurt afterward (using a Greek starter will not give you Greek yogurt.).
I can't tell anyone what the difference is, But I've made Yogurt by different methods of heating it and cooling it as Suggested. I've also made it by just mixing real good store bought Yogurt into the cold milk and putting it into a "Yogurt Maker" and leaving it for about 12 hours. We then strain it for a short time and have "Greek Yogurt". We have also strained it for longer and had "Yogurt Cheese". I really can't tell any difference in the two Methods, And the second way is quicker to set up and easier so that's the way I've been making it for Years. We use the "Whole Milk" as it's more Creamery. The only thing I don't like is My Yogurt Maker is a little smaller than I like, So I'll try some of these Suggestions of making a bigger Batch. Thanks for a great article and Tips.
I've made crockpot yogurt before and it was very runny. It didn't matter because i was making smoothies for kids. Your recipe it the BEST!! I combined old method and it was successful! I cooked milk on stove, put in water bath, brought down to temp and added yogurt. Instead of cooler and jars, I had put mixture in crockpot that I had kept at same temp (120 degrees, yes it was tricky keeping hot water at that temp) covered with thick towels and let it alone for 6 hrs. Worked like a charm!! Thank you so much for this better recipe!!!
Yay! I'm so glad this worked out better for you.
In the cooler now! Really hope this turns out. My boys go through about $4 worth of yogurt a week. A half gallon of local milk cost me $4 and I got a small grassfed yogurt on sale for $1. *fingers crossed*
My mom teach me how to make yogurt when i was 10. We just microwaved the 8-10 cups of milk (fat free) until it was between warm and hot, we pour the 8 oz yogurt and leave it all night at room temperature with a lid (in a big container, not in little jars). it was not creamy like yours but it worked... sometimes it didn't worked for me, but it never failed my mom. Your blog helped me understand better, at least with the measures and the heat. I try doing it with fat free milk and just heat it a bit over 120 and let it cool (i don't think is necesary so much heating, but let's see). and the incubating and letting it in a cooler with warm water (A big cooler since the container is pretty big). I think it'll get better than the one we make with my mom. Thanks for the info. It was so helpful.
I have been making my own yogurt for about 2 years. I started with a crock pot recipe that produced yogurt that was runny, but tasted great. My kids loved it in banana smoothies. I found another recipe, that is similar to this one, and was able to make thick yogurt. I don't have mason jars so I heat my milk in a big pot and then transfer to plastic containers before cooling in a water bath. After mixing in my starter, I put the containers in a big pot of warm water, preheat my oven for about a minute, turn off the oven and let the pot stay in the oven over night. This works really well for me. I am attempting vanilla yogurt for the first time using your tips and I'm looking forward to seeing how it turns out. It sounds silly, but I'm still amazed every time I make yogurt because I had no idea it could be made at home. 🙂
I understand! I still feel the same way...amazed that it works.
We love this recipe and go through a gallon every several days. If we make two gallons of milk at a time, do we need to use two cups of starter?
Hmm. I don't know! I'd google to see if anyone does double batches. I know sometimes dairy recipes, like cheeses, don't work as well on a large scale for some reason, but I'm not sure if that applies to yogurt or not.
I am doing a Specific Carbohydrate Diet that calls for yogurt starter to not have the Bifidis culture in it. I have made several batches with a non Bifidis yogurt I also use organic whole milk (just because I like the idea of "organic". The last batch I made, my starter was a Greek yogurt because that is all the store had that did not have the Bifidis culture in it. Then after I had cooled it in the fridge I poured it into cheesecloth that was in a fine strainer. I am telling you this yogurt is so creamy and tasty that my husband wants me to make it to sell! the original recipe said not to use Greek Yogurt but mine was amazing.
Today's batch of yogurt should have an interesting result. I've been making one or two batches of yogurt every week for almost two years and have never had a problem like this. I heated four cups of whole milk in the microwave for 8 minutes 15 seconds like I normally do but today the milk curdled. The milk was a couple days past its sell date but it didn't smell or taste sour. I mixed in the starter as usual and poured the milk into the jars and they all went into the maker. Now, after about five hours the yogurt has separated with about three-eighths of an inch of whey on top -- it's never done that before. If nothing else I can strain it all and make yogurt cheese with it.
Yep-or use it in smoothies. If I have a batch that turns out too soft, I just make a lot of smoothies!
The _failed_ yogurt is strained. It tastes like very tangy cream cheese and will go well with bagels. I think I'll use the leftover whey in a batch of bread this afternoon.
Yay! So glad you were able to salvage it.
Awesome awesome awesome! Can't wait to try this 🙂
I have been using this recipe for a month. A cup of vanilla Dannon was my starter, but each batch since, I have held back a cup for the new batch and only purchased the whole milk. I do not add any sugars or flavorings.
Thriftiness was the reason I started making this recipe; however, I am amazed how much better my stomach feels since I've been eating it. (Usually, 1 or more times a day)
I've had a sensitive gut for several years and it had recently begun affecting my work and also at random times of the day I felt the need to lie still for awhile.
Thank you for sharing this recipe. I will keep on eating this, and may write back in a few months if it keeps working the way it is now.
Greta
Hey there! I made this yogurt last night and I'm very happy with out it turned out. I used a little sugar and vanilla and also added a half cup of powdered milk. My yogurt turned out a little slimy in texture (still thick, just slimy). Do you think that could have been because I added powdered milk? Or is that the consistency of this recipe on its own? Thanks!
Do you mean that when you take a spoonful out, it leaves kind of a trail? Sometimes my batches are like that and sometimes they are not, and I have no idea why! I've never added powdered milk to mine either.
I switched to a Stonyfield Farm starter recently and my yogurt has not been stringy, although I have no idea if that's coincidence or not.
Hi, this looks like something I need to try, I was wondering if I could use the metal cap and screw top that came with all of my ball jars or if I need to get the plastic ones shown here. Is there any reason not to use my metal ones?
TIA Can't wait to try this out for the kids 🙂
Sure thing! I used the metal lids and screw tops for years until I got my plastic lids. The plastic ones are just handy because they're one piece, and they don't rust. But they are not at all a necessity.
I pretty much use the same recipe as yours. Fool proof every time. The only thing I do different is that I put my yogurt in a cooler wrapped in a blanket and towels. I let it sit for 24 hours and it is still warm when I put it in the fridge. They say the longer you let it ferment the better it is for you. I'm the only one that eats it in my family. It lasts at least a month in the fridge.
Thank you so much for this easy recipe! A friend of mine told me about it and she also gave me a tip to put jars in my crock pot on low with the water instead of a cooler. Worked great!
Hello, First I just want to say thank you for your blog. My husband actually found it and since then I have been making yogurt. Saves us so much money. Second I do have a question. So I have made the yogurt few times but notice that the first time out of the fridge its creamy kinda but still a bit watery and then the next day the yogurt is really watery... Have I did something wrong or is this normal for homemade yogurt...
Thank you so much..
It's normal for some separation to occur, as this homemade yogurt has no stabilizers in it. It's not harmful and you can pour off the whey or stir it back in.
The two best tricks for getting creamy yogurt are to use a good starter (Stonyfield Farm, Dannon), and to use whole milk when you make the yogurt.
This tutorial makes everything seem doable and fairly simple. I'm excited to try it. I do have one basic (and potentially silly question). Why would you make yogurt at home if you still need store bought yogurt as a starter? If you have store bought yogurt already at your house why would you still want to make your own?
You only need a cup of store-bought yogurt to use as a starter, and then in the future, you can use a cup of your own homemade yogurt as a starter for the next batch. So you won't need to keep on buying yogurt from the store to use as a starter. 🙂
Thank you for this wonderful blog! I have a story about making yogurt with Greek yogurt.
I didn't know not to use it. I used it on Sunday. I did have much success....but here is the catch - I had to let it sit on the counter from Sunday until Tuesday. Usually I let it sit up to 24 hours, but this was a good 48 hours. Point being, don't think it won't turn into yogurt, just be patient and let it sit. I thought for sure it was a dud, but I was wrong.
I also use Greek yogurt - Meijer or Stonefield single cups - to start and it always turns out for me. I prefer the Meijer. However, I do use raw milk.
I follow Kristen's recipe cut in half (because I want to keep my cultures at peek levels). I love how easy this recipe is. We just don't eat it quickly enough to warrant a whole gallon at a time. I let it sit more than 4 hours. Sometime as much as 12. Then straight into the fridge to set. Sometimes it is more runny, other times super thick until you stir. But always a success.
Thank you again, Kristen.
Hi, this is a great post and thread! I love making yogurt. I would do it every single day if we consumed it fast enough LOL.
I find that the best way for me is to heat half a gallon of milk in the microwave to 180-190 degrees then cool to 110 (on the counter if I've planned ahead and have time, or in an ice bath if (much more typically) I've waited until 15 minutes past my bedtime to start it 😀 Once cooled, I add only 1 tsp. per half gallon of starter, which I incorporate very gently with a rubber spatula, using a back and forth, side to side motion, then cover the bowl, wrap the whole thing in a heavy towel and leave in my oven (which I warmed slightly by heating to 350 for one minute, then turning it off), overnight. In the morning, always always ALWAYS there is yogurt.
Personally, I prefer the consistency of Greek yogurt, therefore, my follow up once the yogurt is set is to line a large colander with a commercial sized coffee filter (I purchased 500 of them for $10 on Amazon). I dump the yogurt from the bowl into the lined strainer, then drop it on top of the bowl I used to make the yogurt, and allow about half the total in whey to drain out. So thick I can stand a spoon right up in it! I love to add the scraped insides of a vanilla bean to this with a little vanilla extract for extra flavor, although I keep some of it plain to replace sour cream because to me, it tastes even better! I also like to take some of prepared vanilla yogurt and add a few shakes of instant espresso powder and a little maple syrup to it for a delicious coffee version, occasionally adding a few 60% Cacao chips for an extra decadent experience - delicious!
Hello Everyone,
This will be my first time making yogurt. I enjoyed reading all of your comments.
BUT
I am extremely concerned about those of you not properly following the temperatures and sterilizing your containers. Heating the milk kills all of the pathogenic organisms which could make you incredibly sick. It sterilizes the milk so that only the bacteria you are adding can grow. If you do not sterilize your containers, or splashing boiled water into them, there may be harmful bacteria in the containers which will grow along with the culture you have added.
I have a master's degree in medical laboratory science.
Enough of my soap box speech.....just want to drill it in! Sterilize your milk and your containers!!!
If your jars have been thru the dishwasher, though, they'll have been properly sterilized though, right?
Hi Kristen! I used to use your yogurt recipe for years and years, and still occasionally do, HOWEVER - I got an instant pot recently and it makes the most divine yogurt. It has a setting to heat up your milk, and a setting to keep it warm to culture. It takes 8 hours, but it is so incredibly hands off and easy to clean that I have completely switched over to using the instant pot. I just wanted to let you know in case you have one! Also - I always use whole milk as well - with at least pasteurization as I can find at the store that day (Horizon makes an organic one that's just pasteurized, not ultra, which can be hard to find), and for whatever reason that I can't explain, I've always used greek yogurt as a starter. Full fat and plain of course - mostly I just make sure the label says "live, active cultures". Then I strain my yogurt for a couple of hours when it's done to get that divine consistency. Anyway - mostly just wanted to mention about the instant pot. Thanks for everything that you do!!!
I do not have an Instant Pot, at least not yet. I keep hearing about them, though, so maybe eventually I'll break down and get one. 😉
HI
I do something completely different as far as timing goes and I'm trying to figure out how to use your technique with my timing. My husband has a lactose issue. I use cows milk because we prefer it and cook it for 24 hours to insure the lactose is all eaten up. My question is, how would I keep the water in the cooler warm enough for that period of time. I'm thinking to change it once its below ?? what temperature? Do you know what the ideal temperature is?
Thank you
I wonder if you'd have better luck using a crockpot method, which would provide an even level of heat over a longer period of time.
However, you could also go with just replacing the water when it gets too cold.
On another hand, a lot of people do just ferment their yogurt overnight in warm water in a cooler...the fermentation will slow down as the water cools, but it won't stop altogether.
Hey there! Your husband should try drinking homemade Kefir...It is the bomb and so easy to make 🙂
Thank you for this instructions. I needed an easier way to do an entire gallon of milk and have been experimenting with the best way to incubate. By the way, I have been making yogurt for a few years now. I highly, highly recommend using Seven Stars Farm Organic Whole Milk Yogurt as your "starter" or "mother".
How to know if your yogurt is "live". Leave your yogurt on the counter after refrigeration. As it is warmed up does the lid "puff" up? That is the culture "coming back to life!".
Would love to make homemade yogurt but before I get start I should buy a kitchen thermometer any suggestion Looking forward to making some Thanks
I got a Thermapen for my birthday some years back, but it's a bit pricy. http://www.thermoworks.com/Classic-Thermapen?gclid=CN6BmoKSjNMCFRpLDQodQuYORw
You can use a very basic digital thermometer for this, though! I just had bad luck with mine giving out on me after a year or two, which is why I put the Thermapen on my birthday list. It's been going strong for years now.
Thanks it's going to be on my wish list
Honestly a thermometer is not required - I have never used one when making yogurt. The heating process is to kill of any 'bad' bacteria that may already be in the milk from the production process. I warm the milk up to just-starting-to-simmer, then let it cool to tepid (just very slightly warm to touch). Then add the starter, pour into a big glass jar, close the lid, and let it sit in our laundry room overnight plus a business day - so usually about 20 hours. I live in Texas, and our laundry room has poor A/C and a door to the garage - so in the summer the room is around 78F. If I only leave it overnight (say 11pm to 7am) then it isn't ready yet; and is still the same consistency as milk. But when I come home from work around 7pm, the yogurt is ready.
Great website - many thanks for all the excellent info an comments.
This looks so delicious! I'd love to make this at home myself and flavor it! Is it super easy to flavor the yogurt? I'd love to make a vanilla flavor, honey, as well as some fruit variations. It can't be too difficult. This sounds so great and you make it look so easy. I'm worried i'll mess something up along the way but that's just part of the learning process! Thank you for sharing this recipe and guide!
Yep, the vanilla directions are included at the bottom of the recipe.
I tried this and it works! I used what I had on hand which was 1/2 gallon 2 % milk and a small container of Oikos plain yogurt. I followed the heating and instructions very carefully. Put it in 4 pt. jars. (It's just me and my husband.) Put it in cooler chest with the correct temp water. I left it 5 1/2 hours because I made it so I could put it in refrigerator when we went to bed. In the morning we had the most creamy white yogurt I have ever seen. Solid and not runny! Thanks for your detailed instructions. I will definitely make this again!!!
Yay! I'm so glad it worked out for you.
I would agree with you that using a 'Greek yogurt starter' wont produce Greek yogurt. However, some starters (like a Bulgarian starter) are known to produce thicker yogurt. This means less straining required. Starter differences are explained well here:
https://www.yogurtstartercultures.com/
Bulgarian and heirloom starters do well when using a previous batch to inoculate at new batch. This means less worry about opening your starter container too much because their bacteria are more immune to outside bacteria creeping in over time.
Has anyone ever made yogurt using chocolate milk.?
I made yogurt for the very first time last night and mine is as thick as store bought without draining the whey. I let my culture sit on the counter for about 11 hours to come to room temperature. I used Chobani plain Greek yogurt. I also held the cook temperature at 185 for 30 minutes. I put it in a cooler that keeps ice for five days. I only used one jug of warm water to warm the cooler and it was just as warm when I took the yogurt out 13 1/2 hours later as it was when I put it in. The taste is not as sour as I would like but I know it gets more sour the longer it sits in the fridge. I'm so happy that you shared how to make yogurt. Thank-you so much.
This is a nice explanation. It really is easy. There is no need to use a cup of starter. I make a quart at a time. I just add 1 tablespoon of starter. But I do leave it overnight in a warm area.
Is it okay to refrigerate the jars with the whey on the top (yogurt - at least I HOPE it will be) at the bottom? Then just pour the whey out as I open the jars?
Yep, absolutely!
I tried to make make it but my yogurt didn’t turn out, is there something else I could do with the milk/yogurt mixture I would hate to waste it!
I've only had mine fail one time, and I tried using it to remake into another batch. That was a disaster!
So, I'd recommend using your failed yogurt for baking or smoothies instead.
Great instructions. Perfect results.
It’s only my husband and me just now here in the Mid-South, so every two weeks I culture buttermilk and creme fraîche and one quart of this delectable yogurt, which I’ve been making for years. The cooler method is a pain for just one quart and I easily make the water too hot; thus, the oven light method (with jar wrapped in a towel) for 24 hours is my go-to trick. A side note — every other time, I add sweetener (not sugar) and vanilla. However, if you’re adding fruit, add it by the serving only after yogurt has fully cultured, I use my own (currently strawberry-peach) freezer jam, which also works great to cool and sweeten hot cereal. Bon Appétit!
WAY too much equipment and WAY too labor intensive! Give me my Chobani strawberry!
I certainly understand if you don't want to make your own yogurt. I'm a little unsure what you mean about the equipment, though; everything I use to make yogurt is just regular kitchen/household items (Mason jars, thermometer, pot, cooler, etc.).
I had a couple of notes based on 40 years making my own yogurt. But after taking the time to write you a careful and thoughtful response, it said that my response was too long! I'm not going to write it here. If you want to be a good host, please consider that your readers' needs are different from yours. Please put in a JavaScript on-the-fly length limit calculator so that you don't waste people's time. I could have finished making yogurt in that time!
Boy, I'm not sure how to put a counter on there, due to my lack of technical knowledge!
I have the comment length set to a limit because blog-post length comments are often spam (helps weed some of that out for me) and also because blog readers tend to only read shorter comments. So, something more concise is a better contribution to the comments.
I'm so sorry your work in typing all that was wasted; I know that had to be frustrating.
Peter, what's the point of your post? Talk about waisting time!!
I have made this a bunch of times. I use the pilot light in my oven. I always take it out the next morning and it is perfect. This time, I forgot it and and it's the next day. I see a lot of way in it. Is it still good.
My opinion is that it's probably still safe to eat-it just will be a little more sour than usual.
Usually when yogurt has gone bad for me, it gets moldy or it gets a really "off" smell.
My milk scorched in the bottom of the pan, I’m not sure how to avoid this in the future, I hope it doesn’t affect the yogurt.
Try a lower heat and try stirring the milk a little more frequently. Also, a heavier-bottomed pot can help.
Your yogurt should be fine-I have accidentally scorched my milk plenty of times!
I just wanted to say, Kristen, that thanks to your amazing how-to, I have for real learned to make yogurt over this crazy pandemic year. My crowning achievement was making it from my OWN starter from my last batch last month. I did notice that that batch was a little thicker than all the others, and I think it was because I used 1 1/4 cups starter (I had an extra 1/4 cup left and threw it in). So I think that’s the only change I’d make in future. But seriously, thank you! I can get the whole process done and in the cooler in an hour, also while I’m puttering around the kitchen on Saturday morning.
Yay! I'm so happy to hear this!
I followed instructions but it did not thicken much at all. Can I use this milk and start over?
I tried that once with a failed batch and ended up with a curds and whey situation that was entirely inedible!
I would probably just use your semi-failed batch for baking and smoothies and try again with a fresh gallon of milk.
Ok thanks. The only thing I did different was use yogurt that was already opened.
I’d like your assistance. I followed your instructions except I put the starter in before lowering my temp to 120. I’ve now had it in the cooler for 3 hours and it’s really watery. I’m leaving it in the cooler for another 2 hours and hopefully it works. Do you have any suggestions?
It's possible that you killed the starter organisms with the too-hot temperature. I'd probably just use the failed yogurt in smoothies or for baking, and then try again with another batch of milk.
I have tried remaking failed yogurt and my word, it was a disaster! I wouldn't recommend it. Mine turned all sorts of weird and curdled when I tried remaking it.
I make yogurt myself several times a week. https://miteigenenhaenden.wordpress.com/2018/10/18/joghurt-selbst-gemacht/
It's really not an art.
I never boil out the glasses. No need.
When I use raw milk, i.e. milk that comes directly from the farmer and has not been treated, I heat the milk to a little over 70 ° C (~ 167 ° F), then I let it cool down to around 30 ° C (86 ° F). Then I add the yogurt mixture.
When I use commercial milk, I don't heat the milk. Then I stir the yogurt mixture directly into the milk at room temperature.
It is not right for whole milk to become harder. Milk with 1.5% fat is just as firm if you use the appropriate yogurt mixture.
Thanks so much for the clear and easy to follow instructions. My yogurt turned out great!!
I'm so glad to hear that. Yay!
This did not work for me at all. It's still milk consistency after sitting for 3.5 hours. I was really careful about the temperatures and opened a new container of yogurt for the recipe. I'm so bummed I wasted a gallon of milk! I don't even know what to do differently because I followed the instructions carefully. The crock pot recipe I tried wasn't quite thick enough so I wanted to try yours but what a flop. What level heat do you heat the milk at? How much time should the heating and cooling steps take?
Man, that is SO super weird. You are sure your thermometer is calibrated correctly?
What brand of starter did you use?
The heating and cooling steps take varying amounts of time, depending on how heavy duty your pot is, how warm or cold your kitchen is, and so on. The important thing is to just depend on the thermometer's reading, as long as the thermometer is working right!
I'm so sorry to hear your batch was a dud.
Do you have a copy of your first blog?
I remember reading it and following you!
...moving into your first apt.?
Jony
Hmm, no, when I started blogging I'd been married for 11 years, had four children, and had already owned two homes!
Hello. I tried making a 1 gallon batch yesterday. I don't see anything in the instructions about using fresh raw milk or how old the milk can be, so I used raw milk that was 2 weeks old. Well, that did not work at all. Also, I did not see anything in the instructions on whether we are suppose to stir the milk while its getting up to temperature or to just let it sit. The more I stirred it, the bigger the clumps got. Looked like I was making mozzarella cheese. I just kept on with the process because I did not know what to expect. I also did use an open container of yogurt as my starter. Plus I don't think the temp of water in my cooler stayed at 120° and my quart jars were not hot. I am pretty sure I did every thing wrong that I possibly could. Please respond. I would like to try again.
Hmm, that's interesting that it was clumping up as you heated it! You were just heating the raw milk, with nothing added? I'm trying to imagine what made it clump, since you hadn't added any starter to it.
I would try with a fresher batch of milk; I've used raw milk from a friend and it worked just fine. I'm guessing the problem was your old milk.
Does the Bulgarian yogurt work for a yogurt starter?
I have no idea; I have no experience with Bulgarian yogurt. If you try it, let us know!
Making my first batch as I am posting.
?When should I add flavoring? I assume I should add flavoring with starter. Pls advise.
Thx in advance.
I always just make my yogurt vanilla, and then I mix things in when I'm ready to eat (like fruit, nuts, granola, chia seeds, etc.)
Good evening. I made my third batch of yogurt this past Monday. The first turned out perfect. The second, not so much. The third was a repeat of the first. Fantastic. I just finished the first jar of the third batch. After it sat in the refrigerator a couple of days I added sugar and flavoring and let it sit overnight in the fridge. Absolutely wonderful.
My question is, to 16 oz’s of yogurt, how much sugar would you recommend and how much concentrated flavoring would you suggest. Also, I want to add bananas to the mix, suggestions?
Thank you in advance for your help.
Bob
If you want sweeter yogurt, I suggest adding a cup of sugar to the pot of milk when you add the starter, along with a tablespoon or two of vanilla.
I like to add fruit right before I eat my yogurt; nice and simple, and no worries of the fruit going bad.
I don’t normally partake of whole mil (People around me need to breath) so making this last (third) batch, I broke down and bought lactose free milk for my yogurt. Worked fine. I am wondering how almond milk would work. Almond milk is what I normally drink and cook with.
Speaking of which, I have almond milk and a fudge round here somewhere…
Any ideas what I did wrong? I thought I followed the directions exactly but the yogurt did not thicken. Has anyone else has this fail as well? Thanks in advance!
If your milk was too hot, it could have killed your cultures. Are you sure your thermometer is correct?
Also, what starter did you use?
About how long does the yogurt have to set in the fridge before it's complete? Is this preferential?
I just let mine get nice and cold; it’s already usually quite solid by the time I take it out of the cooler.