How to Create Word Cloud Art in Canva
When I posted about the sweet word art gift that my readers gave to me at our get-together, some of you asked how reader Beth had made the art.
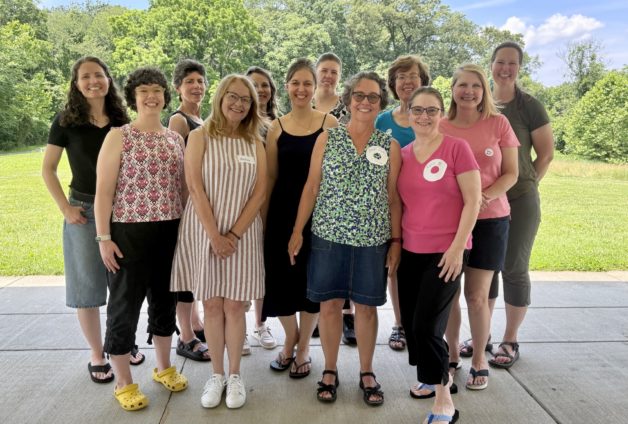
So, she agreed to do a guest post explaining her method.
____________________________
How to Create Word Art in Canva – Specifically, Kristen’s Word Art
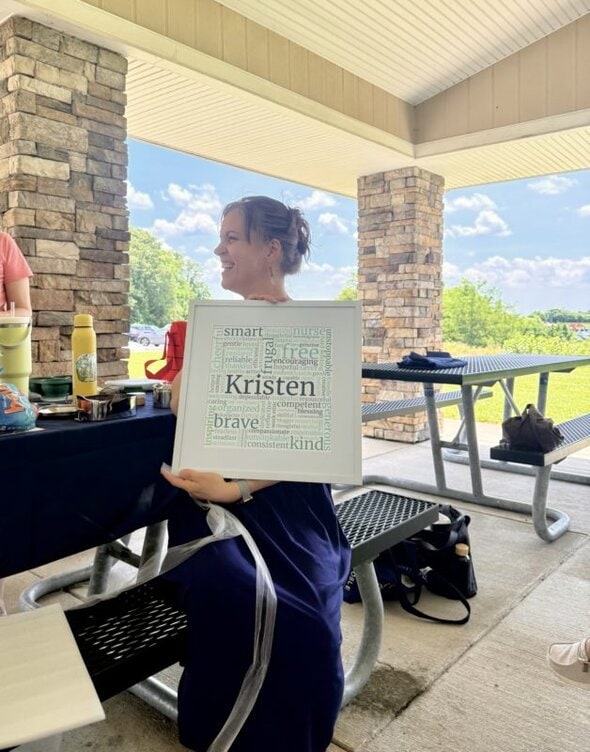
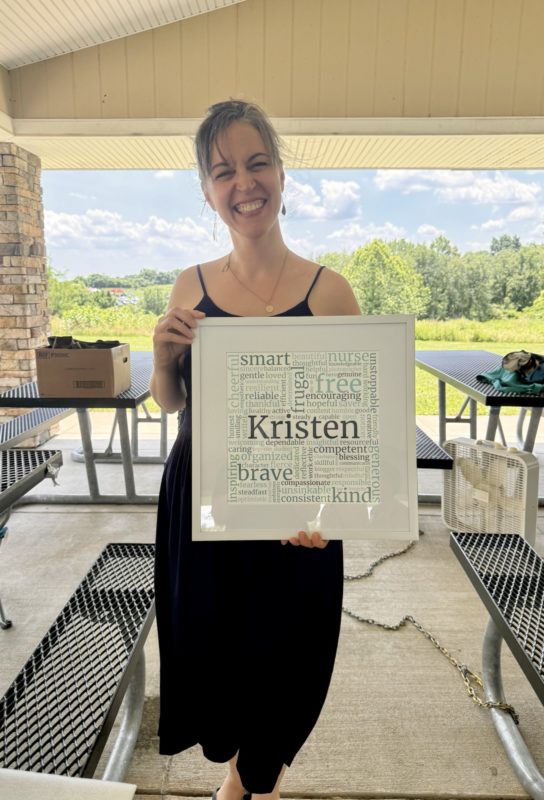
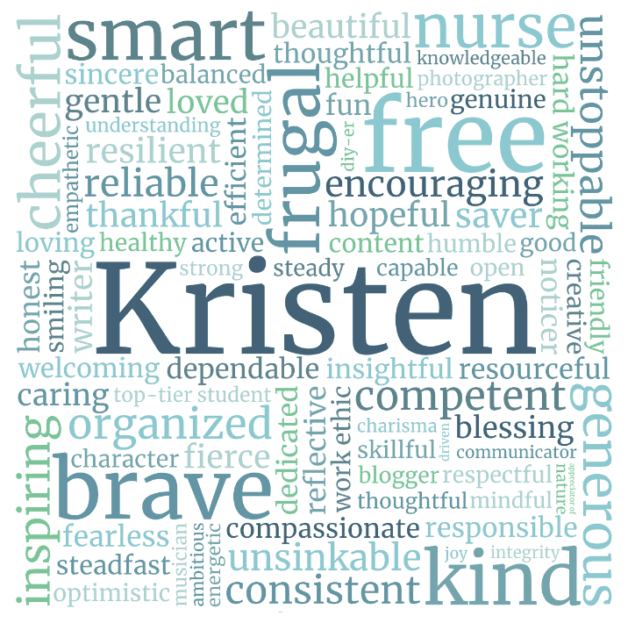
What a treat it was to be able to use my own words and the words from this community to create a gift for Kristen. She means so much to all of us. I think I enjoyed making the word art as much as I enjoyed giving to her.
On to the instructions . . .
First, know that there are sites like WordArt.com, where you can choose shapes and enter your words and assign weight to them, that are much easier and faster than creating a project like this in Canva.
For Kristen’s project, we had so many words (yay!) that when I tried to use a program like that, too many words came out much smaller than I wanted and there was no way to make them bigger. I do think word art generators could be a good option if you don’t have loads of words.
Some people prefer all caps in word art and others use lower case. I thought lower case looked better for this one, but all caps can be easier because you’re not working around letters that are higher and lower than others – g, y, k, l, h, t, etc. You can also opt for serif or a sans serif font. It’s really up to you.
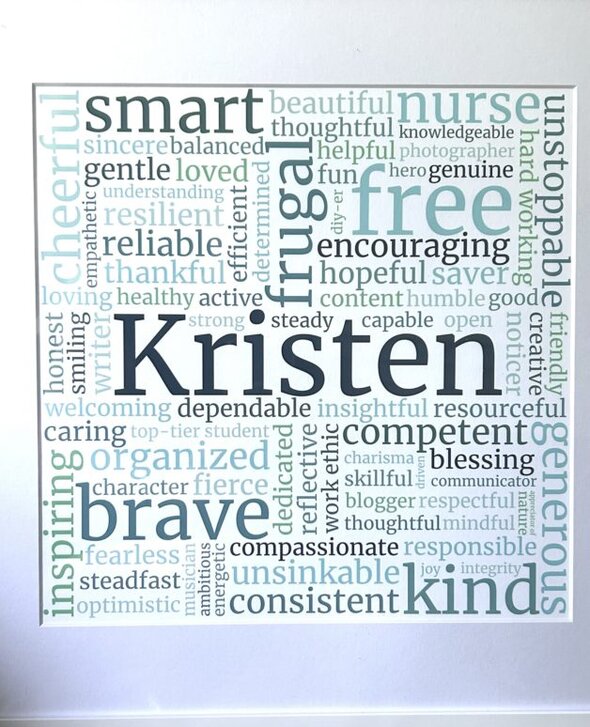
The final product for Kristen’s word art was a 12 x 12 print matted in a 16 x 16 frame. If that’s the size you want, the details for getting there are below.
A final caveat – I’m not an expert Canva user and there may be a better way to do this. Below is what I did through lots of trial and error.
One
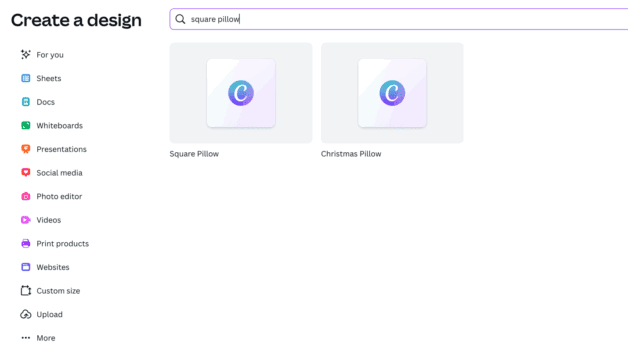
Open Canva and click create a design. In the search bar type “Square Pillow” and select it. (We’re not making a pillow, but starting with this design gave me the resolution I needed for the final product.)
Two
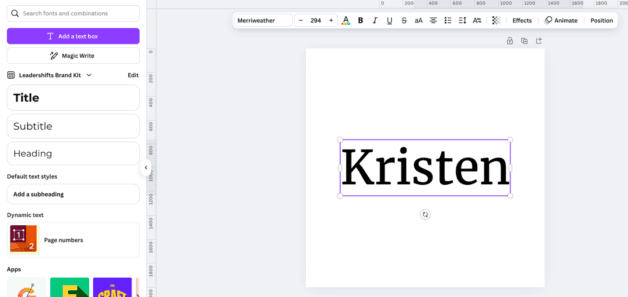
Start adding text boxes. I started with Kristen’s name, since it was the center anchor text, and adjusted the size and font. I used Merriweather size 294. The font size will vary depending on the length of the name.
Three
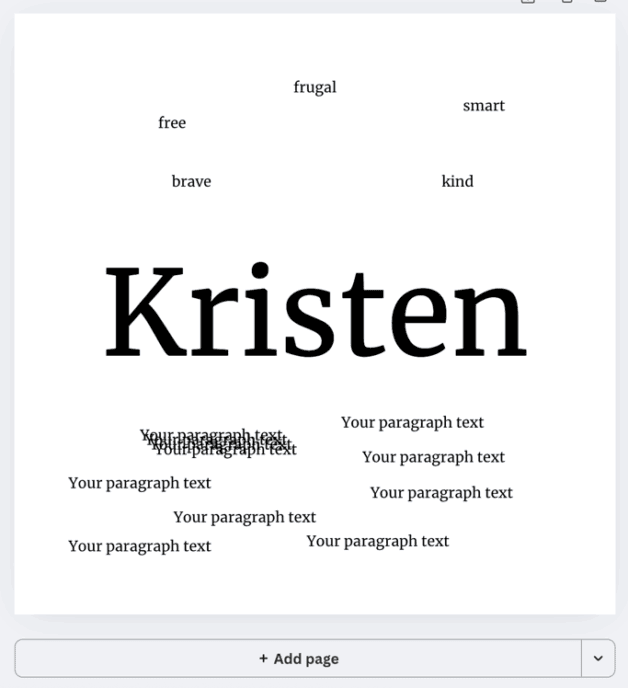
Create another text box and change the font to Merriweather, size 36 (for now – it’s small enough to allow you to add a lot of words, but still large enough to see). Then use the duplicate feature to duplicate that text box a bunch of times and start spreading them around.
Four
After you have several duplicated text boxes, you can start entering the words you want to use.
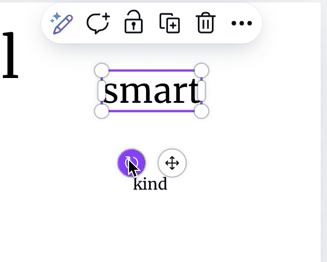
Five
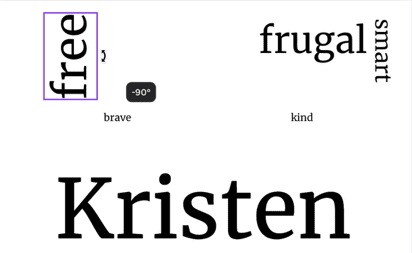
Once you’ve entered all the words you can start rotating and adjusting the size until they’re arranged the way you want them. Canva makes it really easy to resize and rotate the text boxes.
This part can take a while depending on how many words you have and how much you embrace precision and tedium. 😉 Fortunately, I happen to love playing around with word placement, but it can be hard to know when to stop.
Note from Kristen: Beth sent in a little video showing how she resizes and rotates and I think you should be able to view it by clicking here: Resize and Rotate
Six: Colors!
Once everything is where you want it, you can start adding colors to the words. I’ll include the colors I used for Kristen’s below, but a fun way to come up with a color palette, so you can be sure the colors you’re using work well together, is to use the site coolers.co (free w/ads).
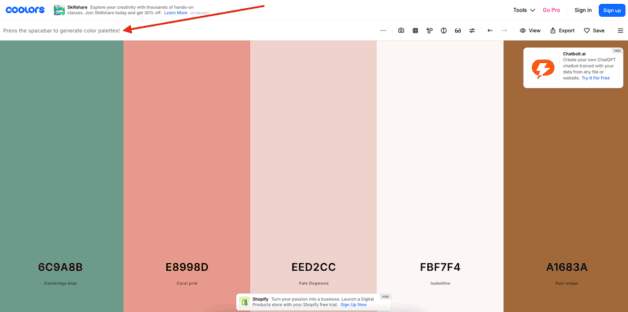
Click “Start the Generator” on the main page and then use the spacebar to scroll through loads of color palettes until you find something you like. You can use any number of colors you want. The HEX codes are included so you can enter them right into Canva.
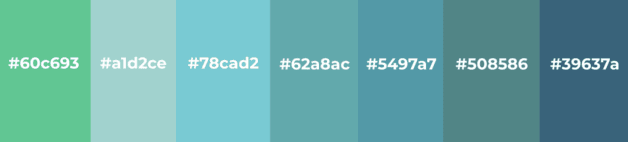
These are the colors I used in Kristen’s word art:
Seven
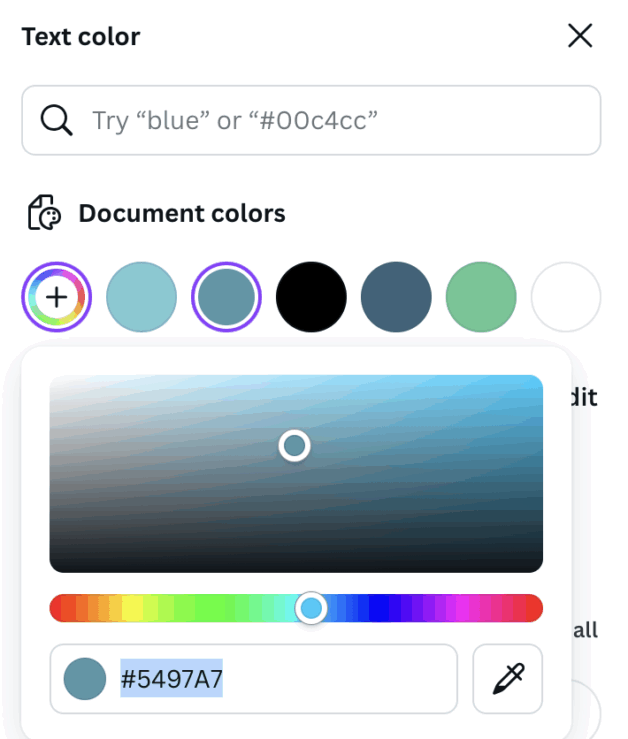
Back in Canva, select the text box and click the font color at the top to change it. Then click the add a color button (+) and enter the HEX code. As you add colors, they will be added to “Document Colors” so you won’t have to enter them every time. Then start coloring the text in each box.
Eight
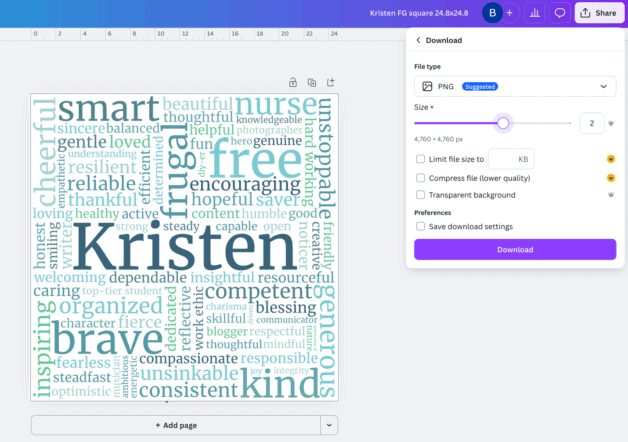
Once the word placement is the way you want it and the colors are the way you want them, you’ll download your image as a PNG file and move the size slider to 2.
Nine
To make the final, printable product, you need to create a new design and add the word art you just downloaded. This will allow you to create margin if you plan to frame it. Go back to the home page in Canva and select Upload (see image below), and then upload your PNG.

Ten
Create a new design, custom size, 2000 x 2000 px. Once in the blank design, click “Uploads” on the left and select your PNG file. You will stretch the image to fill most of the space, leaving a margin.
For Kristen’s, I stretched it to 1916 x 1916 and made sure it was centered horizontally and vertically. I added the border line in the photo below so you can see the margin space.
Eleven: Print it
You have a few options for printing something like this. I used Print with Canva and selected a Medium (12 x 12) sized poster and purchased my own frame. I received the print within a few days.
Another option is to use Shutterstock. You can download the final product (with the margins built in) from Canva and upload it to Shutterstock where you can just have it printed or have it printed and framed, with or without a mat (there are more frame options there than in Canva). It will allow you to preview the image to make sure nothing is cut off.
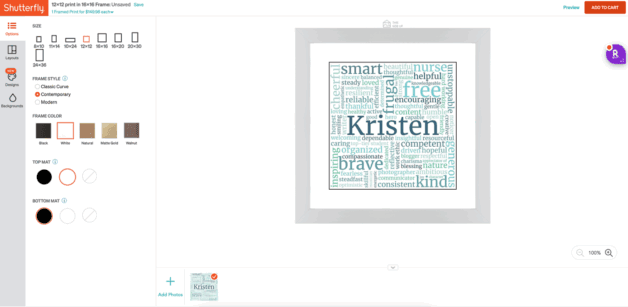
Even though I didn’t order from Shutterfly, I created a project there to make sure the image would work with a mat with all the text intact. To visualize it better I used a black bottom mat but would have changed it to white before ordering.
I think that’s it, but if you have any questions, put them in the comments. I’ll be checking there.
_________________
Beth, thank you for this detailed tutorial! I am so impressed with all the steps it took to put this together and now I have even more appreciation for my special gift.
Thank you again from the bottom of my heart to you and to all the readers who sent in words. I love, love, love my word art! 🙂
And readers, if you have someone on your gift list who appreciates words of encouragement, I am 99.99% sure they'd love to receive a piece of word art! It is such a meaningful gift because it really can't just be bought, and it is so personal.
10/10. 🙂
I have done some sub-par word art before and this is next level. It's stunning and what it stands to represent almost brings tears to my eyes. What a wonderful group of friends you have, Kristen <3
What a gift of love - thanks, Beth, for taking words from the group and turning them into something so beautiful for Kristen! Such a perfect idea- and really well executed!
I've tried to make a couple simple word clouds before using free word cloud generators, but your word art looks 100 times better!! Thanks for the tutorial.
This is so cool! Thank you for sharing!
Beth, I'm glad that you enjoyed the process of making Kristen's beautiful word art gift. That encourages me to try it - thank you.
It was such a beautiful gift. I loved it. I did think that the program used would have been easier to put together. That was a lot of work that came out beautifully. I was thinking there was a program where you just input your words, the name and the size you want and wella! done, the computer did all the sizing for you. But that was not the case.
Thank you, Beth, for creating something so beautiful for someone so special.
Oof - that's a lot of work. Thank you for doing this for our Frugal Girl.
Everyone, there's a company called Framebridge that does a nice job of framing at a good price. You can do it all online and they mail the finished project to you, so they're a good choice for a project like Kristen's word cloud.
Thanks for this tip, @WilliamB. I had not heard of Framebridge, but if I ever do another project like this, I'll check them out.
Wow Beth, you created a perfect collage of those welldeserved words. Your step by step process guide is clear and easy to follow!
Beth, you did such an amazing job on that artwork - a labor of love!
Thank you for these directions.
Thank you, Beth, for this wonderful tutorial. It is such a beautiful gift. Could be used for so many different Occasions.
I echo Elizabeth - any word art I've done in the past is rinky-dink compared to this - beautiful! I appreciated hearing specific details to consider, e.g. different apps being better suited for different #s of words/printing ease; that's very useful. Thank you Beth for writing out the tutorial, and of course, for the idea and amazing execution of the original artwork!
Some people are very clever, great idea.
Beautiful and meaningful. Thanks for the tutorial!
What a wonderful idea and execution! I never would have thought of something like this.
Thank you for explaining this, Beth. I’ve been curious, and also wondered if it would be possible to do such a thing by hand. . . of course it would, but can you imagine if you got 75% through and then messed up a word??
@Central Calif. Artist Jana, I definitely cannot imagine. I think I would cry. 😉
I would too!!!!
Ohmigosh, Beth, what a great tutorial on your process - such detail and precision! I'm so glad I got to see the lovely finished product in person. Thank you for posting about your process! Such talent!
Wow, that must have taken a lot of time. Good work! I had assumed you used a Word Cloud generator.
Help!
I need to change a word in a saved copy in Canva and it won't let me. What am I doing wrong? The original got messed up as well. 🙁
Michelle
Great tutorial! Why does it need to be saved and uploaded again? Why can't it just be printed from the "square pillow" PNG saved with slider at 2?