 Every Wednesday (ok, most Wednesdays!) I share a baking recipe. And lots of pictures of said baking recipe. I don’t call this Wednesday Baking because I bake solely on Wednesdays…no, my oven gets a workout much more frequently than once a week! Wednesday just happens to be the day I share baking recipes with you. All the past baking posts are archived in the Wednesday Baking category, which can also be found in a tab underneath my blog header.
In our current culture, baking any sort of yeast bread will earn you impressed looks from most people, simply because yeast baking is something of a lost art.
But if you really want to surprise people, tell them you make your own pita bread. 😉
Because everyone thinks that it surely must be too hard to do this at home. But it’s totally not, and so you should add this recipe to your repertoire.
Besides being an impressive skill, pita-bread-baking will also allow you to eat pita bread that is far more tasty than the stuff you can buy at the grocery store. In their defense, pitas from the store probably were tasty when they were first baked, but they’re obviously not super fresh by the time you buy them. When you bake your own pitas, you can eat them hot from the oven, and that’ll beat anything you can buy at the store.
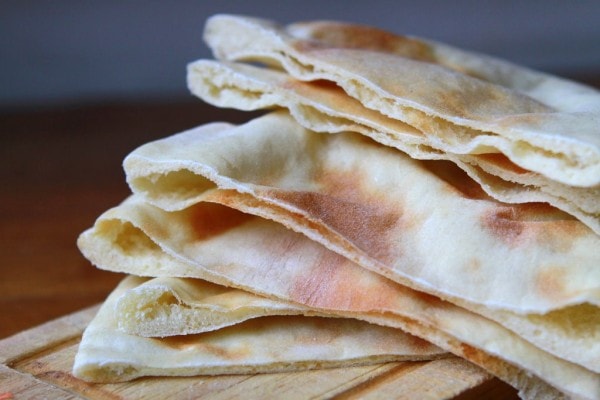
Though I’ve been making them for years, pitas always astound me. The dough is nothing special, and there’s no special shaping technique either. You just roll out rounds of dough, place them in a very hot oven, and somehow, they turn into hollow little loaves.
The dough-making process is nothing remarkable, so I’m just going to share step-by-step pictures of the shaping and baking part of things.
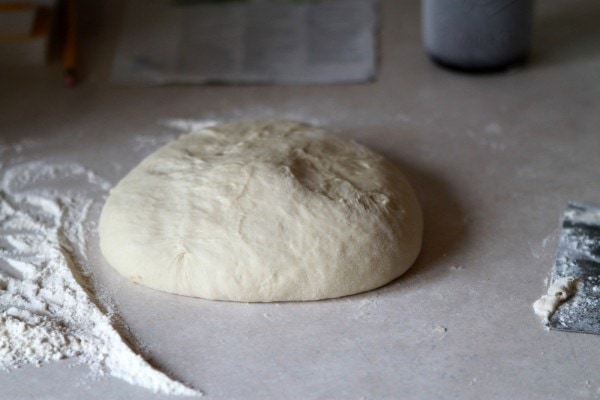
Here’s my lump of dough. After your dough has risen, you’ll want to punch it down and let it rest for 10 minutes. This makes the dough a little easier to shape. At this point, you need to turn your oven on to 400 ° F because you need a fully preheated oven to bake your pitas.
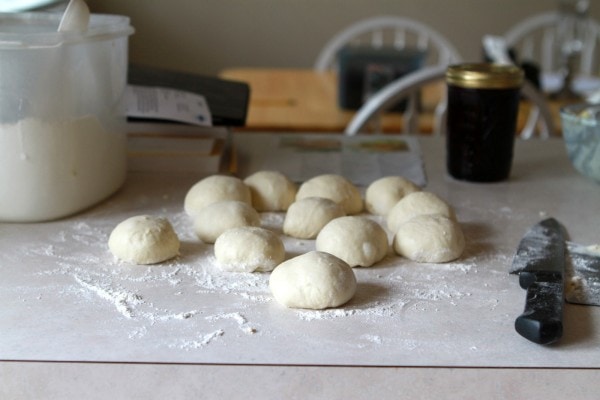
The original recipe (from my Better Homes and Gardens bread cookbook) calls for cutting the dough into 32 pieces. However, this makes very, very small pitas, and is too much work for my taste. So, I cut my dough into 16 pieces.
Obviously, not all 16 of my dough balls are pictured.
I like to let the dough balls rest for 5-10 minutes so that they’re easier to roll out (resting relaxes gluten, the stretchy protein in wheat flour).
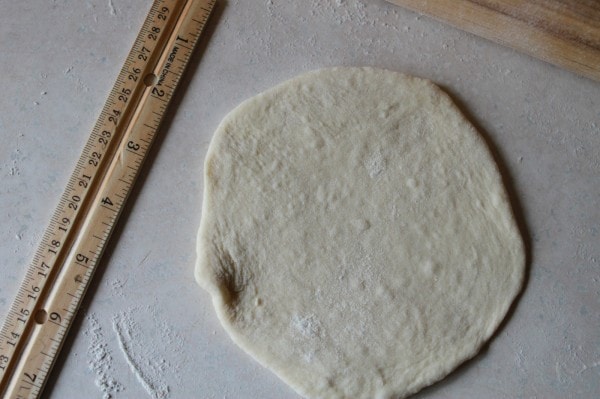
To make a pita, roll out a dough ball into a flat circle. At first, it’ll seem like you can only make it stretch to a few inches.
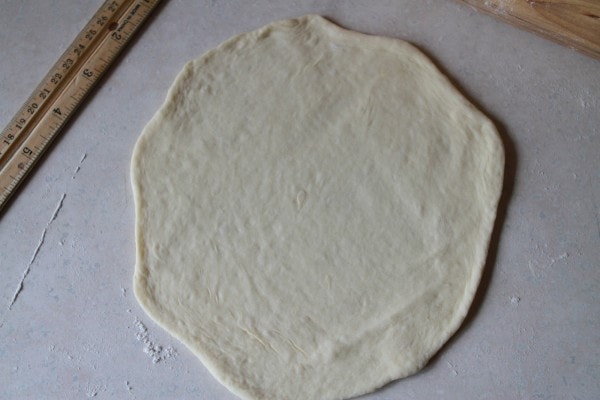
But it is possible to make it thinner and larger, which is what you want to do. A thinner pita is more likely to puff, in my experience.
To make this process easier, I often roll 8 balls into the smaller round, like in the first picture. Then by the time I’m finished rolling 8 balls out, the first round I rolled out has rested and is easier to roll into a larger round.
I hope that makes sense. Basically you’re rolling out several rounds of dough so that the smaller rounds have time to rest before you try to make them into larger rounds….sort of like an assembly line.
Some of my pitas are more round than others, but I don’t worry too much about the misshapen ones. They all taste good, and since I’m not competing for a beautiful pita prize, it’s just not worth stressing over.
Pitas don’t need to rise at all after you shape them, so it’s time for baking!
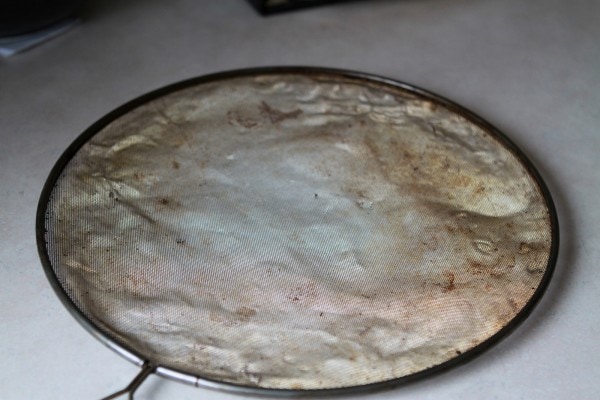
My original recipe calls for baking these on an ungreased baking sheet, but when I’ve done that, my pitas have mostly refused to puff. So, the solution I came up with back in my teen years was this:
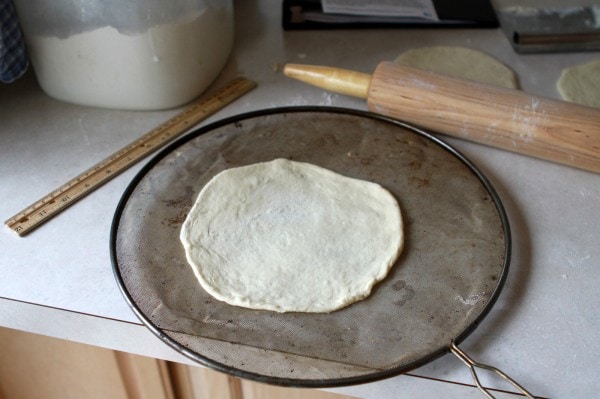
It’s a frying pan splatter screen with the plastic handle insert removed (the plastic wouldn’t survive a 400 degree oven!). Baking the pitas on this allows the heat from the oven to quickly hit the dough, and this blast of heat makes the pitas puff properly. I don’t think I’ve had a single puff failure using this method.
When I made these last week, it occurred to me that a preheated pizza stone might work just as well, but I haven’t tried that yet. Maybe I’ll do that this morning.
Anyhoo! I just place the dough round straight onto the screen (I can fit two on at a time), put it into the oven, and bake the pita for 7-9 minutes.
The dough will start out flat, of course, and then after a few minutes in the oven, it will slowly start to puff up. If you have children, they’ll probably be quite interested in watching this process. I rather enjoy it myself.
Unfortunately, my oven light bulb is currently burnt out, so we didn’t get to see any of these pitas puff. It was very sad.
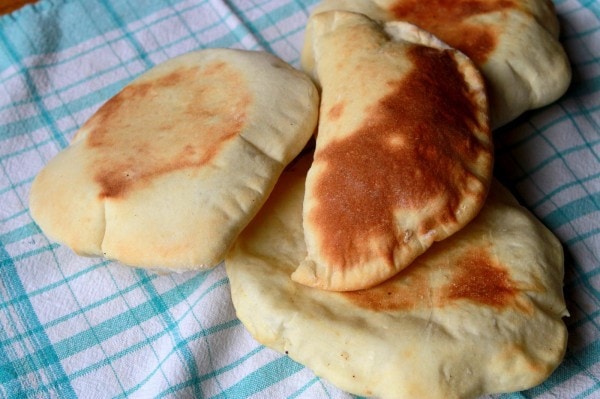
Put the puffed pitas on a kitchen towel to cool. Just so you know, the pita on the left there is ideally baked, whereas the one on the right there is a little over-baked. It’s not awful to get the pita that brown, but the heavily browned ones will dry out more quickly.
So you should eat them right away. 😉 Suffer for the cause, people!
You can split the pitas into rounds and top them with the usual bread toppings…peanut butter, butter, jelly, and so on. Or you can cut them in half and use them to hold more substantial fillings like chicken salad, cheese and vegetables, grilled meats, and so on.
And you might find, as I do, that eating a plain one one hot out of the oven is pretty darn delicious too.
Pita Bread (printable PDF coming later today!)
5 to 5 1/2 cups flour
2 pkg. (4 1/2 teaspoons) active dry yeast
2 cups milk
3 tablespoons sugar
2 teaspoons salt
3 tablespoons butter or oil
In a large mixer bowl, combine 2 cups of the flour and the yeast. Heat milk, sugar, salt, butter to 115-120 ° F. Add to dry mixture and beat 3 minutes. Stir in enough remaining flour to make a soft dough. Turn out onto a floured surface, and knead for 3-5 minutes.
Place dough in bowl, cover, and let rise 45 minutes. Punch dough down, cover, and let rest 10 minutes. Preheat oven to 400 ° F.
Divide dough into 16 pieces and form each into a ball. Let balls rest 5 minutes, then roll each into a 7-8 inch round (this is easier if you roll the balls into a 4-inch round, let them rest a few minutes, and then roll them to a 7-8 inch round).
Place pitas on a baking screen in the preheated 400 ° F oven, and bake for 7-9 minutes, or until puffed and lightly browned. Cool on cloth-covered surface.
Today’s 365 post: Speak softly…

Wendy
Wednesday 11th of November 2020
Love your recipes. Was hoping to find the pita bread pdf version.
Michelle
Saturday 3rd of January 2015
I just made these and they turned out wonderfully. They are the perfect accompaniment to the hummus I made earlier. Thank you so much for sharing the recipe as well as the splatter screen trick.
Jared
Friday 28th of March 2014
This recipe looks amazing! I'm just wondering, have you ever tried making pita with a sourdough process? I understand that the fermentation process can help make pita bread healthier (http://creationbasedhealth.com/is-pita-bread-healthy/). Any thoughts?
Kristen
Friday 28th of March 2014
I never have-I'm sorry!
Andrew
Sunday 2nd of October 2011
nice! I made babaganoush today so I'll be whipping up some of these tomorrow... happening upon your blog looking for kneading tips was perfect timing!
cheers
Alicia
Saturday 30th of July 2011
I just made these tonight and they are amazing! Fresh and hot out of the oven with homemade hummus. Thanks Kristen!